Author:
Lewis Jackson
Date Of Creation:
13 May 2021
Update Date:
1 July 2024
Content
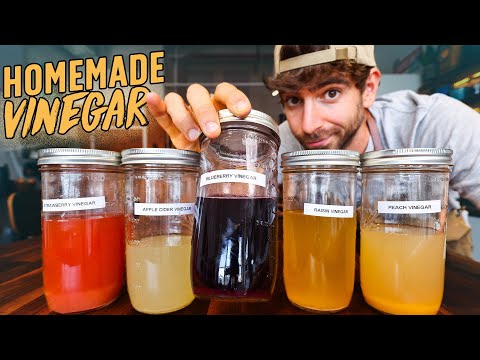
While it's easy to go to the store to buy a bottle of vinegar, you'll love making it yourself - and it's also delicious! All you need is a clean jar, some alcohol, a "vinegar" (female vinegar to ferment) and at least 2 months for the vinegar to work. Once you've mastered the basic vinegar recipe for any alcoholic beverage, you can try other special vinegar recipes like wine vinegar, apple cider vinegar, rice vinegar, or - if you're ready to wait. At least 12 more years - you can make balsamic vinegar.
Resources
- Vinegar ("female vinegar"), commercially available or homemade
- 350 ml of wine and 350 ml of distilled water
OR
- 710 ml of beer or alcoholic cider (minimum alcohol content of 5%)
Steps
Part 1 of 4: Pour alcohol into the prepared bottle
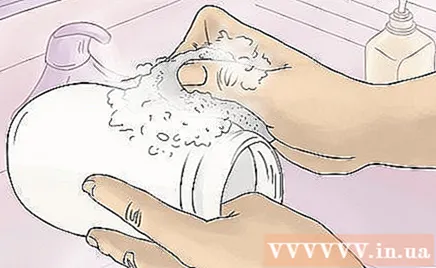
Rinse a 2-liter large mouth bottle with soap and water. You can use ceramic jars, even old wine bottles, to make vinegar, but wide-mouthed jars are easier to find and work with. Remove the cap and rubber ring (you don't need the cap here), then rinse the jar thoroughly with soap and warm water.If you want to do one a smaller batch of vinegarUse a 1 liter bottle and cut the amount of alcohol (and water) in half.
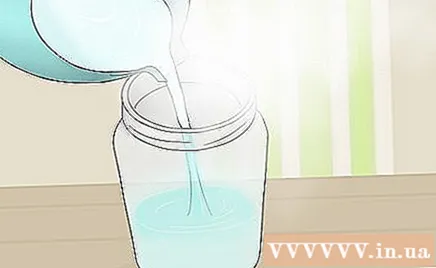
Disinfect the inside of the bottle with boiling water. Boil a pot of boiling water, place the jar in the sink and carefully pour boiling water into the jar. Pour the water out of the bottle once you have it safe in the jar - it may take about 5 minutes for the water to cool enough for you to reach the jar.- Make sure the jar is not cold when you fill it with boiling water - sudden changes in temperature can break the jar. If necessary, you can rinse the jar with warm water first.
- This method of sanitizing doesn't reach safe levels for canning or storing food, but it's sterile enough to make vinegar.
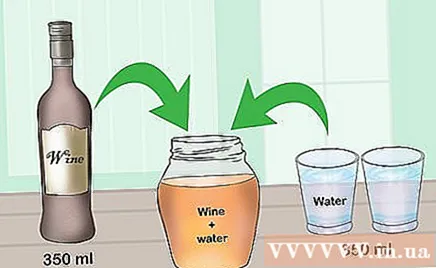
Fill the bottle with wine and water, 350 ml each. Basically, vinegar is formed by bacteria that convert alcohol (ethanol) into acetic acid. This process is most effective if the liquid has 5% -15% alcohol content, ideally 9% -12% alcohol. Most wines have an alcohol content of about 12% -14%, and combining alcohol with water at a ratio of 1: 1 - that's 350 ml each - helps balance the flavor and acidity of the final product.- Use distilled water instead of tap water to reduce the risk of strange taste.
- For a lighter flavor, use 8 ounces of wine and 470 ml of water for the vinegar. For a stronger flavor, mix 2 parts wine with 1 part water.
- You can use white or red wine as you like, but be sure to use a sulfite-free wine (check the label).
Use 710 ml of beer or alcoholic cider instead of wine. You can make vinegar with any alcoholic beverage with at least 5% alcohol. Check the beer or cider bottle labels to make sure they are up to the mark and fill the jar without adding water.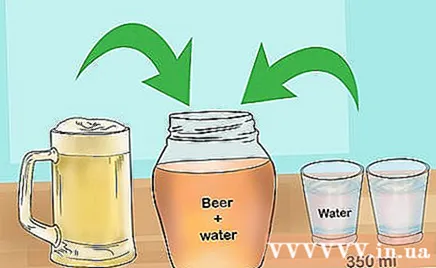
- Other alcoholic beverages with a higher alcohol content will work, but you will need to add more water to reduce the alcohol level to 15% or less.
Part 2 of 4: Add vinegar and preserve the jar
Drop or pour store-bought vinegar into a jar. Female vinegar contains bacteria that are essential for converting ethanol into acetic acid. The vinegar sometimes forms in an open bottle of wine and looks like a slime ball floating on the surface. You can buy vinegar in either gelatinous or liquid form - find it at homegrown or natural food stores, or online.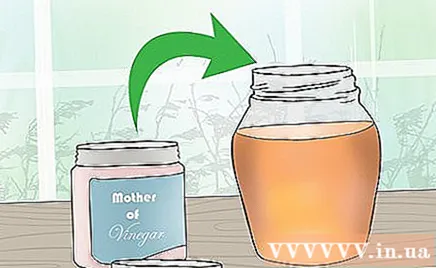
- If you are using gelatin vinegar, read the instructions on the packaging to see how much to use - just scoop the vinegar into the jar.
- With liquid female vinegar, you will pour 350 ml into the vial, unless otherwise instructed on the packaging.
Use homemade vinegar if you have saved it from a previous batch. Female vinegar continues to form each time you make a batch of vinegar. If you made vinegar last time, or asked someone else to make vinegar, you can use the vinegar from the previous batch. You just have to take it out and drop it into a new jar.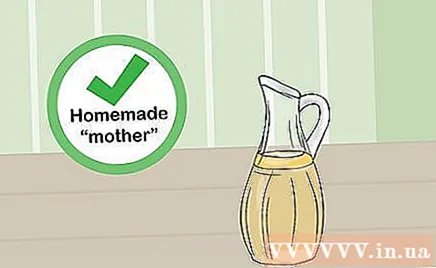
- You can repeat this process from year to year if you want.
- The female vinegar of one vinegar (like wine vinegar) can be used to make another (like cider vinegar).
Cover the top of the jar with cheesecloth and rubber bands. Just cover the top of the bottle with a tissue or cheesecloth, then stretch the rubber band over the top of the jar to tighten it. The top of the vial should be well ventilated so that outside air can enter the vial.
- Do not leave the bottle open. Dust can fall into the jar, and chances are you'll end up with a bunch of drowned fruit flies floating in the vial!
Place the bottle in a dark, ventilated, and moderate temperature place for 2 months. Find a place on a shelf, in the kitchen cupboard, or somewhere relatively dark and well ventilated. The transformation to vinegar will happen between 15-34 degrees Celsius, but ideally 27-29 degrees Celsius - so choose a warm spot if you can.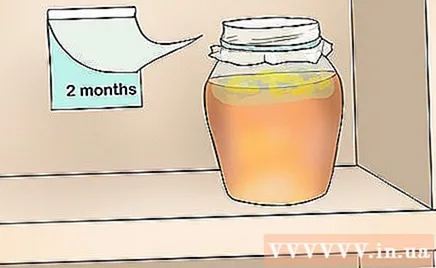
- If you can't find a dark place, wrap the jar with a thick kitchen towel - but don't cover the top of the jar with cheesecloth or paper towels.
- Do not shake, stir, or move the vial (if possible) for the first 2 months. Thus, female vinegar has conditions to form and promote its effects.
- You should notice the vinegar smell and possibly a strange smell coming from the jar. Just leave it alone and leave it there for 2 months.
Part 3 of 4: Tasting and bottling vinegar
Use a straw to suck out some vinegar after it has been fermented for 2 months. Remove the rubber band and the fabric covering the top of the vial, and plug the straw into the liquid so that you don't touch the vinegar floating on the vinegar. Place your thumb on the tip of the straw to keep some vinegar inside. Lift the straw out of the vial, place in the small cup and release your thumb to let the vinegar drip into the cup.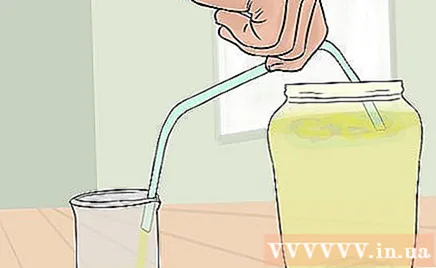
- You can do this with a plastic straw or a reusable straw.
Taste the freshly sucked vinegar and wait more if necessary. Try some vinegar. If the vinegar is light (because the fermentation is not enough) or too strong and strong (because there is not enough time for the vinegar to cool), cover and wait 2 more weeks for the vinegar to continue to ferment.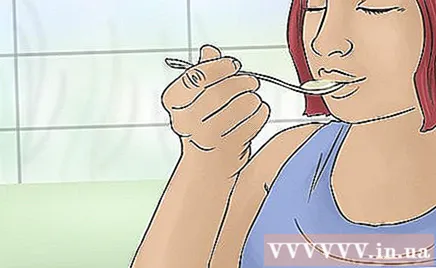
- Continue to taste the vinegar every 1-2 weeks until satisfied.
Remove female vinegar if you want to use it again. Carefully remove any vinegar floating from the surface and place it in another jar containing a vinegar liquid (such as a 1: 1 solution of wine and water). So you can keep making new batches of vinegar at home!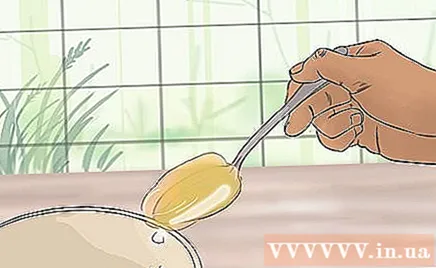
- Another way is to slowly pour out most of the vinegar from the jar, leaving only a small amount at the bottom of the jar with the vinegar. Then, you can pour more alcohol and make a new batch of vinegar in the old jar.
Kill bacteria in vinegar for permanent storage. After you have removed the female vinegar from the fermentation jar (or left it in the jar), pour the vinegar into a medium-sized saucepan. Place a saucepan on medium heat and use a food thermometer to check the vinegar temperature. When the temperature is over 60 degrees C but less than 71 degrees Celsius, remove the saucepan from the stove and wait for the vinegar to cool to room temperature.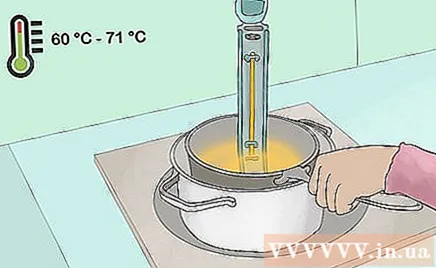
- The process of killing the vinegar will help the vinegar to be stored permanently in a glass jar at room temperature and low light.
- You can skip the antiseptic step if you want, and the vinegar will last for months, even years without losing quality or flavor. But this quick step is worth it to permanently guarantee the quality of the vinegar you make yourself.
Pour the finished vinegar into the bottle through a funnel and filter paper. Put the coffee filter in the hopper, then place the funnel into the mouth a clean and sterilized glass bottle - an old wine bottle is good for this. Slowly pour the vinegar through the filter into the bottle. Seal the bottle with a cork or screw cap.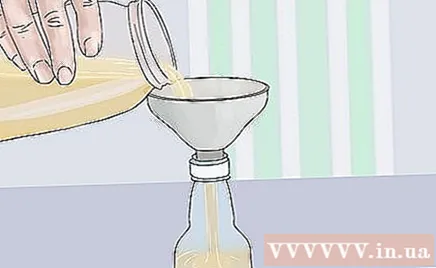
- Rinse the bottle with soap and water, then pour in boiling water and let stand for 5-10 minutes to sterilize.
- Label the bottle, note the type of alcohol used to make vinegar, and how long it waits for it to ferment. This is great if you want to give it as a gift or add it to your own collection!
Do not use homemade vinegar for canning, storing, or storing foods at room temperature. Homemade vinegar works great for salads and marinades, and for other purposes when cooking or refrigerating.However, because the acidity (pH) level can be very different, homemade vinegar is not safe for canning or storing food at room temperature.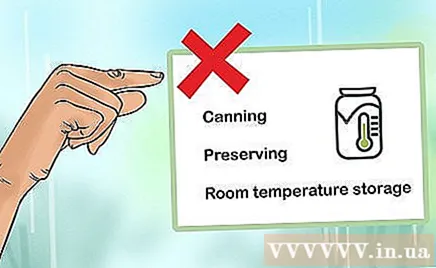
- If the acidity is too low, the vinegar won't resist potentially harmful pathogens like e. coli in the food you want to preserve.
- This is true even if the vinegar has been disinfected. However, vinegar itself (whether bactericidal or not) can still be stored at room temperature or cooler in a dark place.
Part 4 of 4: Other Formulas
Try making maple vinegar for a unique flavor. To mix 710 ml of the vinegar solution, combine 440 ml maple syrup, 150 ml black rum, and 120 ml distilled water. Follow the same steps as the basic vinegar-making section described above.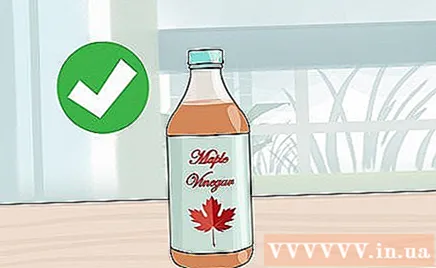
- Maple vinegar has a unique, rich flavor that is very suitable for sprinkling on grilled pumpkin or roasted chicken.
Skip alcohol for a basic apple cider vinegar. Grind 1.8 kg of apples in a food processor, then squeeze the apple pulp through the cheesecloth to extract 710 ml of the vinegar solution. You can also use pure organic apple juice. Follow the basic vinegar recipe described in this article.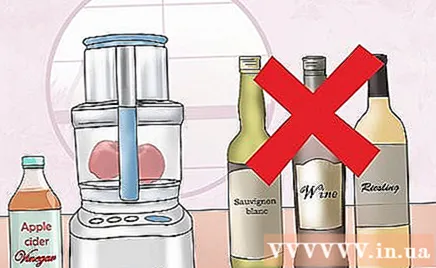
- Although this recipe doesn't use alcohol, the sugar in the apple juice will provide enough "food" for the vinegar to work. However, you may have to wait a bit longer for the fermentation solution to match your taste.
Try making honey vinegar like another non-alcohol vinegar. Boil 350 ml of distilled water and pour in 350 ml of honey. Stir until well dissolved and allow the mixture to cool down to just a little warmer than room temperature (but below 34 degrees C). The next steps are similar to the basic vinegar making process.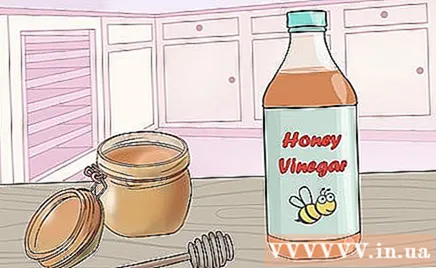
- Just like the apple juice recipe, the sugar in honey is enough to feed the vinegar and support the fermentation.
What you need
- Glass vial of 2 liter capacity
- Cheesecloth or paper towels
- Rubberband
- Plastic straws or straws used many times
- Medium-sized saucepan
- Food thermometer
- Empty, clean, corked wine bottles.
- Funnel
- Coffee filter paper


