Author:
John Stephens
Date Of Creation:
2 January 2021
Update Date:
1 July 2024

Content
Formatting the drive deletes all data on it and creates a new filesystem. You will need to format the drive to install Windows on it, or to start using it if you intend to install additional drives. You can format the drive to quickly erase all data on it. You can also shrink existing drives and format available storage areas to create extra drives on your computer. If you intend to sell your computer, you can use special tools to securely delete all your data.
Steps
Method 1 of 4: Format the primary drive
Back up all important data. Formatting the drive will erase all of the data on it and remove the operating system. Make sure to back up any important files elsewhere, such as to an external drive or in the cloud.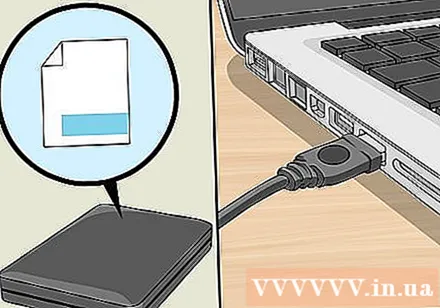
- If you intend to securely erase the data on a drive to prepare it for resale, see the section Formatting a drive safely in this article.

Insert the Windows installation disc. You will use the Windows installation disc to format your drive. This is the easiest way to format a primary drive, as you cannot do this from within Windows. You don't need to use the installation disc you own, because you don't need to actually enter the product key (unless you reinstall Windows). If you can't find the installation disc, you can still choose one of the following options depending on your version of Windows:- Windows 7 - You can download the ISO file for Windows 7 for which you intend to import your product key. Then, you will transfer this ISO file to a blank DVD or USB drive using Windows 7 USB / DVD Download Tool which you can download here.
- Windows 8 - You can download Microsoft's Windows 8 Media Creation tool here. This program will download and create Windows installation media on a blank DVD or USB drive (4 GB or more). Run the tool and follow the instructions on the screen to create the installation media.
- Windows 10 - You can download Microsoft's Windows 10 Media Creation tool here. Run this program to download and create a Windows 10 installation disc on a blank DVD or USB drive. Most users will download a 64-bit version of this tool. If not sure, see the article How to Check if your Windows version is 32-bit or 64-bit.

Set up the computer to boot from the installation drive. To run the installer and format the drive, you'll have to set up your computer to boot from that drive (DVD or USB) instead of booting from the hard drive. The process will be slightly different depending on whether your computer is running Windows 7 (or earlier), or if your computer is running Windows 8 (or later).- For Windows 7 (and earlier versions) - Please restart your computer and press the BIOS, SETUP, or BOOT key that is displayed when the computer first boots. The most commonly used keys are F2, F11, F12, and Del. In the BOOT menu, set your installation drive to the primary boot device.
- For Windows 8 (and later versions) - Click the Power button in the menu or Start screen. Hold ⇧ Shift and click Restart to reboot into the "Advanced startup" menu. Select the "Troubleshoot" option then click "Advanced options". Click "UEFI Firmware Settings" and then open the BOOT menu. Then set your installation drive to the primary boot device.

Begin the installation process. Windows will download the setup files and begin the installation process. You will be asked to choose your language and accept the terms before proceeding.
Select the "Custom" installation method. This allows you to format your hard drive during the installation.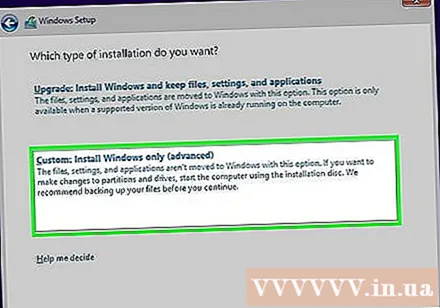
Select the partition you want to format. After clicking through the initial installation screens, you should see all the hard drives and their respective partitions. Basically, you'll see multiple partitions on your computer, one for your operating system, one recovery partition, and any other partitions you've created or the drive you installed.
- You can delete partitions on the same drive to merge them all into one unallocated partition. This will delete all data on the partitions. Click the "Drive options" button to see a "Delete" option for the partition.
- If you intend to delete all partitions, you will need to create a new partition before formatting it. Select an unformatted area and click "New" to create a new partition. You are allowed to set the size of the partition depending on the available storage space. Note that you usually cannot create more than four partitions per drive.
Format selected partition. Please click the "Format" button after selecting a partition or drive. If you don't see the Format button, click the "Drive options" button to see it. You will be warned that the formatting process will erase all data on the partition. After you agree, the formatting will take place automatically. It may take a while for the process to complete.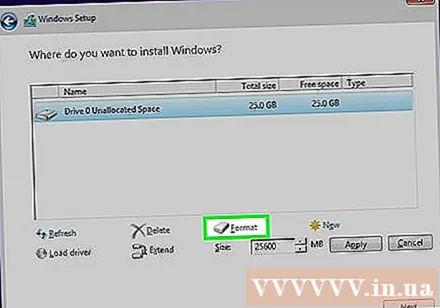
Install the operating system. Formatting the primary drive will remove the operating system, meaning you won't be able to use your computer until you reinstall the operating system. You can proceed to install Windows after formatting the drive, or you can install another operating system like Linux. To install Windows, follow the instructions in the installation program after formatting. To install Linux, you will need Linux installation media. Refer to How to Install Linux for specific instructions for installing the different versions of Linux. advertisement
Method 2 of 4: Format the secondary drive
Open the Disk Management utility. When connecting a new external drive or installing a new hard drive, you'll need to format for it to appear in Windows Explorer. You can do this using the Disk Management utility.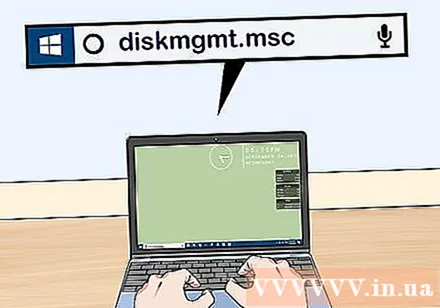
- Press ⊞ Win+R and type diskmgmt.msc to run Disk Management. In Windows 8 and 10, you can right-click on the Start button and select "Disk Management".
- It may take a while for all of your installed hard drives to appear.
- If you want to safely erase the data on a drive before selling it, see the section Formatting a drive safely in this article.
Partition a new drive (if asked). If you are opening Disk Management for the first time after installing a new drive, you may be asked about how to initialize the drive. Don't worry if this window doesn't appear.
- Select "GPT" if the new drive has a capacity of 2 TB or more. Select "MBR" if the new drive is less than 2 TB in size.
Select the drive you want to format. All your drives and partitions will be listed in Disk Management. If you've just installed a new drive, it will usually appear in a row and labeled "Unallocated". Expand the "Status" column to see detailed information about each partition.
- You cannot format the "Boot" partition in Windows, because this is the partition on which Windows will be installed.
- Formatting will erase all of the data on the drive, so be sure to choose the correct drive.
Create partition (if necessary). If the drive has not been formatted, you will need to right click on it and select "New Simple Volume".Follow the instructions on the screen to create a partition in the storage space is not formatted.
Right click on the drive or partition and choose "Format". This step will open the Format window.
Set up format options. You can give the drive a new name (Volume label), as well as choose its file system. For Windows, select "NTFS" as the file system for maximum compatibility. You can choose whether or not you want to perform a quick format. Only uncheck this option if you are concerned that your drive is damaged.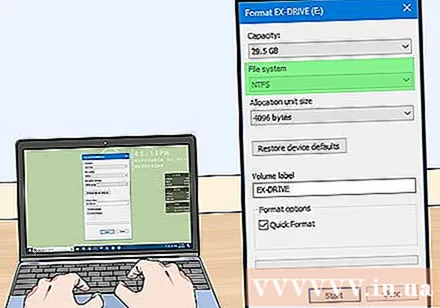
Wait for the formatting to complete. Click the Format button after you're satisfied with your setup. Formatting may take a few minutes. Once the process is complete, you can use the drive to store the file and install the program into it. advertisement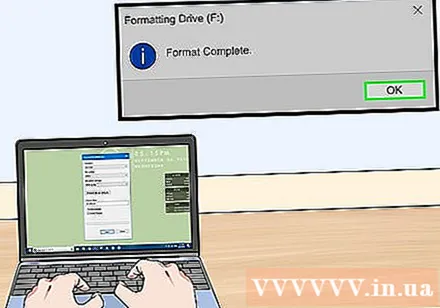
Method 3 of 4: Merge existing drives
Open the Disk Management utility. You can shrink your existing drives to convert the available storage space on them into a new partition. This feature can be helpful if you have a lot of free space on the drive and want to create a drive dedicated to certain files, such as media.
- Press ⊞ Win+R and type diskmgmt.msc to quickly run the Disk Management utility. You can also right-click the Start button in Windows 8 and 10 to choose Disk Management from the menu.
Select the partitions you want to merge. You can merge any partition with little free space available. However, you should choose at least a few GB of free partition to make the new one useful. Make sure to leave enough space for your existing partition, especially in that case your boot partition. Windows works best when there is at least 20% free partition.
Right click on the partition and choose "Shrink volume". This step opens a new window after Disk Management has determined how much storage space is available to create a new partition.
Enter a size for the new partition. The window will display the available storage space to merge the existing drive in megabytes (MB). 1024 MB equals one gigabyte (GB). You will need to enter the desired size to merge the drive by creating a new partition of that size.
Start the merge process. Click "Shrink" to create the amount of storage space you specified in the drive you currently have. It will appear in Disk Management as the unformatted storage space on the same drive as the old partition.
Create a partition. Right-click on the unformatted storage area and select "New simple volume". This will launch the Simple Volume Wizard.
Follow the steps on the screen to create the partition. You can choose how much unformatted storage you want to use for the new partition. You can also assign a drive letter.
Format the new partition. As you follow the steps, you will be asked if you want to format the partition. You can either format it with the file system immediately, or format it later by following the steps in the method mentioned above. advertisement
Method 4 of 4: Format the drive safely
Download DBAN. DBAN is a free hard drive formatting tool that can safely overwrite (overwrite) your data so it cannot be recovered. You will want to do this if you intend to donate, sell, or recycle your computer or drive to avoid identity theft.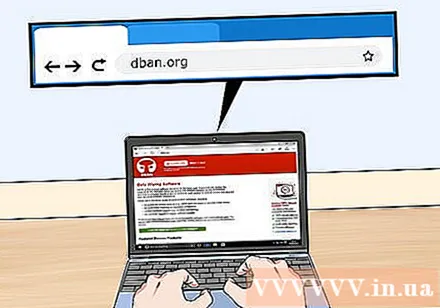
- You can download DBAN from. The free version will suit most users.
- You cannot use DBANs to securely erase electronic hard drives (SSDs). You will need to use a premium program like Blancco.
Burn DBAN to blank DVD or CD. Because the DBAN is small, it will fit on a blank CD or DVD. If you are using Windows 7 or higher, you can right-click on the downloaded ISO file and select "Burn to Disc" to burn it to a blank disc in your drive.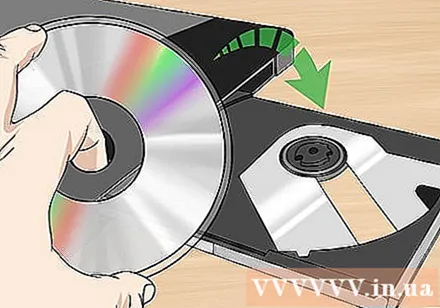
Set up the computer to boot from DBAN disk. You will need to set up your computer to boot from an optical drive and run DBAN.
- For Windows 7 (and earlier versions) - Please restart your computer and press the BIOS, SETUP, or BOOT key shown at the manufacturer's logo screen. Usually it will be the key F2, F11, F12, or Del. Open the BOOT menu and set your optical drive to the primary boot device.
- For Windows 8 (and later versions) - Click the Power button in the menu or Start screen. Keep key ⇧ Shift and click Restart to restart in the "Advanced startup" menu. Select the "Troubleshoot" option then click "Advanced options". Click "UEFI Firmware Settings" and go to BOOT menu. Set up your optical drive as the primary boot device.
Run DBAN. After setting the boot sequence, reboot the computer to run DBAN. Press ↵ Enter on the main DBAN screen to start the program.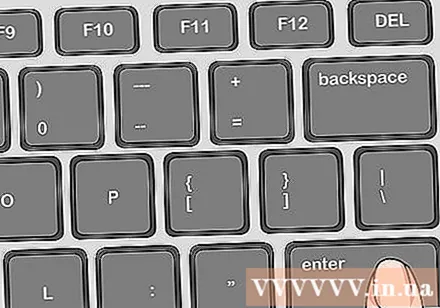
Select the drive you want to delete. Use the arrow keys to select the hard drive you want to erase, and then press Space to choose it. Be careful when selecting drives if you have something you want to keep, as once you start there's no way to go back. You can even delete the Windows installation by mistake if you're not careful.
Press.F10to begin deleting. DBAN's default settings will be used to securely erase your data. Once deleted, it is almost impossible to get the data back. The deletion of the default DBAN usually completes within a few hours.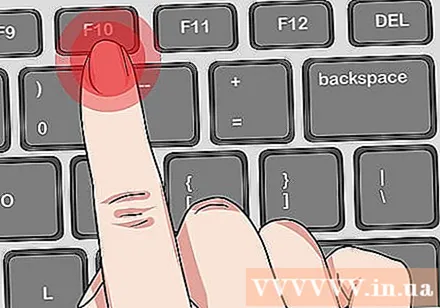
- If you want to be even more sure that everything has been completely erased, tap M on your selected drive and select "DoD 5220.22-M" or "Gutmann Wipe". This process will take a longer time to complete, but deleting will be much safer.


