Author:
Laura McKinney
Date Of Creation:
4 August 2021
Update Date:
1 July 2024
Content
Wheat flakes are small pests that destroy dry foods such as cereals, pancakes, dried vegetables, cheese, corn and dried fruit. They can thrive in even the cleanest of kitchens if the conditions are right. A warm, dark, damp kitchen is an ideal breeding ground for flour mites - pests can lurk in food or on packaging. The article will guide you on how to identify flour mites, how to treat them, and prevent them from infestation.
Steps
Part 1 of 3: Flour mite detection
Look for brown "flour flakes" on food surfaces. Wheat flakes have a pale white body and are so small that they are nearly invisible to the naked eye. Therefore, it will be difficult to detect until the flour mites appear massively. The flours have slightly brown feet, so living and dead flour with their waste forms a brown mantle. They look a bit like sand.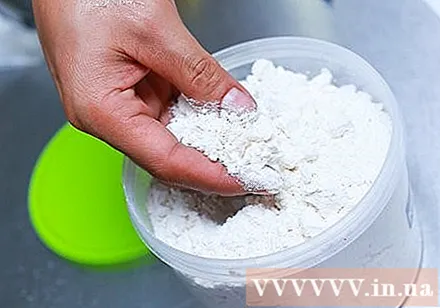

Rub flour or suspicious dough between your fingers and check for a mint-like smell. When crushed, the flakes will have a characteristic mint-like odor. Food also has a strong smell or sweet taste, even before you notice flour mites.
Spread a little flour on the surface and check after 15 minutes. Spread the dough into a smooth layer first as possible. If the flour is deactivated by the flour, the surface of the dough will be uneven due to the movement of the dust.
Stick a piece of tape on the packaging or kitchen counter to check for flour flakes. The particles will stick to the tape and you can see them using the magnifying glass. Also, check that the paste on the batter box and the edges of the batter box are coated with aluminum foil. Wheat flakes may not get in, but they may be on the top of the can and get in when you open the can.

Note if you experience unexplained itching after handling flour or other grains. Although flour mites do not bite, some people can develop an allergic reaction to the allergens on the flour mites or their waste products. This is called "mite contact pruritus". advertisement
Part 2 of 3: Removing flour mites
Place foods with severe flour contamination in a plastic garbage bag and throw it in the trash outside of your home. Flour mites feed on the bacteria and mold in the flour and their appearance indicates that the food has spoiled. Wheat flakes can also spread mold spores to other foods if transferred to other containers. Wheat flour is harmless to most people, so there is no need to worry if you eat a little.
- In rare cases, you may experience an allergic reaction from eating lice-contaminated flour, known as mite anaphylaxis, or pancake syndrome. The reaction usually occurs within minutes after eating the contaminated food and can cause hives, difficulty breathing, swelling of the throat, nausea, fatigue and / or fainting.
- See your doctor right away if you experience any of these symptoms.
Freezing dry foods can become contaminated with mites to destroy the flour mites. If the food shows no signs of mite infestation or is not completely infested with mites, you can store them at -18 ° C for 7-14 days to destroy scattered flour mites, eggs or larvae.
- After the flour has died, sift the dry food or discard the food that has been contaminated with the mites that may contain dead flour.
Eliminate and disinfect trash, jars or containers used to store food contaminated with flour. Up to the last mite-contaminated food in the container should be discarded to block surviving flour mite food sources. Rinse containers and lids with hot water and make sure to dry before adding new foods.
Clean the kitchen or kitchen cabinet that used to contain food contaminated with flour. Vacuum cabinets and walls, pay special attention to cracks. If you don't have a vacuum cleaner, use a clean, dry brush to sweep it. Be sure to throw the bag in the vacuum cleaner in the trash outside of your home after cleaning.
- Clean all surfaces but avoid chemical insecticides near food or food storage areas.
- Try cleaning with a 1: 2 vinegar mixture or a natural insect repellent and a safe insecticide like durian leaf oil or orange oil (water-soluble essential oils 1 :ten).
- Use the dryer to dry the food storage area. Wheat flakes like humid places.
Part 3 of 3: Preventing flour mites
Keep the food storage area cool and dry. Wheat flakes cannot multiply in food storage areas with low humidity (below 65%) and well-ventilated food storage. Pay attention to where kettles, pots, dryers, and stoves are located and make sure they do not create a humid air in the food storage area.
- Place a fan in the kitchen to keep the air cool and dry out the moisture.
Store flour, cereals and other foods susceptible to flour contamination in clean, airtight containers. This keeps the food fresh, dry and free from flour contamination. If flour mites remain after the cleaning process, blocking food sources will make them hungry and prevent them from laying eggs in the grain.
- Closed plastic bags can be effective in the short term, but flour can chew holes in the bag and get into food. Containers made of glass or thick plastic should be used.
- The flour mite's lifecycle is about a month so the rest will die if you can keep everything clean and covered.
- Avoid sharing old foods with new foods. Wait until you've used all the flour in the box, wash it, scrub the old flour on the bottom of the box, then add new flour.
Buy dry food in small portions. Although slightly more expensive than buying in bulk, this means you won't have to store foods prone to flour contamination for a long time. If left in a humid environment for too long, the food can become damp, start to grow mold, and become contaminated with flour.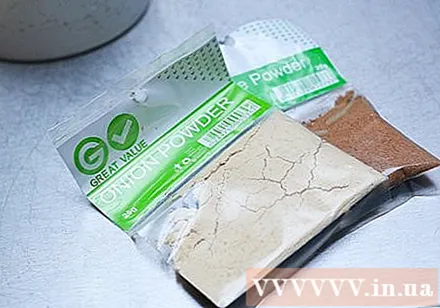
- Be sure to inspect all packaging before bringing dry food home. Make sure the packaging is not damp or damaged and that food is not stored on damp shelves.
Stick bay leaves in a food storage container or cupboard. Flour mites, cockroaches, moths, rats, food weevils and many other pests hate the smell of laurel leaves and they will avoid dry foods in a bay leaf. You can put bay leaf straight into the box (the smell won't get into the food), stick it on the lid of the box or inside the kitchen or kitchen cabinet.
- There are mixed reports on whether to use fresh or dried bay leaves. Many people report that using both is fine, so you can buy the one that is easiest to find and see if it works.
Keep pet food separate from other dry foods. The rules for storing pet food are not as strict as for human food. Pet food is also more susceptible to pests and diseases. However, pet food in the form of dry seeds is usually heat processed and contains little water. For this type of food, if there are mites, it is also a rare story. You should store pet food in an airtight container and away from human food. Anyway, pets don't want their food to be contaminated with human food. advertisement


