Author:
Laura McKinney
Date Of Creation:
10 August 2021
Update Date:
1 July 2024
Content
If you want to cut your wedding expenses while maintaining the style you've chosen, making your own wedding invitation is a great way to save money. This article will guide you on how to make a complete wedding invitation.
Steps
Part 1 of 3: Sorting Information
Arrange the parts of the wedding invitation. The wedding invitation usually consists of three parts: the greeting card, the invitation and the response card. Decide if you want your wedding invitation to include all of these parts and how you want each of them to be different or similar.
- Congratulations cards usually include engagement and wedding announcements, the names of the bride and groom, as well as the date and (optional) wedding date. You do not need to add locations or other details.
- Invitations should be sent out at least two to six weeks before the wedding. You should include the wedding ceremony information including the bride and groom's name, wedding venue, and specific date and time. In addition to the basic information, you can add more information to your invitation card.
- Response cards are smaller in size and usually come with an invitation card. This is the type of card inserted inside the invitation, although not a required card, but it will be quite useful. The return card is contained inside an envelope and this is the type of card that gives the recipient the opportunity to let you know if they are able to attend your wedding, how many people will be in attendance, and Their favorite food for dinner. The recipient will send this response card back to you, so you can see the number of people who will be in attendance for easy arrangement.
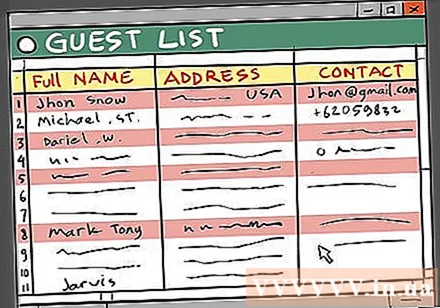
Make a list of guests. Before making a wedding invitation, you need to determine the number of wedding invitations that you have to make. To do this, make a list of guests that are divided individually within each family or by each household. Include their first name and address and you can also add their email addresses and phone numbers if desired.- It is easier if you organize this information into a spreadsheet program on your computer. This way, you will be able to quickly track information and make any edits as needed.
- When the guest responds to the response card, color or mark their name in the guest list. This will help you keep track of the number of people attending your wedding and the number of people you have not received a reply to.
- Pay attention to any of the guests on the list that may need you to use a different method to send out the invitation. If they live in a rural or remote area, you may have to send them invitations online or by post. If they speak a different language, add a translation of your wedding invitation.

Write information on wedding invitation. Once you have decided what parts you want to make for your wedding invitation, proceed to design one (or several) templates for each section. Choose the exact language you want to show in your wedding invitation, including the order of elements in the wedding invitation. Choose the exact wording you want to present in your wedding invitation, including the order and spacing of each group of different information in your wedding invitation.- Decide if you want to use formal or informal language. According to Vietnamese custom, the classic solemn introduction includes "" respectfully invite you to our wedding ceremony at the time ... "or" respectfully invite you to the wedding and wedding ceremony. Our child's credit to ... "
- If you want to design a wedding invitation in a more informal style, try using a "welcome to our wedding at ..." style introduction or just use a single phrase something like "You're invited to a wedding!" include information about specific locations or dates / times.
- Even though these are sample paragraphs, make sure you reread them carefully to avoid making any spelling or grammatical errors when writing your wedding invitation.
- Don't limit yourself to a single wedding invitation writing style, try creating different versions of wedding invitations with different writing styles.
- You can include a map of directions in your wedding invitation, especially if the venue is quite remote or most of the guests are not aware of it.
Part 2 of 3: Wedding Card Design

Choose a color scheme. It's better to start designing a wedding invitation after you've prepared a real wedding plan. To be able to create the best wedding invitation, choose colors that match the tone used for your wedding.- Use up to 3 colors in your wedding invitation. This will help your wedding invitation not be messy and confusing.
- Use at least one neutral color or background color. White or cream is commonly used, but any lighter color can be used as a base color. You can then add 1-2 bright or vibrant colors to make your wedding invitation stand out more.
- Make sure you use a contrasting color for the background / text so that the guest can easily read everything in your wedding invitation.
- Use the same colors for invitations, greeting cards, and response cards. You want all the parts of the wedding invitation to harmonize, not against each other.
- Choose your own color for each part of the wedding invitation. These sections include the background, the text, and any other elements you add.

Background design for wedding cards. Before you start adding text and images to your wedding invitation, you need to choose a background for your wedding invitation. If you are using formal language for your wedding invitation, consider using a classic neutral backdrop. Friendly words will be suitable for a background with funny, funny patterns or patterns.- If you want to use a solid background, decide which color scheme you will use. Will you use a single color, or use an ombre effect to blend two or more colors together?
- Consider using a pattern or image as your background. While you may have to make some modifications in the writing area, using a textured background is an easy method to add more appeal to your wedding invitation.
- Remember that you can use paper with a pre-printed background. This way, you simply need to add text and layout to your wedding invitation, and choose the patterned paper you want.
- You can use textured paper (instead of patterned paper) to create the illusion of a background image's presence.

Image selection. If you want to include pictures or drawings in your wedding invitation, brainstorm a few ideas. If you don't feel confident in your skills in this area, ask a close friend or an artistically gifted / gifted close friend to help and provide suggestions.- If you want to add images to your wedding invitation, design it yourself or use an online free photo site. You might consider using a border or border around the card text, small vignettes or suitable patterns, or an engagement photo of the bride and groom.
- If you are using images, decide if you want to decorate the image on a cardboard (cardboard) with the contents of the card printed on a separate piece of vellum (glossy paper). stick to the top of the card, or you want to combine all the pictures and contents of the wedding card on one sheet of paper.
- Avoid adding too many elements to your wedding invitation. If you are using a patterned background, do not add too many drawings or borders. Do not use more than two pictures or drawings in your wedding invitation, and make sure what is written in the card is the focus.
Choose a font style. Just as important as images and colors are the fonts used to write the content of your wedding invitation. Fonts play an important role in shaping a certain look for your wedding invitation.
- For a trendy wedding invitation, go for a classic serif font. This way will bring elegance and sophistication to your wedding invitation.
- If you're using card writing and informal design, consider using handwriting or sans-serif font. However, you don't have to use this font alone, and of course you can also use a formal font for your wedding invitation.
- Only use a maximum of 2 fonts. Using multiple fonts in wedding invitations is not uncommon, but using more than two fonts can be confusing.
Consider using more accessories. Today's wedding invitations can be heavily detailed and have a lot of appendages as well as artistic elements outside the wedding invitation. Consider using embossing, adding ribbons or bows, using confetti, or adding glitter to your wedding invitation.
Choose an envelope. There are hundreds of different types of envelopes on the market, some specially designed for wedding invitations. Envelopes are difficult to do manually, except for brides who are truly adventurous. Find envelopes of the right size, shape and color through online websites to match your wedding invitation.
Format your wedding card. Once you've decided on all the elements - typography, color schemes, backgrounds, and usable images - you can now design a template card. Outline your wedding invitation according to the right content / image layout.
- Create more versions of each wedding invitation style by moving text around, increasing / decreasing the size of objects, and using different border styles.
- Don't think that you need to use a certain formatting style. Try using a variety of styles to determine which one you like best; You can be quite surprised at the things you like and dislike.
- Remember to think about the size of the wedding invitation. This may cause the format of the wedding invitation to be slightly changed.
Perfect your wedding invitation. Once you've gone through all the design styles and positioned your piece of content, combine them to create a complete wedding invitation. Make sure that the contents of your wedding invitation don't make any fundamental mistakes and that you have determined the correct size for your wedding invitation. advertisement
Part 3 of 3: Printing Wedding Cards
Select paper material. While you may have already defined the type of paper you will use, if you want to add a patterned or textured background, you should only proceed with choosing the paper type for the wedding invitation after you've designed the background. .
- Visit the local printing shops to find out about the different styles of paper on sale. Pay attention to the price, and consider the variation in cost if you're buying in bulk.
- Avoid using glossy photo paper for your wedding invitations, as these are more likely to deteriorate. Instead, try using matte or cardboard.
- Make sure the paper you choose can be cut to size or ordered to the exact size used in your wedding invitation.
- If you are considering using multiple layers of paper for your wedding invitation, make sure you pick the right paper for each layer of paper. You will probably need to use equal amounts of paper for each layer of paper.
Decide which method you want to use to print your wedding invitation. You can print your wedding invitation at home or through a print shop. Normally, if you design your own wedding invitation, you will save enough money to be able to use the high quality printing service at the local printing shop.
- If you print your wedding invitation at home, make sure that your printer is compatible with the paper you plan to use and that it has plenty of ink left to print.
- Contact many local printers for pricing estimates. For regular wedding invitation printing and cutting services, you can expect to pay a very low fee.
- Make sure you print your wedding invitation to the correct size so you don't have to waste time and money on re-printing your wedding invitation due to the wrong size.
Combine the parts of the wedding invitation. Once you have printed and cut all the wedding invitations to the right size, combine the parts of the wedding invitation together! If your wedding invitation has multiple layers of paper, use glue or rivets to fix them together. Place your response card or navigation map inside the wedding invitation and then put it all in one envelope.
- Remember that you can stick the envelope using stickers or wax instead of just licking the envelope to stick it.
- Use the clearest and best handwriting to write the address on the envelope or print the sticker in the right font for your wedding invitation.
Send your wedding card! After you have incorporated the wedding invitation elements and wrote the address completely, send a card inviting friends and family to celebrate your big day. Make sure you send out your invitations at least two to six weeks before your wedding. advertisement
Advice
- There are many cheap online wedding invitation templates you can choose from to design your own wedding invitation.
- Consider hiring a graphic design student to make your wedding invitation at an affordable price.


