Author:
Robert Simon
Date Of Creation:
20 June 2021
Update Date:
1 July 2024
Content
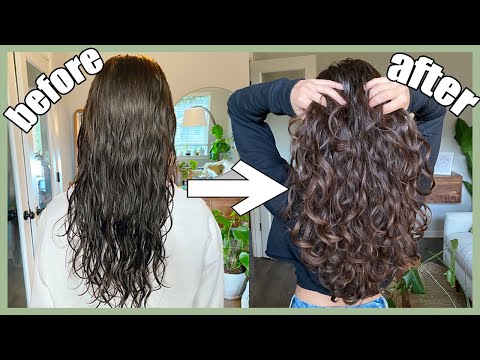
Naturally curly hair is difficult to achieve when you have relatively straight hair. However, there are many methods you can use to create natural curls, such as using a toothpick to create curls, curl it into fabric, using curls and braids or buns for curls. There are also some things you can do to make your curls even more curly once you have wavy hair.
Steps
Method 1 of 5: Use socks and cloth
Cut a few socks lengthwise. To use curl, you will need a lot of fabric. You can take advantage of the fabric by cutting the socks lengthwise (from the tip to the toe up) or you can cut old towels or old shirts into small pieces.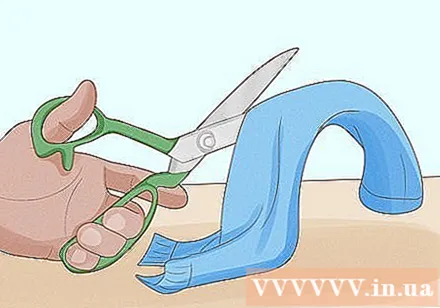
- Don't cut fabric too short or too thin; You will use those pieces of fabric to tie small pieces of hair.
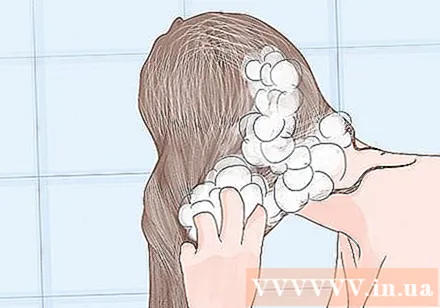
Shampoo. You will start working with hair that is clean and moist, but not too wet. If your hair is too wet, use a soft washcloth to absorb the excess water. You can also use a thin tooth comb to brush your hair to untangle your hair.- If you have thick hair, you can blow dry it to slightly damp hair. Otherwise, your hair will not dry completely overnight, and wrapping won't be as effective.
- You can also wait until the wrap is finished before drying your hair, such as sitting in a blow dryer while there are still curls in the fabric to create curls.
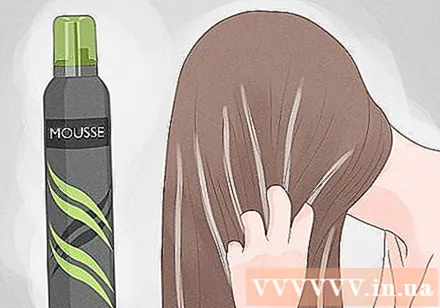
Add some gel, cream or styling mousse. If your hair is not curling well then using a little gel or mousse can help create it. In addition, using a gel or mousse helps to keep the hairstyle for a long time.- Try a product that helps create curls like mousse for curly hair.
- If you are using mousse, you should take a large amount.
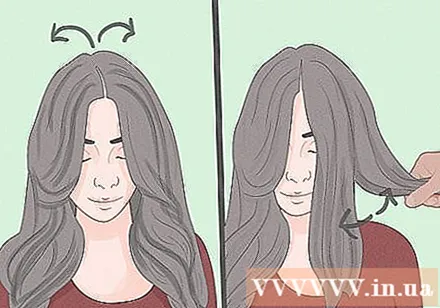
Divide hair into chunks. Start by dividing your hair in half, then dividing each side into two smaller sections. This will make the process easier.- You can also clip the top half of your hair so you can handle each part at once.
Wrap your hair in the cloth. Take a thin section of hair and place it in the center of the fabric to start the pants. Then, pull the ends of hair underneath the fabric and wrap the hair around the piece. Continue wrapping up close to the scalp.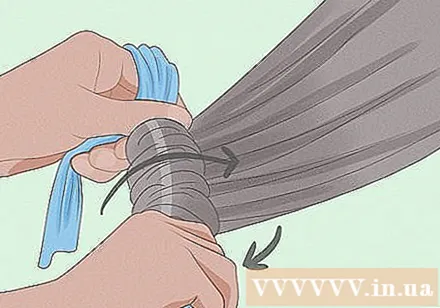
- If you only wrap a small part of your hair, you will have a tight curl.
- If you are using a large section of hair to wrap it, you will have large curls.
Tie the cloth tightly into the knot. Pull the ends of the fabric close together and tie the knot tightly. You can tie up two knots if you have thick hair.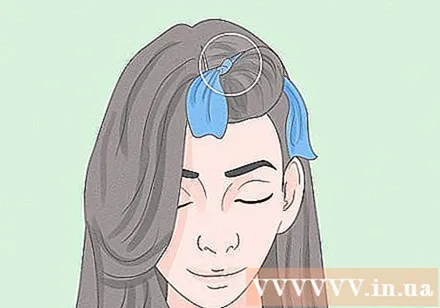
- Alternatively, you can use a toothpick to help keep your hair in place if you find it difficult to hold on.
Curl the rest of the hair. Continue to roll the rest of the hair into the fabric until the hair is gone. Try to keep the hair sections as evenly as possible, but don't worry about having to curl it perfectly.
Wait for the hair to dry before removing the cloth. It may take a few hours for your hair to dry or you can let it dry overnight.Don't remove the fabric too soon, otherwise the curls will not curl completely.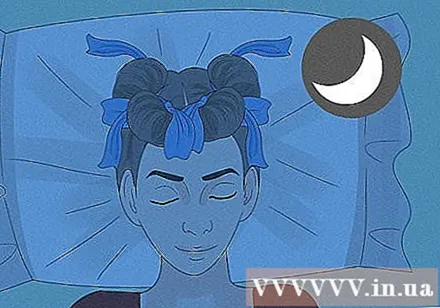
- Try removing a piece of cloth to check. If your hair has dried and turned into curls, you can remove the rest of the fabric.
- Don't worry about the cloth falling off while you sleep. You can still use a curling iron to curl the incomplete hair.
Hair styling as you like. When you remove the cloths, your curls will probably become curled. You can leave the hairstyle alone or release it by running your fingers through the hair.
- Spray some styling glue to keep the curls in place.
- If you want a gentle vintage wavy curl, you can use a brush to brush your hair.
Method 2 of 5: Use a roller
Preparing instruments. You can use a hard roller or a foam sponge to naturally curl your hair. Since this method does not use heat, the roller will not damage the hair. You need to prepare the following tools: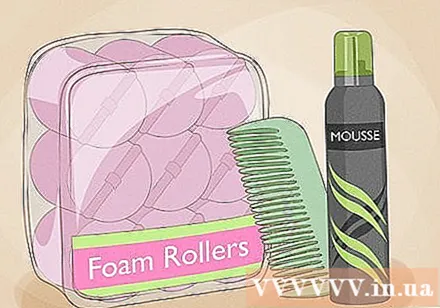
- A set of optional size foam rolls (small, medium, large, or extra large)
- A wide tooth comb
- Some gel or mousse (optional)
Wash your hair and condition your hair with conditioner. Clean and untidy hair is very important before applying; therefore, you need to wash your hair and use conditioner if you haven't cleaned it before. Use a brush while wet to help untangle your hair. Starting from the ends, gradually remove the hairline.
Apply a few hair products. If you have straight or often difficult curls, you will need to apply some gel or mousse. This will help keep the curl curls better and longer.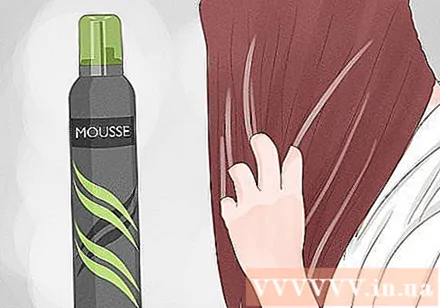
- Use a lot of mousse to make the hair more effective.
- You can look for a product specifically designed to make your hair curly.
Begin to roll a small portion of hair into the roll. Take a small portion of hair and wrap it around the roller, starting at the ends and rolling it up close to the scalp. You will take a portion of hair that is less than the width of the roll. Place the ends of hair under the roller. Keep your hair close to the roller and roll it up close to the scalp. Clamp to keep the roller in place if necessary.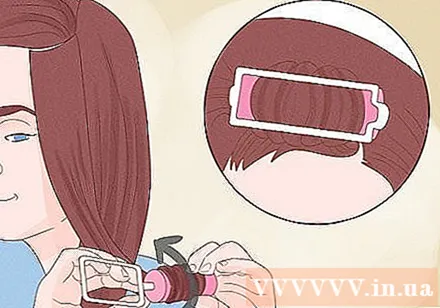
- You need to roll in such a way that the roll is positioned horizontally against the scalp.
- You can divide your hair into two equal sections and curl the hair shaft into the ends.
- You can also take a portion of the hair from the top of your head and curl it into the roller so it is horizontal on your head.
Wait for the hair to dry completely. It is important to make sure your hair is completely dry before removing the roller. If you're in a hurry, you can use the dryer on low or medium heat. If you remove the roller too soon, the hair will be droopy and not completely curly.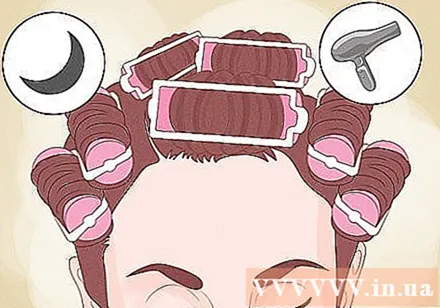
- If you don't want to use heat on your hair, try wrapping it the night before so it can dry overnight.
Hair styling as you like. The curls can be tightened by not touching the hair after removing the roll or dividing it into separate curls. If you want to keep the curls tight, you can spray on a little more styling glue.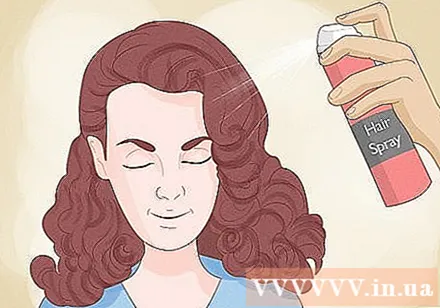
- You can also make the curls look softer and spread out by smoothing your hair with your hand.
- Don't use a round brush to brush curly hair, as it will get ruffled. Use a wide-tooth comb or a special brush specifically for curly hair if you want to brush your curls.
Method 3 of 5: Tet or bun
Make sure your hair is clean and damp. Wash your hair and condition it with conditioner before going to the next step. You can also use a thin tooth comb while it is still wet to remove any tangles.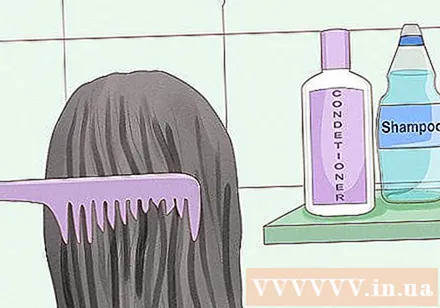
- Try brushing your hair while washing your hair while there is conditioner in your hair.
Apply a few hair products. The curls will last longer if you apply some mousse or gel before braiding or bun. You need to get enough product to apply it all over hair.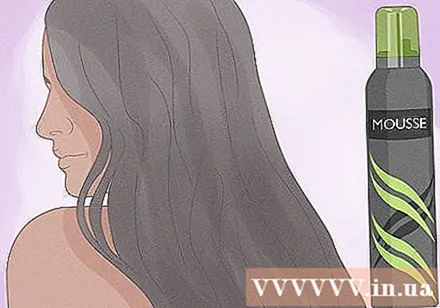
- Use special curling hair products like mousse for curly hair styling. This will make your curly hair look more beautiful.
braiding for curly, wavy hair. The more braids you braid, the more tight it will be. You should braid at least two braids, i.e. one braid on each side of the head.
- For a tighter braid, you should try braids. Note that this only curls the lower part of the hair, the upper part will be almost straight.
French New Year hairstyle for even top-down curly hair. Again, the more braids you braid, the tighter the curl will be. One or two braids give your hair a big wavy look, and the curls will curl slightly when you braid the five or six.
Curl your hair into small buns. Divide the hair equally into upper and lower halves, then divide each section into two. Hold each section in place with an elastic band so you have four small ponytails. Take the bottom left part of the hair and twist it like a rope. Continue twisting until the hair curls itself into a bun. Hold the bun in place with another filament or a few toothpicks. Do the same thing for the bottom right and top two parts of the hair.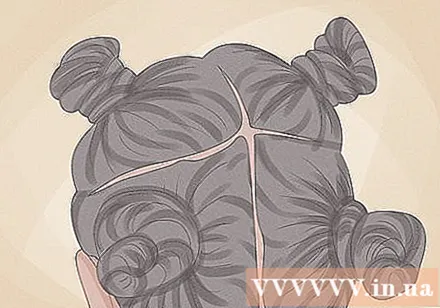
- You can also create a garlic bun or two for wavy curls.
Allow your hair to dry completely before removing the bun or braid. This will take a few hours. If you're in a hurry, you can use the dryer on medium or low heat. However, if you want to have nice curly hair, you should let it dry overnight.
Style curly hair to your liking. After removing the braid or bun, perhaps your curls will become curled. You can run your hand through your hair to make the curls pop. Do not use a round brush to comb your hair, as it can become messy. advertisement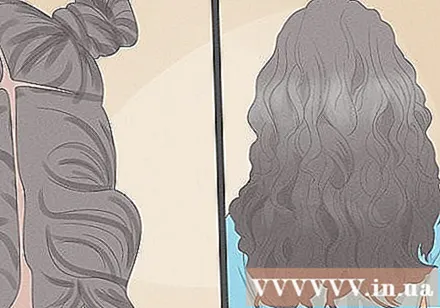
Method 4 of 5: Make hair naturally curly and reduce frizz
Do not wash your hair more than three times a week. The more often you wash your hair, the drier it will be. When hair is dry it becomes frizzy instead of frizzy. However, you can use conditioner for regular hair care.
- When using shampoo, you should apply more to the scalp and gradually down towards the ends of the hair.
- When using conditioner, you will apply more to the ends of your hair and down towards the scalp.
Choose a sulfate-free hair product. Sulfate is a powerful cleansing ingredient that makes hair dry, frizzy and tangled. That's why it's best to avoid shampoos and hair products that contain sulfate.
- Choose a product that says “sulfate-free” (sulfate-free) on the label.
- You might also consider washing your hair every other day or every three or four days.
Use a wide-tooth comb to style curly hair. Do not use a round brush to brush curls when dry. This will cause the curls to separate and make hair appear ruffled. Instead, use a wide-tooth comb to keep the curls in place.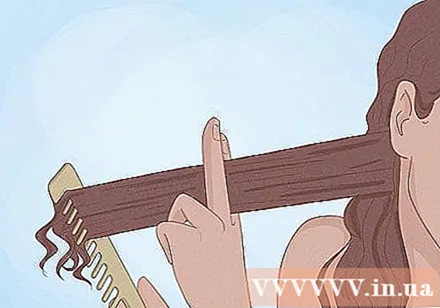
- Always brush stripped ends and never straight from root to tip for hair breakage.
- However, you can use a round brush to brush curly hair while wet. Be sure to brush every small part starting with the ends of your hair first.
Try to let your hair dry naturally. If you need to blow-dry your hair, spray your hair with a product that protects it from heat damage first. Then, set the unit to medium or low heat and use a heat diffuser. This will help maintain the natural curl of the hair.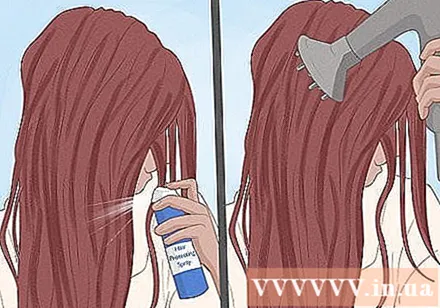
- While the hair is still damp, you can use your fingers to create curls. Wrap a lock of hair around your finger, then gently spiral your finger down. Repeat for the remaining curls. With this you will keep the shape of the curl and make it curl in the same direction.
Dry your hair with a t-shirt or synthetic microfiber towel. Regular towels are too hard to use for curly hair. The fibers in a towel can pull weak strands of hair, causing the hair to break. Therefore, you should dry your hair with a microfiber towel or a t-shirt.
Use more hair products for frizz or reduce frizz There are many different products on the market that can be found in cosmetic stores and hair salons to help you make your hair curly naturally. Most of these products need to be applied on wet hair, but there are also products that can be used on dry hair. Here are some ways to use hair products: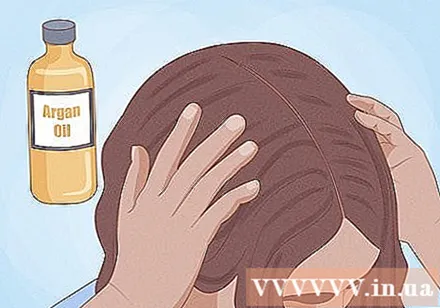
- Use mousse or gel on damp hair to make hair curly. Take a grape-sized product and apply it to your hair with your fingers.
- Use oil on dry hair to reduce frizz. Take a pea-sized amount of oil and apply it to the ends of your hair. You can use natural argan oil, coconut oil, or jojoba oil.
- Use sea salt hairspray to create beach-style frizzy hair.However, be aware that this product can make the hair sticky. You can also make your own homemade sea salt spray by stirring sea salt with water.
- Apply anti-ruffles cream on dry or damp hair. You will take a product the size of a grape and focus on the ends of your hair as well as the outer layer of your hair.
Consider getting a haircut every six weeks. Cutting your hair regularly will reduce split ends. You can also take the opportunity to evenly trim layers or trim your hair. Floor hair is great for naturally curly hair; straight hair without layered hairs will not hold curls, making the hair look straight. advertisement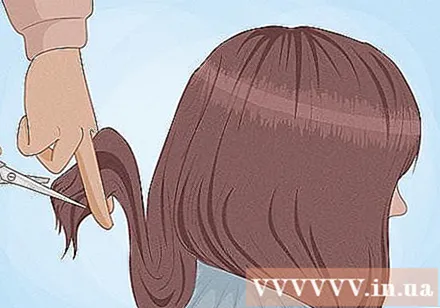
Method 5 of 5: Use a toothpick to make hair curly
Preparing instruments. You can create more natural curls using a toothpick - a popular tool for decades. The toothpick method does not require chemicals and other expensive products. Curling hair with a toothpick involves wrapping a small portion of hair in a circle and holding it in place with a toothpick for a few hours. Here's what you need: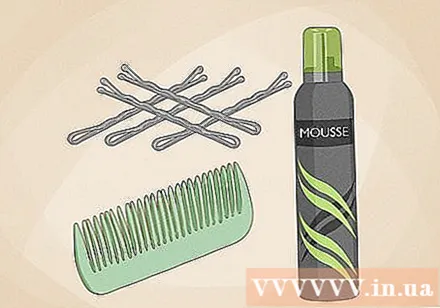
- Toothpick clamp
- Mousse (optional)
- Comb
Apply when hair is clean and slightly damp. Your hair shouldn't be too wet, otherwise it will take a long time for it to dry. If necessary, you can use a soft cloth to soak the water from your hair.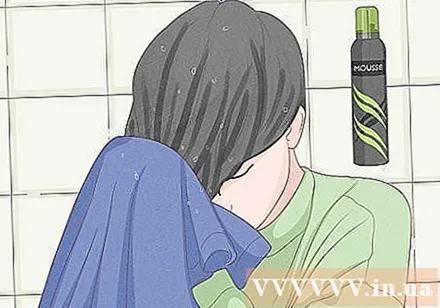
- If you have straight hair or are difficult to keep curls, you can add a little styling mousse.
Divide hair into two equal parts. This will make it easier for you to see which direction to make your hair curly. When handling the left side of the hair, wrap it clockwise. When working on the right side of the hair, wrap it counterclockwise. This way, you will create curly hair with a uniform look.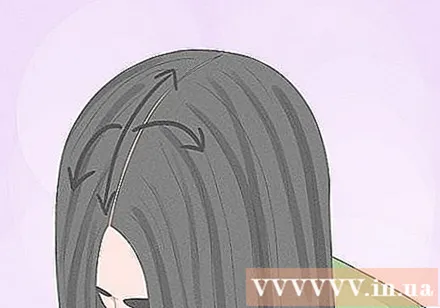
Take a piece of hair about 2.5 cm wide from the top of your head. Make sure the hair is not too large to be clamped neatly against the scalp. If the hair is too thick, it will take a long time for the hair to dry. Furthermore, a toothpick clip cannot hold your hair in place if the part of your hair is too thick.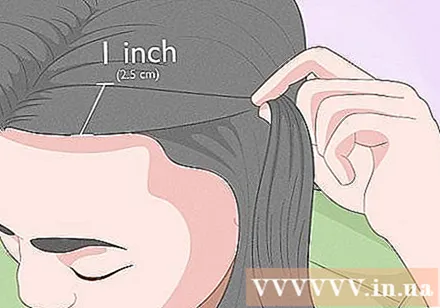
- Use a comb to divide your hair.
- You can also clip part of your hair up so that it's easy to focus on handling small sections at once.
Use a brush to evenly brush the part of the hair you will be using. Try to brush the hair as smooth as possible. Start brushing from the roots first, then gradually down the ends of your hair.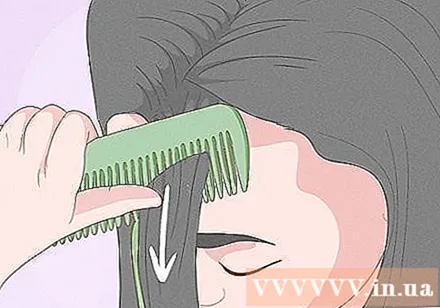
Use your fingers to curl the hair. Place the tip of the hair close to the finger and wrap the hair around that finger, gradually up against the scalp.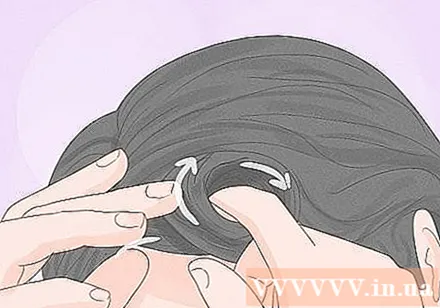
Pull your finger out of the curl. While you are pulling your finger from the middle part of the curl, make sure to use your other hand to hold the lock in place. Press the lock of hair close to the head.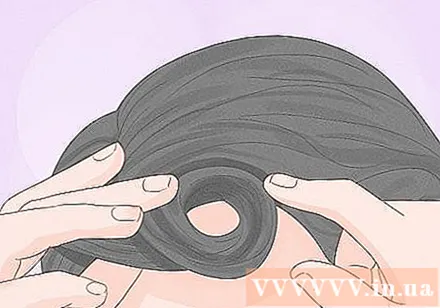
Hold the curl in place with two toothpicks. When inserting a toothpick to hold the curl in place, try to clip it so that it creates an X shape. This will make it easier to hold the curl in place.
Repeat these steps for the rest of the hair. Remember to roll your hair towards your face. This means that when you work on the left side, you will scroll clockwise; with the hair on the right side it will roll counterclockwise.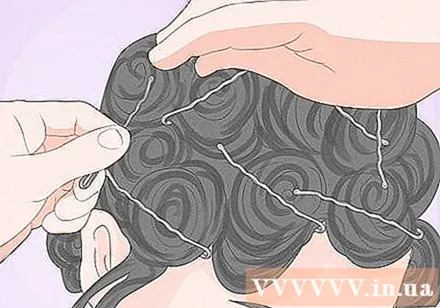
Wait at least 3 hours before removing the toothpick clip. Your hair should be completely dry before removing the toothpick. If you are in a hurry, you can use a hairdryer on a medium or low heat setting to help your hair dry faster.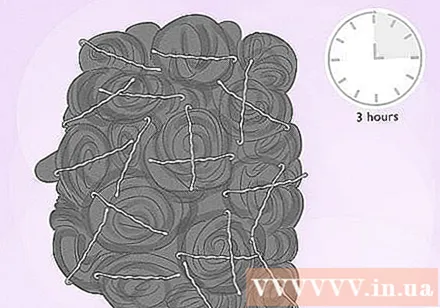
- Your curls will become curled when the toothpick is removed. You can make the curls slightly flatter by running your fingers through your hair. This way, the curls will come out slightly more loose and puffy.
Completed. advertisement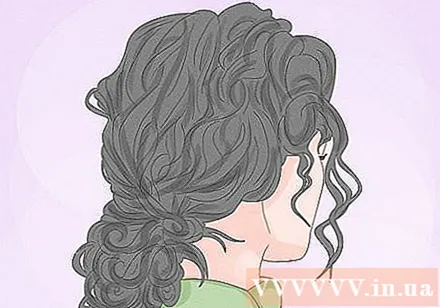
Advice
- If you want to use a curling iron, don't forget to use extra heat protection products. This way, the hair will avoid damage.
- Wash your hair (to make it wet), then braid it into a braid (or braids) then let it dry or braid it overnight and then remove it.
- Rest your hair between styling sessions to give it time to recover and not breakage. Only do these methods at most three to four times a week.


