How to Make Paper Hats

Author: John Stephens
Date Of Creation: 21 January 2021
Update Date: 2 July 2024
Anonim
How to make a Paper Hat Super Easy!!!
Video: How to make a Paper Hat Super Easy!!!

Content

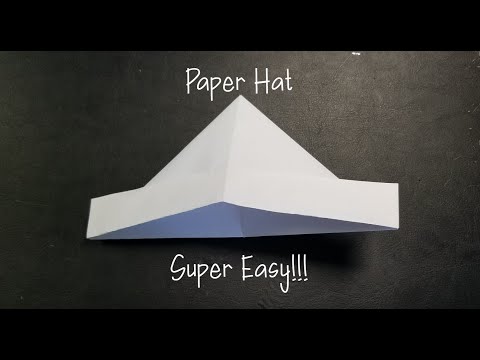
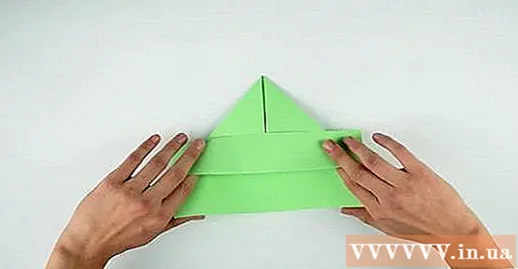
  • Paper 75x60cm is best, but you can use printed paper to make a little doll hat.
  • Fold the paper in half width. Stack the two short sides together, then flat the paper (hamburger style). Line your fingernails along the folds to make the folds sharper. Don't open the paper.
  • Fold the two high corners into the center fold. Rotate the paper so that the folded edge is on top. Fold the left and right corners into the vertical fold in the center of the paper. In the end you will have a house shape.

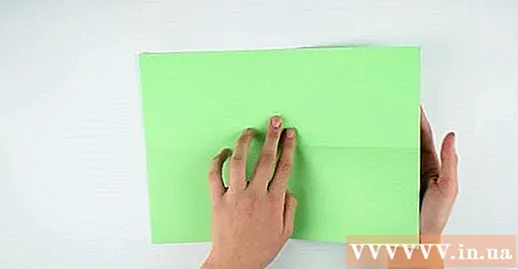
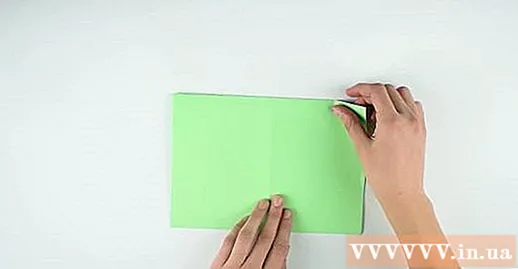
  • Fold a stack of paper lying along the bottom edge upwards. There are 2 "flap" of paper located along the bottom edge of the house. Fold the paper upside down. The new fold running along the bottom edge of the paper should be equal to the bottom edge of the triangle.
  • Fold the brim inward if it is too wide. Open the brim to reveal the creases. Fold the bottom edge up to this fold, then fold the brim up, just like the step above.
    • How wide the brim you want is up to you and your personal taste. Most people like a hat about 2.5-5cm wide.

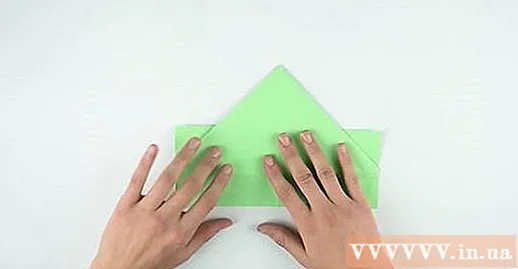
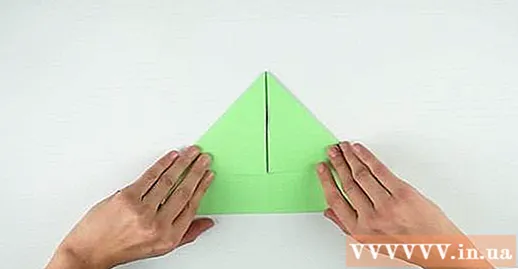
  • Turn the paper over and fold the second rim up. If you have folded the first brim twice, fold the second brim twice as well.
  • Stick the corners of the brim if desired. You don't need to do this, but gluing the corners will make the hat look better. Stick tape on both edges of the brim to keep them in place. You can also use the glue, but wait for it to dry.
    • To make an Alpine hat, you will fold the corners of the brim into the paper layer so that the hat is triangular, and then attach the rim of the rim to the hat.

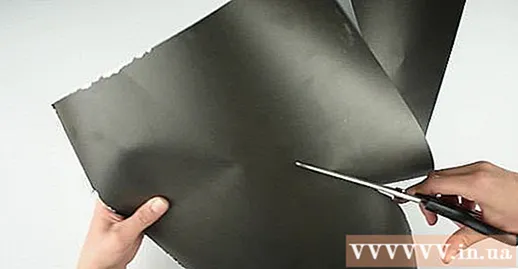
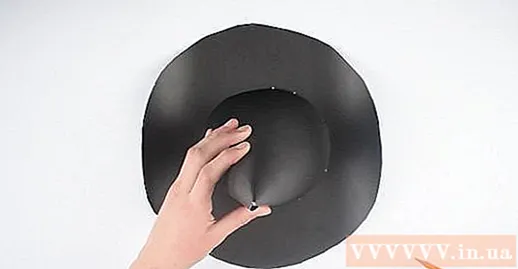
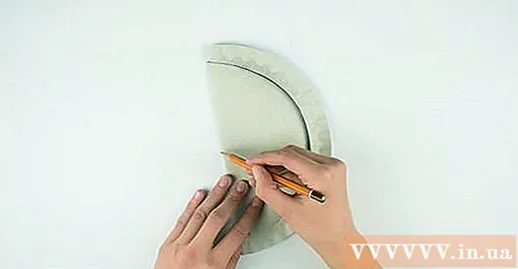
  • Draw half of a circle on the paper. You can use a plate, compass or pencil wrapped in a string to draw a half circle. This circle should be twice the height of the hat. For example, if you want to make a princess hat 30cm tall then the circle should be 60cm wide.
    • Draw a circle along one side of the paper. This will give you exactly half a circle.
  • Use scissors to cut the half of the circle. If you use regular printing paper, you will now decorate with paint, highlighters, stamps and stickers. Now wait, attach anything bulky to the hat. If you use paint, wait for it to dry.
  • Wrap the paper in a cone, then glue the edge. Roll the two sides of the paper together, then stack the two sheets together until a cone is formed. The deeper you roll the two layers of paper, the smaller the cone shape. Once you are satisfied with the size of your hat, connect the edges of the paper with tape, clips or glue.
  • Cut the brim to stick to the hat if you want to make a witch hat. Erect the cone on a piece of paper and draw it around the base of the cone. Lift the cone and draw a circle around the drawn circle to create a wider brim. Cut the big circle out, then keep cutting the small circle out of the big circle. Use duct tape or glue to the brim of the hat on the conical legs.
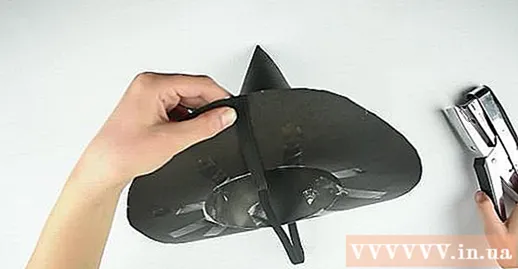
    • Hot glue works too, but you can use tape - stick the tape on the inside of the hat so that others can't see it.
    • Skip this step if you're making another hat.
  • Press a thin rubber strap against the base of the hat if desired. Cut a piece of rubber strap long enough to wrap under the chin when you put on the hat, plus 5cm. Tie the button on each end of the string and press it against the base of the hat. Place the knot on the trigger.
  • Fold a large paper plate in half. Fold a thin sheet of paper about 25-30cm in size. Make sure both sides are white. Avoid using paper plates made of cardboard.
  • Cut off the edge of the disc. Rotate the disc so that the folding edge is vertical. Start cutting at the end of the fold and stop cutting while you are about 2.5cm from the edge of the fold. Cut closer to the edge of the plate for a large hat, or cut further from the edge of the plate for a small hat. Do not cut the entire circle from the plate.
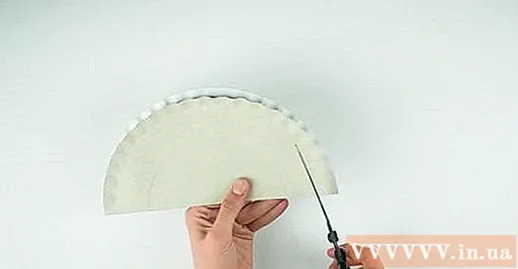
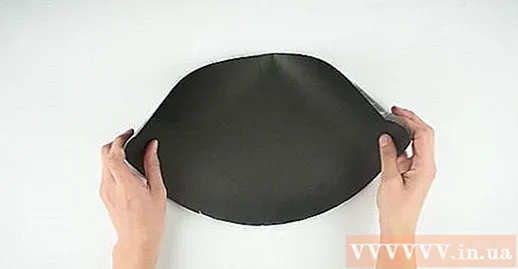
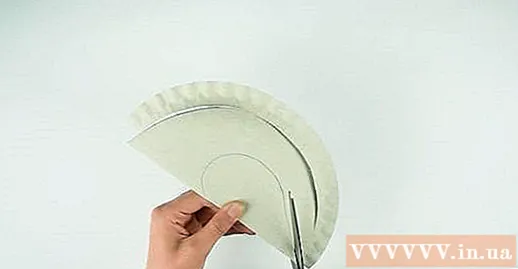
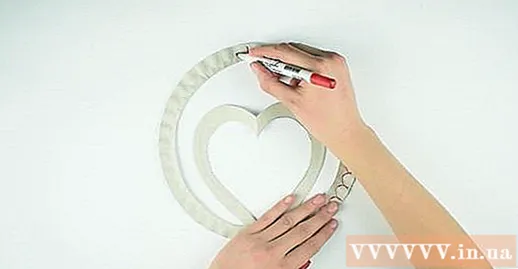
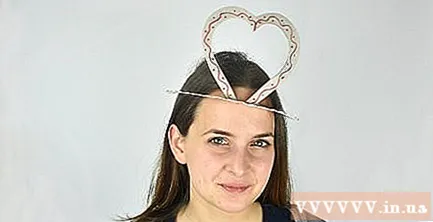
    • If you want to make a crown, cut the inside of the plate into pieces like pizza. Start cutting at the fold and stop cutting inside the edge of the disc. Do not cut over the edge of the disc.
  • Draw half of the shape, starting at an inch. Use a pencil to sketch half of some shape along the fold, like a half heart or half a star. Make sure the bottom of the shape is connected to the 2.5cm uncut section.
    • The picture you draw must be connected to the uncut section 2.5 cm so it does not come off.
    • Skip this step if you're making a crown.
  • Cut along the line you drew. The excess paper between the symmetrical shape and the edge of the disc will come off. Throw away this excess paper.
  • Open the plate and decorate the hat. When you open the disc, you will have a circle with a symmetrical shape in the center. Decorate the hat as desired and allow to dry.
    • Use acrylic paint, poster paint or glue color.
    • Draw the shapes on the hat using glitter color.
    • Apply crystal or satin on the hat for an extra sparkle.
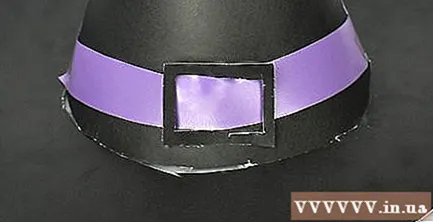
    • Decorate the hat with other items such as stickers, fringed balls or buttons.
  • Fold the inner shape up so that it is perpendicular to the hat. Find the juncture between the shape and the hat. Fold the shape along the ramp so that it is upright. If you make a crown then simply fold all the triangles upright.
  • Wear a hat. If the hat is too small cut around the inside of the rim to make it bigger. If the hat is too big, cut off the back brim. Stack the ends together until the hat fits the head, then stick or clip. advertisement
  • Advice

    • Use different colors and decorations to make a special hat.
    • Use colors suitable for the festival or the season, like orange and black for Halloween.

    Warning

    • Do not use a high-temperature glue gun as it may burn you. You should use a low temperature glue gun.

    What you need

    Make a sailor hat or Alpine hat

    • Newspaper
    • Adhesive tape or adhesive (optional)

    Make a paper hat cone

    • Paper
    • Paper plate
    • Drag
    • Pencil
    • Staplers, glues, or double-sided tape
    • Thin rubber strap (optional)
    • Ornaments (glitter, tassel, crystal stone, etc.)

    Make a paper hat shape

    • Paper plate
    • Drag
    • Pencil
    • Staplers, glues, or double-sided tape
    • Thin rubber strap (optional)
    • Ornaments (glitter, tassel, crystal stone, etc.)