Author:
Peter Berry
Date Of Creation:
20 February 2021
Update Date:
1 July 2024

Content
The high or low water level in the toilet sink doesn't seem like a big deal, but over time it does. When there is not enough water in the tub, the flushing force will not be strong enough and cause the toilet bowl to block. Conversely, when there is too much water in the tub, the toilet can overflow or not flush completely. Fortunately, these problems are not difficult to solve. The float height can be easily adjusted by hand or screwdrivers in minutes, and you don't need to hire a mechanic.
Steps
Method 1 of 3: Adjust the float-arm structure
Open the toilet lid. Lift the toilet lid off and set aside. You should now have access to the structures inside the toilet bowl. Be careful not to drop the lid of the tub and do not place the lid in easy-to-fall areas. The toilet lid is made of porcelain so it is easy to break.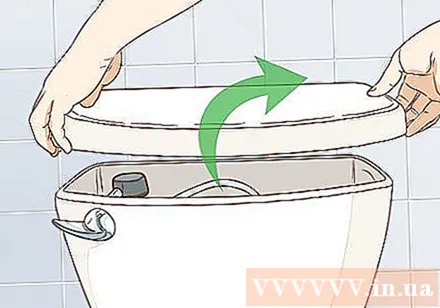
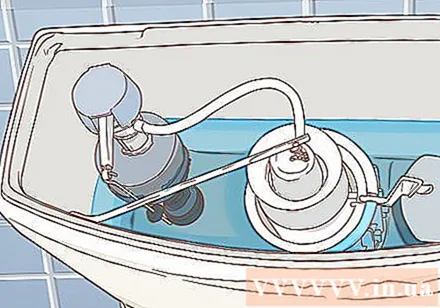
Watch the water level in the tub. The water level in the tank should be 2.5-5 cm lower than the inlet valve and overflow pipe (the large pipe is located near the center of the drain tank). If the water level is higher or lower than this level, it is not in equilibrium.- Your toilet may have a marker inside the drain, printed or engraved in the porcelain, indicating the water level to be set.
Disconnect the water supply from the drain tank. Find the location of the water supply valve outside, on the rear wall or under the toilet. Turn the knob fully clockwise, then drain the tub completely. After draining the water completely, the tub will not replenish. This way you can work inside the tub unobstructed.- Keep rotating the knob until you hear the water stop running.
- Do not attempt to adjust or repair anything in the toilet sink that has not previously drained.
Check for buoys and supply valves. Observe the drain mechanism to assess its general condition. If you find that there is a defect or defect, you may need to call a mechanic to have it repaired.
Check the height of the float. Check out the float in the tank, which is a plastic ball attached to the swingarm on top of the water supply valve. The height of the float determines the amount of water in the tank after re-supply. The float should be horizontal with the marker line if in good working order. If the float seems too high or too low, adjust the height of the float and check the water level after the water replenishes.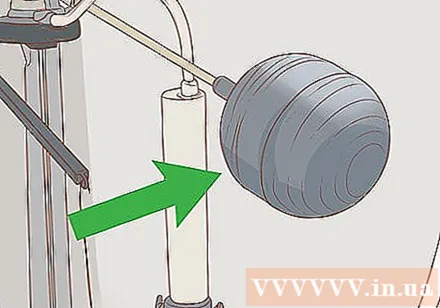
- If the float is above or below the marker line, it could be the cause of too much / too little water discharge.
- Shake the float. If you can hear the water inside the float, have a mechanic replace it.
- Make sure the float is properly connected to the supply valve.
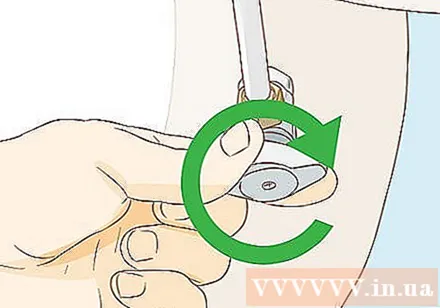
Use a screwdriver to adjust the height of the float. On top of the feed valve is a screw attached directly to it. Rotate the screw clockwise or vice versa enough. Rotating clockwise will raise the water level and counterclockwise will lower the water level.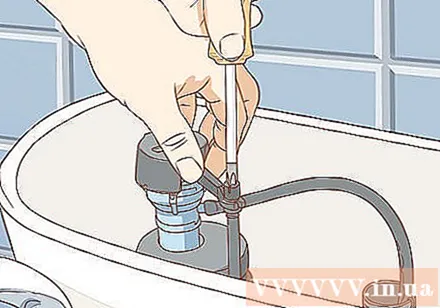
- Avoid turning the screw more than once at a time. Adjusting too much each time can cause the toilet to flush unevenly.
- If the screw is too rusty and not rotating, simply rotate the float. The float is threaded into the swingarm directly connected to the valve.
Drain the toilet water to check the water level. Turn the knob to turn the water back on in the tub and wait 1-2 minutes for the water to fill. After flushing the toilet, you will observe the water level in the tub. Ideally, the water is about half full. If the water level is still too high or too low, flush the tub completely and re-adjust the float until the water level meets the requirements.
- Call a mechanic if the water level still does not reach after several adjustments.
Method 2 of 3: Adjusting the cylindrical float
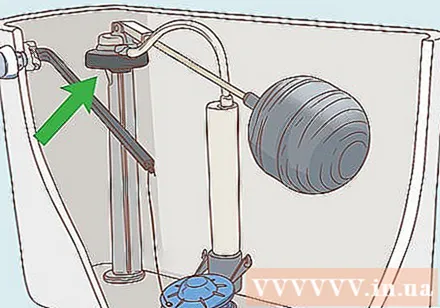
Recognize cylindrical buoys. Some new-style toilets are equipped with modern monolithic buoys (sometimes also called floating cups) in lieu of buoy-arm float designs. This type of float is designed as a solid cylinder attached to the shaft of the supply valve. If the drain tank is equipped with a cylindrical float then you can adjust the water level in seconds.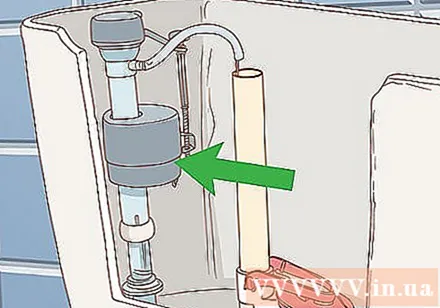
- The cylindrical floats are easy to install, remove and maintain also easy, user friendly with little experience in home repair.
Open the toilet lid. Open the tub lid and place it on a flat surface, such as a table top. Be careful not to drop the lid or place it near the edge of the table, as the sink lid is usually made of porcelain so it is easy to break. After opening the cover, check the water level - if the water level is 2.5-5 cm high or lower than the inlet valve or overflow pipe, then you need to adjust.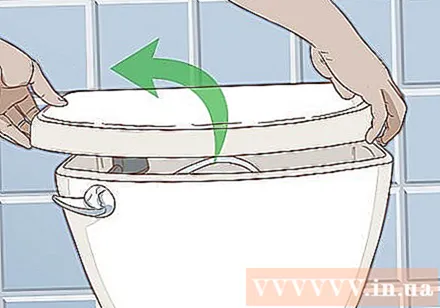
Turn off the water supply before you adjust the float. Find the location of the water supply valve outside, on the rear wall of the toilet or under the sink. Turn the knob fully clockwise. Once the valve is fully turned, flush the tub completely.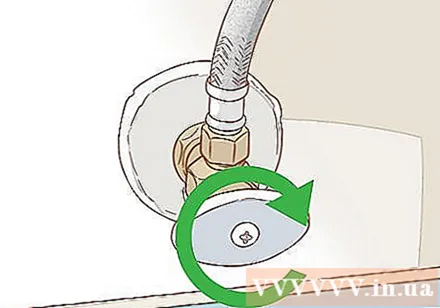
Locate the adjustment on the side of the float. The regulating lever is a small and long pipe, connected to the supply valve. For most toilet models, it will run either parallel to the valve or across from the top of the valve. Adjustable lever is used to increase or decrease the amount of water in the tank.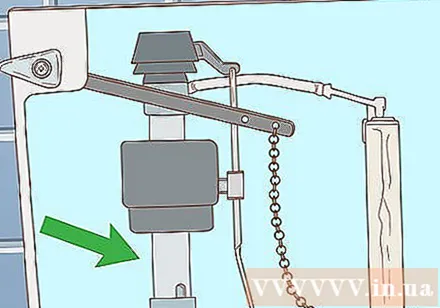
- It is advisable to get to know the internal structure of the drain tank before making any major changes. Refer to the manufacturer's user manual or website if available.
Find a clamp attached to the float. Several cylindrical buoys are positioned by squeezing the clamp attached to the float to raise or lower the float to the desired height. Raise the lever to increase the water level and lower the lever to decrease the water level.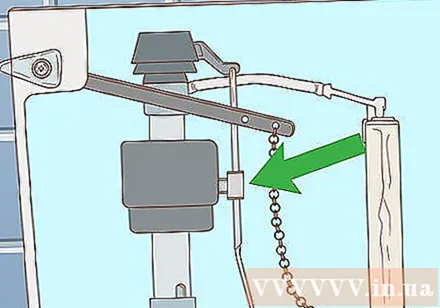
- If the float is equipped with a clamp, squeeze the clamp to adjust the height of the float. If not, find the position of the knob on the lever.
Raise or lower the float by more than 1 cm. Use 2 fingers to grasp the knob mounted on the top of the adjusting lever. Turn the lever clockwise or vice versa to raise or lower the float. After setting the float to the right height, reinsert the tank cap and open the tub.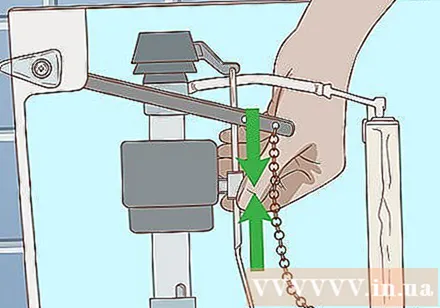
- If you cannot rotate the adjustment lever, find a slot to screw the screwdriver. Some of the knobs are tightened by screws.
- Avoid turning the knob more than once at a time. If the water level is adjusted too large, the toilet may not drain evenly.
Check the height of the water level after you open the water inlet valve in the tub. Rinse the toilet a few times to see if the water level in the tub has decreased or increased. The water should be about half full. If not, keep adjusting the float until the desired height is reached.
- Call a technician if the water level is not satisfactory after several adjustments.
Method 3 of 3: Install a new water supply valve
Replace the water supply valve if the adjustment is ineffective. If the toilet flushes continuously and the float height adjustment is not effective, you need to replace the valve. Replacing a new valve requires opening the hole under the sink, if you are not used to doing relatively complicated things in the toilet, you should call a mechanic.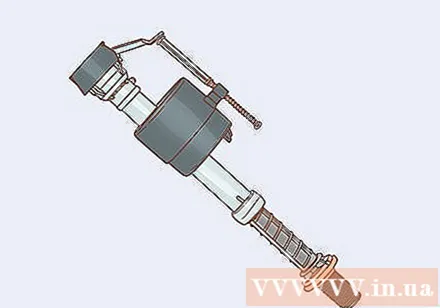
- Depending on the type of toilet you will need a different type of valve. Check the valve that your toilet model uses online before buying.
- You can also buy a multi-function toilet repair kit at a hardware store or department store. Including a new level valve, float and exhaust valves fit almost every toilet.
Cut off the water source and drain the tub completely. To install a new water supply valve, you need to flush the toilet bowl completely. Find the location of the water supply valve outside, on the rear wall or under the toilet. Turn the knob fully clockwise, then flush the toilet. After draining the water completely, the tub will not replenish. Continue rinsing until the tub is completely clear.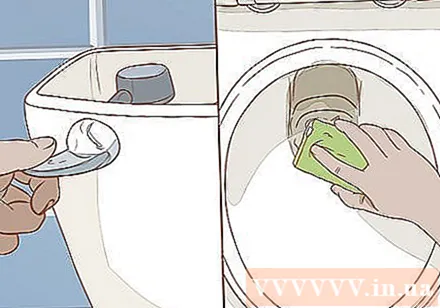
- Use a dishcloth or towel to blot any remaining water in the tub.
Remove the supply valve from the outside of the toilet bowl. You will see 2 nuts on the outside of the toilet bowl. First, open the nut that connects the water supply hose to the valve. Pull the water supply hose out of the valve. Then, unscrew the plastic nut that connects the valve to the sink, usually you can easily open it with your hand. After you have opened the two nuts, you can remove the supply valve from the tub.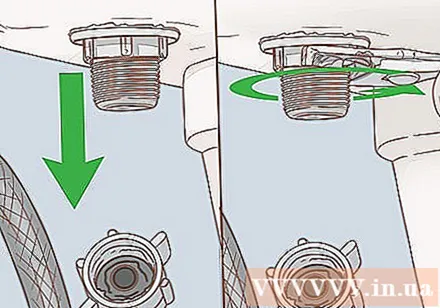
- You may have to use a wrench or plier to remove nuts.
- Spread a towel to absorb water leaking from the drained hose.
Remove the old valve from the tub. Pull out all the valves, including the float attached to it. The valve set will be drawn in a single block. Dispose of the old valve assembly unless you plan to have it fixed.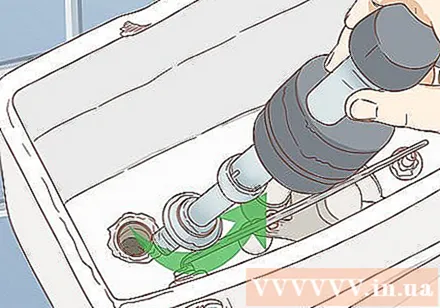
- Handle the tub with care to avoid damaging or breaking other devices inside the tub.
Fit the new feed valve into position. Fit the foot section of the valve through the hole in the bottom of the tub. The rest of the valve assembly will be upright after you finish mounting the valve, the valve should be tightened and not swayed or moved. Be sure to securely connect the valve to the bottom of the tub before reassembling the complete toilet.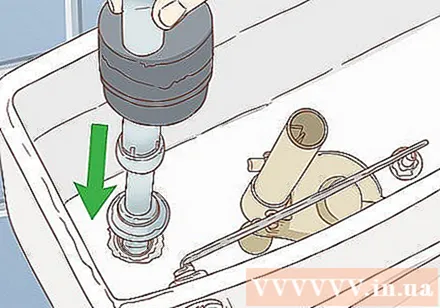
Reattach the water supply hose. Attach the water supply hose to the valve leg, and thread the washers that connect the small water supply hose to the bottom of the toilet bowl. Tighten the plastic nut back to prevent leaks when you turn on the water supply.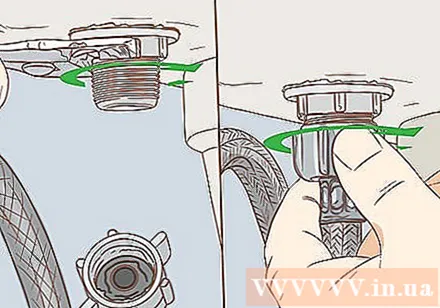
Turn on the water supply and try flushing the toilet. Find the water supply valve on the tank wall on the outside, turn the valve clockwise to turn on the water supply. Try flushing the toilet several times to check the new water level.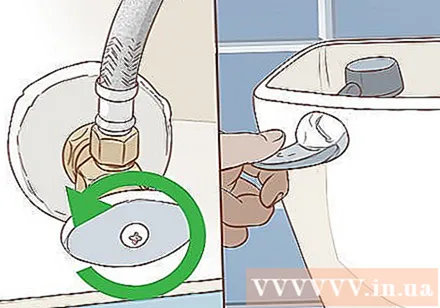
- You should also check the shutoff valve and the foot section of the new valve. Clean this area to check for water leaks, and tighten joints if there is water leaks.
- If the water level still does not reach, you should call a technician. Plumber can easily fix the problem.
Advice
- If you need a new one, buy a multi-function toilet repair kit at a hardware store or department store. Including a new level valve, float and exhaust valve fit almost every model toilet.This kit can help you with any problems with water level, low drain force, or continuous drain.
- If you have difficulty in removing the toilet parts, you should call a repairer.
Warning
- Don't forget any small details when reassembling the toilet. Forgetting to install a part can cause water to leak or damage the device over time.
- When installing a new water supply valve, be sure to reinsert the components in the correct order.
What you need
- Screwdrivers bake
- Towel
- Dishwasher sponge
- New water supply valve (optional)
- Spanner or pliers (optional)


