Author:
Gregory Harris
Date Of Creation:
13 August 2021
Update Date:
1 July 2024
Content
- Steps
- Part 1 of 3: Planting onions indoors
- Part 2 of 3: Selecting and Preparing a Suitable Location
- Part 3 of 3: Planting seedlings outdoors
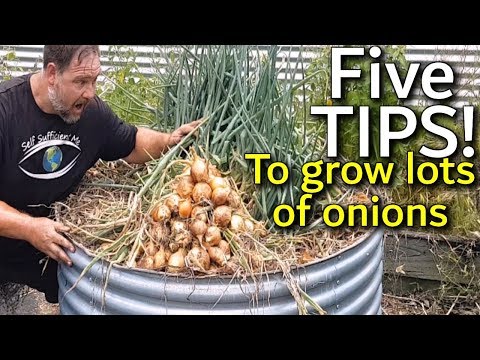
Onions are a great addition to a wide variety of dishes, they can be added to food both raw and cooked, and this plant is easy to grow in your garden. However, like most other plants, onions do prefer certain conditions. For example, raised beds and rows work best for him, as he likes well-drained soil. Find a suitable spot and prepare it while the onion is growing indoors. Take a little time and effort and you can soon enjoy fresh onions.
Steps
Part 1 of 3: Planting onions indoors
 1 Purchase onion seeds or bulbs. To grow onions, you need seeds or bulbs, which can be purchased at a garden supply store. If you live in the countryside, it is possible to purchase bulbs from the local market when the season comes. Alternatively, onion seeds can be ordered online.
 - If you buy the bulbs, you can plant them right away and skip the seed germination step. The bulbs can be planted directly in open ground.
- Choose an onion variety that suits your climate. Long-day bow, that is, one that requires a lot of sunlight, grows best in northern climates. If you purchase it from your local plant nursery, it will be suitable for your area.
- Short-day onions are best suited for southern latitudes, where they can be grown in winter if they are soft enough.
 2 Start at least 6 weeks before the last frost date. It is necessary to pre-plant the seeds indoors so that the seedlings have time to grow. You can even plant the seeds 8-10 weeks before the end of the frost.
 - In other words, you can plant the seeds at the end of January.
- Planting the seeds indoors will give them more time to release the leaves, resulting in larger bulbs. If you don't want to plant onions indoors, purchase bulbs to plant outdoors immediately.
 3 Plant 4-5 seeds per cell. If you have a single-cell seedling cassette, you can plant 4-5 seeds in each cell. They must be placed at a depth of 1-1.5 centimeters. Each cell is a separate cup with soil in which the seeds should be immersed.
 - If you have a flat seedling box, plant the seeds 0.6 centimeters apart.
- In any case, the seeds should be in the soil at a depth of 1-1.5 centimeters.
 4 Prune seedlings as needed. During the growth process, the seedlings may become too tall. At the same time, their leaves will begin to fall. In this case, it is useful to prune the seedlings to 7-8 centimeters.
Part 2 of 3: Selecting and Preparing a Suitable Location
 1 Find a good spot. Onions should be grown in a well-lit area. This means that the plot should not be shaded by other plants (including trees) and buildings.
 - The best way to find the most illuminated spot is to observe your garden.
- Every couple of hours during the day, go out to the garden and inspect it. Note which areas are best lit by the sun throughout the day.
- Choose an area where the bow will receive the most sunlight.
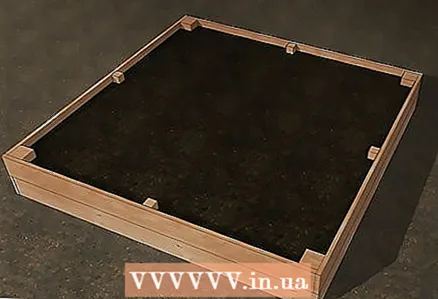 2 Try raised beds. These are structured beds with soil in the middle. Usually they are propped up at the edges with boards, concrete or wooden blocks. As a result, the surface of the bed is raised above the level of the surrounding ground.
 - First, measure the garden bed. The standard size is 1.2 x 1.2 meters - in this case, most people will be able to reach the middle of the garden. Level the soil with a shovel or rake.
- Find the boards you need. You will need bars with a cross section of 9 × 9 centimeters and a length of 30 centimeters - from them you will make pegs in the corners. The center pegs will require four 4x4 cm bars. Finally, use 8 planks with a section of 4 × 14 centimeters and a length of 120 centimeters for walls.
- Fold the 4x14cm boards in a square. First screw one plank to the side of the 9x9 block flush with the bottom end and outside edge. Attach a second 4 × 14 board to the same block in the same way, but now at the top end. It should be flush with the top end of the block and right above the first board. Screw it on.
- Now you need to add the next two planks so that they fit the edge of the block and cover the ends of the first planks. In other words, the first boards should rest against the second, and the bar should protrude from the outside, not from the inside. Keep building the square until you have connected all the boards. Then measure the resulting rectangle diagonally to make sure it really is a square. Move the boards slightly to make a square, if necessary.
- Add other pegs. Drive them into the ground in the middle of each wall from its outside, and then screw them to the boards with long screws. Finally, add soil to the garden bed.
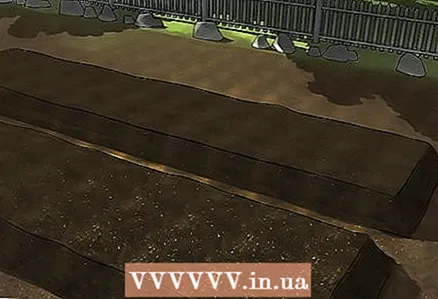 3 Make raised rows. Another option is to raise individual rows. In this case, you do not have to build any structure, only one land will be enough.
 - When the soil is dry, sprinkle organic material such as compost, rotten hay, or grass over it. Use a garden rake or rotary tiller to stir it into the soil to make it loose and crumbly.
- Mark the borders of the rows. The rows should be 1.2 meters wide or slightly narrower so that you can reach the middle. Leave space for passage between the rows. If you want to leave room for a wheelbarrow, make the aisles at least 30-60 centimeters wide.
- Make raised rows: Move soil off the paths to the center of the beds. It is convenient to use a rake for this. You may need a shovel at the end. To prevent anything from growing in the aisles, cover them with five layers of newsprint. You can also use cardboard. Pour mulch or sawdust on top.
 4 Check the soil. A soil test kit is available at your garden supply store. You can also take a soil sample to a soil analysis laboratory. The soil pH should be in the range of 6-6.8.
 - You may need to adjust the soil pH level.
- If the soil needs to be made more acidic (i.e. lower the pH to 6.8), sulfur powder, aluminum sulfate, or ferrous sulfate can be added to the soil.
- Add lime to raise the pH (i.e. make the soil slightly more alkaline).
- If you need to know how much to change the soil pH level, use a soil test kit. Add the required substance to the soil little by little and measure its pH level until you reach the required value.
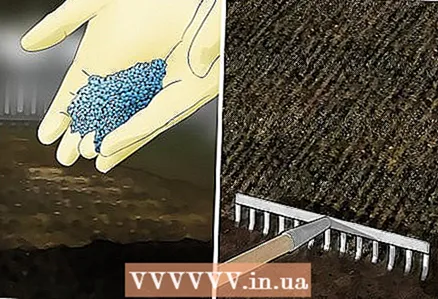 5 Add nitrogen. Onions need nitrogen to grow properly, so always add nitrogen to the soil before planting onions. You can also add nitrogen to the soil in the fall so that it is already enriched with it in the spring.
 - The easiest way to enrich your soil with nitrogen is to use a fertilizer that is high in nitrogen. Nitrogen fertilizers, composted manure, blood meal, and other compostable organic materials are good sources of nitrogen.
Part 3 of 3: Planting seedlings outdoors
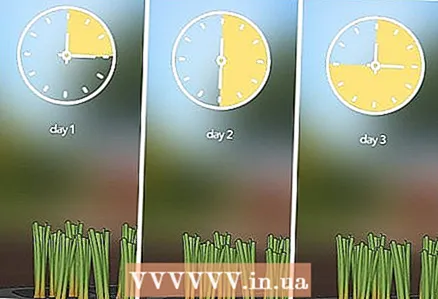 1 Temper the plants. When it gets warm in the yard and you are ready to transplant the onion into the open ground, it should be hardened. Tempering the seedlings means they need to be taken outside for a while to get used to being outside. First, take them out in warm enough weather. The temperature must be at least 4 ° C.
 - Increase the time the seedlings spend outdoors by a couple of hours each day.
- At the same time, start watering the seedlings less. When you transplant them outdoors, they will receive less water. Plants need to get used to this. Give them just enough water to keep them from withering.
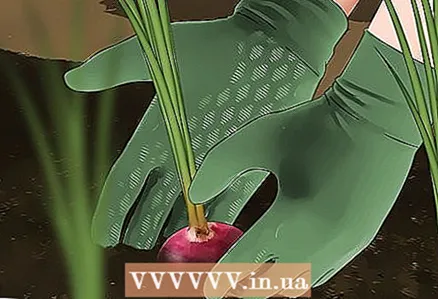
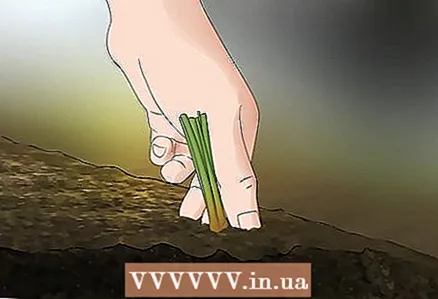 2 Transplant the onion into the ground. After you harden the seedlings for 7-10 days, it is time to transplant them. Onions can be transplanted outdoors when temperatures rise to about 10 ° C. Make sure the temperature does not drop below -6 ° C before replanting your plants. Each seedling should be immersed in the soil about 1.5 centimeters.
 - The end of March or the beginning of April is usually suitable for transplanting.
- Of course, if in your area the cold lasts longer, the seedlings should be replanted later.
- Seedlings can be transplanted 2-4 weeks before the end of the last frost.
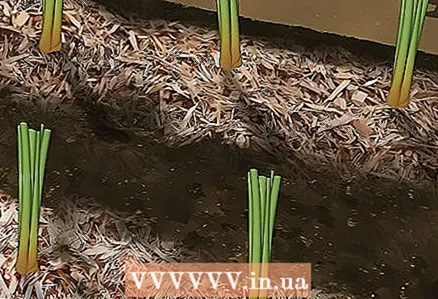
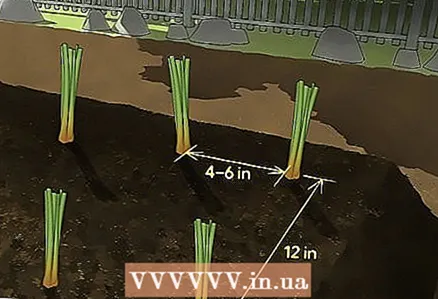 3 Plant the seedlings at a sufficient distance. If you want to grow especially large bulbs, plant the plants 10-15 centimeters apart. If you want smaller bulbs, plant the plants 5 centimeters apart. They can be planted even closer together if you plan on growing green onions.
 - Row spacing should be 30 centimeters.
- Regardless of whether you made a bed or individual rows, you should have two furrows per row.
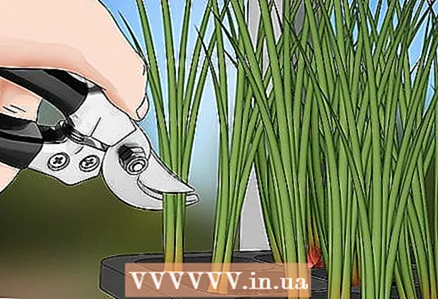
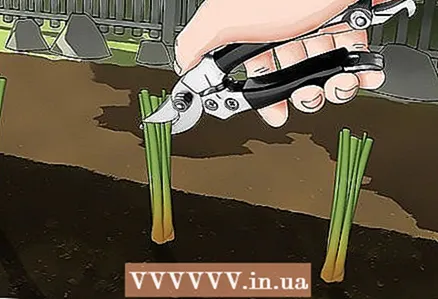 4 Prune your plants. When the plants are in the open field, they should be about 10 centimeters tall. Prune the seedlings with scissors after you transplant them.
 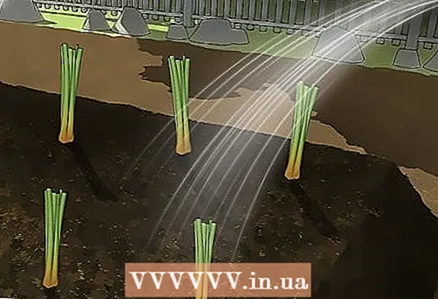 5 Water the onions regularly. Onions need a lot of water. In fact, he needs about 2.5 centimeters of water per week. If there is no rain, the plants should be watered regularly.
 - If you're unsure of when to water your onions, check to see if the soil is damp. While the onion leaves its leaves, the soil should be constantly moist. However, one watering per week should be sufficient if the moisture is well absorbed.
- When the bulbs begin to grow (that is, when the aerial part stops growing), the plants should be watered much less frequently to keep the bulbs dry.
 6 Add mulch as needed. You can cover the ground around the plants with a layer of mulch. Mulch will suppress weed growth.Mulch is simply a layer of material that is used to cover the soil. These can include pieces of bark, grass or straw clippings, or inorganic materials such as stones, plastic, or brick shards. Mulch is sold at garden supply stores, although you can simply use cut grass from your garden.
 - Organic materials improve the soil over time.
- Among other things, mulch helps the soil retain water.
- However, the mulch should be removed as soon as the bulbs begin to grow. You will see this by the bulbs protruding slightly from the ground. Bulbs need much drier soil while mulch retains moisture.
 7 Wait for the harvest. To obtain large dry bulbs, you must wait at least 100 days, but preferably up to 175 days, before harvesting. If you like green onions, they can be harvested in just 3-4 weeks.


