Author:
Peter Berry
Date Of Creation:
18 February 2021
Update Date:
26 June 2024

Content
Digital cameras have sparked our passion for photography, allowing us to be more creative than ever before with the ability to take hundreds of photos!
However, looking at the photos with friends through the camera's tiny screen is really difficult, so the only way to see the photos (and post them on Facebook, which is the place to show them off!) Is to transfer them to a computer. . This article will show you a few ways to do this.
Steps
Method 1 of 6: Direct transfer
Use a USB cable. Since most digital cameras today develop a connection via USB, this is a very good approach. However, it is not always effective as it depends on the compatibility of the camera, computer and operating system.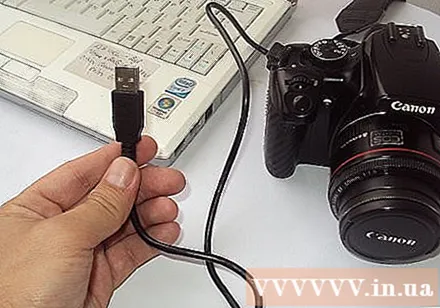

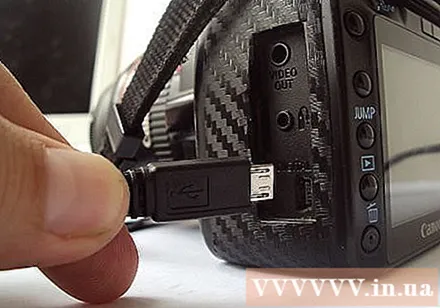
Power off the camera. When connecting and disconnecting electrical equipment, especially sensitive ones such as digital cameras, it is best to turn off the power first.- Connect one end plug (usually the small one) to the camera.
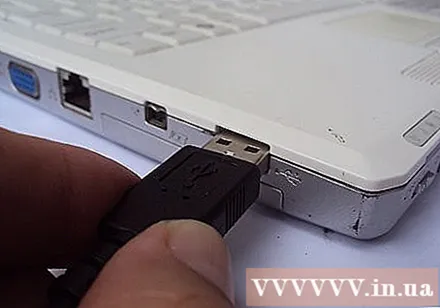
- Connect the other end (usually the big one) to your computer's USB port).
- Connect one end plug (usually the small one) to the camera.
Power on the camera. The camera will appear as a drive on the computer screen. advertisement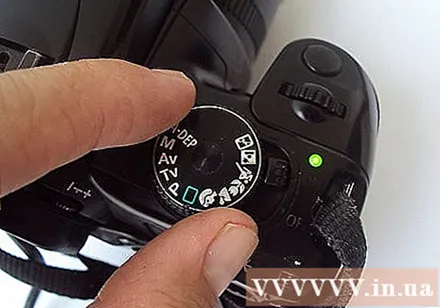
Method 2 of 6: Use a memory card reader
- Prepare an SD card reader. This device is a small flat box that plugs into the USB port.
Plug the memory card reader into your computer's USB port. It can be plugged in directly or with an extra USB cable.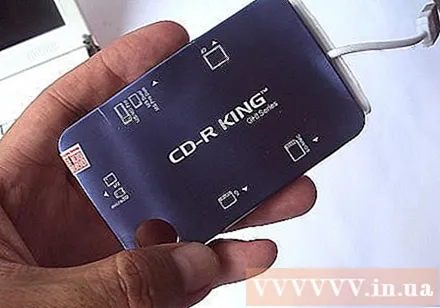
Insert the camera's SD card. The card will appear as a drive on your computer screen.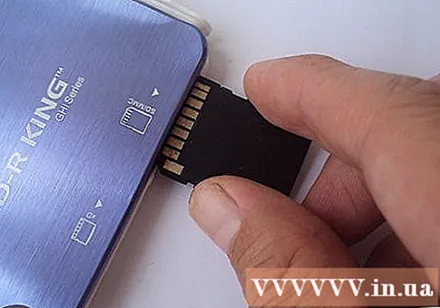
- Drag the photo from the card to the computer and you're done.

- Drag the photo from the card to the computer and you're done.
Method 3 of 6: Send it by email
Take pictures with the phone's camera. Although not a Canon EOS 7D camera, but the quality is still good enough to create beautiful photos.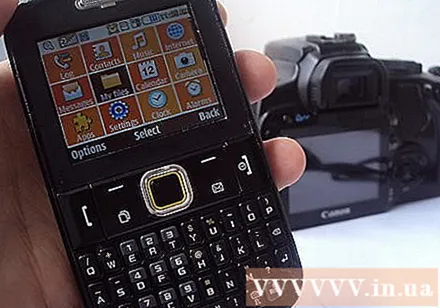
Take a photo. All beautiful pictures are created by pressing the shutter button!
Compose a new email. Send the photo as an attachment and as Steely Dan says "email yourself". advertisement
Method 4 of 6: Use a cloud storage service
Use your phone's camera. Some applications, like Instagram, post photos to a shared data source and are always available for you or others to download photos to your computer.
Take pictures with Instagram. Use more photo filters that you love.
Share a photo with the Instagram community and choose to send it to your email. advertisement
Method 5 of 6: Use iCloud
Sign in to iCloud. This is possibly the easiest and fastest way to transfer photos from camera to computer. With iCould, iOS camera photos are typically transferred to cloud storage and can be obtained from devices with iCloud, Mac or desktop.
Get photos. When you get home, connect the photo store to iPhoto or Aperture or any other device that can recognize the photo store of the iOS operating system. advertisement
Method 6 of 6: Windows XP
Connect the camera or memory card to the computer. This is a simple step. You can either connect the camera directly to the computer or take out the memory card and insert it into the memory card reader and plug it into the computer.The usual connection is via a USB port.
- When your camera or memory card is connected to your computer, the Windows XP Camera Wizard window appears. If you don't see the window appearing, you can open it by clicking the command: Start -> Accessories -> Scanner and Camera Wizard.
Choose an image. The next step allows you to choose the photos you want to transfer. In addition, the window also allows you to rotate the image and view detailed information of the image such as the date of the photo. This way, you can define a name to give to the file. However, normally you will just move all the pictures to a file on your computer without doing anything else, but if you want more information, this window will help you.
Choose to save photos. You will need to fill in two fields.
- The first field is: Type a name for this group of pictures. The information you enter will be the name of each picture on your computer. For example, if you know the moving photos were taken on June 21, 2012 in Idora Park then enter the name 070612-Park-Idora and then each picture has this name plus the serial number: 01 , 02,… In this way you can also identify the image by its name.

- The second field is: Choose where to save the group of pictures. This is the step to choose where to save your image file. Click on the browse button (yellow file) and select the drive to save the image file on your computer.

- The first field is: Type a name for this group of pictures. The information you enter will be the name of each picture on your computer. For example, if you know the moving photos were taken on June 21, 2012 in Idora Park then enter the name 070612-Park-Idora and then each picture has this name plus the serial number: 01 , 02,… In this way you can also identify the image by its name.
Wait for the transfer to complete. Check the photo file - all the pictures you transferred will be in it.

Note: This method only applies to Windows XP. advertisement


