Author:
Peter Berry
Date Of Creation:
12 February 2021
Update Date:
1 July 2024

Content
On a home network with multiple computers connected, you can improve performance and share data between all devices easily by creating folders. These folders can be accessed by any authorized computer on the network, which is a great way to use the data you need from anywhere on the network. See step 1 below to learn how to share folders on any operating system.
Steps
Method 1 of 3: On Windows
Share specific folders
Make sure that the File and Printer Sharing feature is turned on. To share specific folders, this feature needs to be activated. How to enable this feature will vary slightly depending on the version of Windows that you are using. We strongly recommend that you do not enable folder sharing when you are on public networks, such as at school or cafes.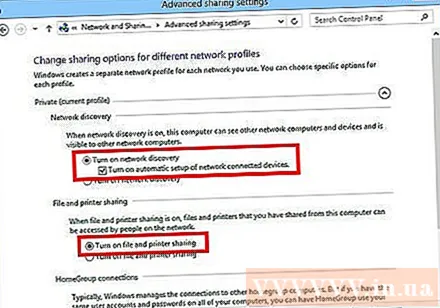
- On Windows 10 Open Control Panel> Network and Internet (Internet and networks)> Network and sharing center. Click "Change advanced sharing settings" to the left of the network name.
- On Windows 8 Right-click the Network icon in the system tray on the Desktop view and select "Network and Sharing Center". Click the "Change advanced sharing settings" link, expand the profile for which you want to enable sharing (Private or Public). Enable both the "Network discovery" and "File and printer sharing" options. Click the "Save changes" button and enter the administrator password if necessary.
- On Windows 7 Click the Start button, enter "control panel" and press ↵ Enter. Double-click the "Network and Sharing Center" icon, then click the "Change advanced sharing settings" link. Expand the profile for which you want to enable sharing (Home / Work or Public). Enable the two options "Network discovery" and "File and printer sharing". Click the "Save changes" button and enter the administrator password if necessary.
- On Windows Vista Click the Start menu and choose Control Panel. Click on Network and Internet then select Network and Sharing Center. Expand the lines "Network discovery" and "File and printer sharing" located in the "Sharing and Discovery" section. Make sure all is turned on, then click the "Save" button on each item.
- On Windows XP Click the Start button and select Control Panel. Open Network Connections, right-click on the network, and select Properties. Check the box for "File and Printer Sharing for Microsoft Networks".
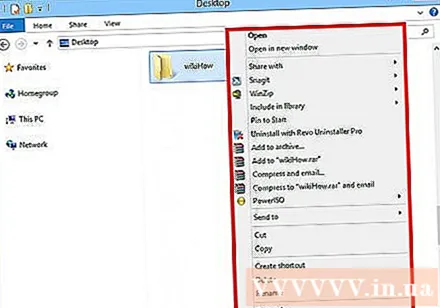
Find the folder you want to share. After enabling File and Printer Sharing, you can share any folder on your hard drive with others on the same network. Go to the folder you want to share using Explorer, then right-click the folder.
Click the "Share with" option. The Sharing submenu will open. You can choose to share with everyone on the Homegroup or with a specific audience.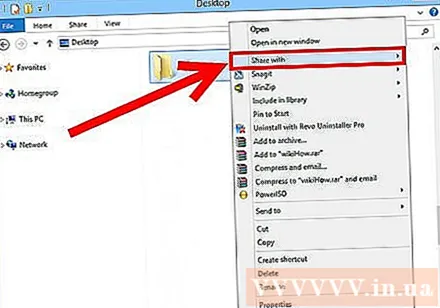
- When choosing the Homegroup, you can allow Homegroup members to read and edit the directory, or limit them to only see content on the directory.
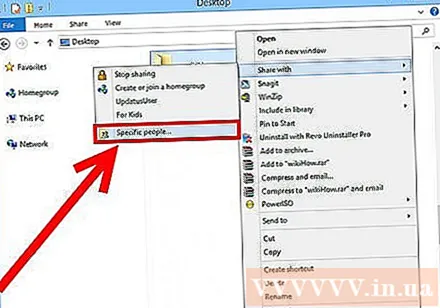
Click the "Specific people" option to choose the users you want to share with. A new window with a list of all users currently having directory permissions will appear. You can add users to this list and give them specific permissions to the directory.- To share a folder with everyone, click on the drop-down menu at the top and select "Everyone". then click the Add button.
- To share with specific users, click the drop-down menu and select or enter a username and then click Add.
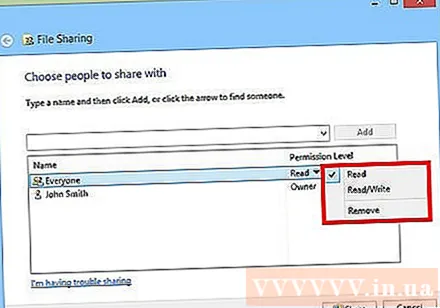
Grant permission for the user in the list. Find the user for which you want to change permissions in the list. Look in the Permissions Level column and click the arrow next to the current permission. Choose a new permission from the list.- Read - Users can view, copy and open files in the folder, but cannot change or add new files.
- Read / Write - Besides the Read permission, users can also make changes to the data and add new files to the shared folder. Data in the directory can be deleted by users with Read / Write permissions.
- Remove - Remove the permission for this user and remove them from the list.
Click the Share button. Your permissions settings will be saved and the folder will be available to all authorized users on the network. advertisement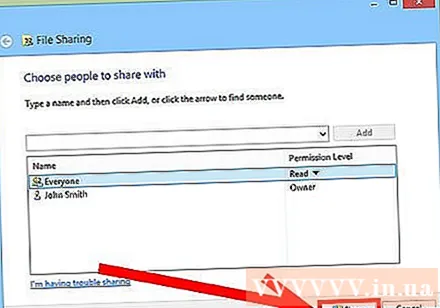
Use the Public Folders feature
Turn on the Public folders feature. Public folders are folders that are always shared with anyone accessing the network. People can view and edit public folders without specific permissions. By default, the Public folders feature is turned off unless you're in a Homegroup group.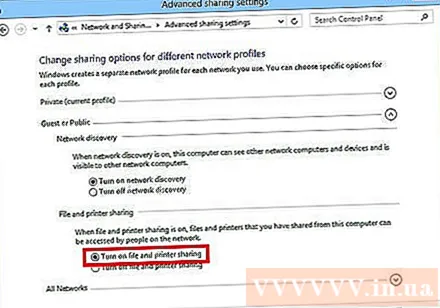
- On Windows 8 Right-click the Network icon in the system tray on the Desktop view and select "Network and Sharing Center". Click the link "Change advanced sharing settings". Expand the "All Networks" section, find and enable the "Public folder sharing" option. Click the "Save changes" button.
- On Windows 7 Click the Start button, enter "control panel" and press ↵ Enter. Double-click the "Network and Sharing Center" icon, then click the "Change advanced sharing settings" link. Expand the profile where you want to enable the Public folders feature (Home / Work or Public). Find and enable the "Public folder sharing" option, click the "Save changes" button and enter the administrator password (if applicable).
- On Windows Vista Click the Start menu and choose Control Panel. Click on Network and Internet then select Network and Sharing Center. Expand the line "Public Folder" in the "Sharing and Discovery" section. Click the switch to turn it on and click "Save".
Enable or disable Password Protected Sharing. In the same place as the Public folder control, you'll see options to share a protected password. When this feature is enabled, only people who have a user account and password on the same computer have access to public folders. At this point, other computer users will not be able to access the Public folder.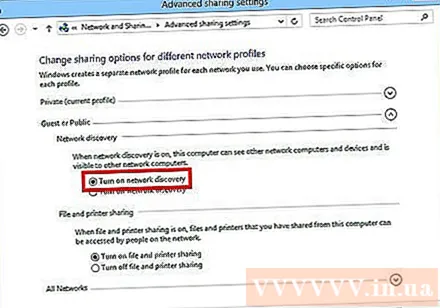
Find public directories. Once the folder is enabled, you can start adding the data you want to share with everyone on the network. The Public folder is part of the Libraries view, and how to access it varies slightly depending on the version of Windows. Within each Libraries library (Documents, Music, Pictures, and Videos) there is a Public folder.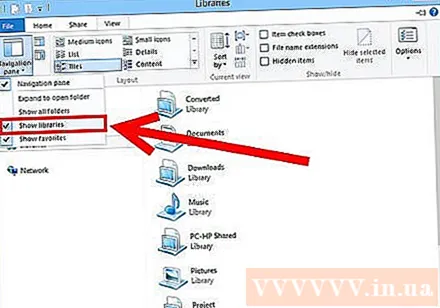
- On Windows 8 By default, the Libraries view is not visible in Windows 8. To view it, open Explorer by clicking This PC. Select the View panel and click the "Navigation pane" button on the left. Click the "Show libraries" option so that the Libraries folder appears in the sidebar. Please expand the library you want to add files to to see the corresponding Public folder.
- On Windows 7 Click Start and select Documents. In the left pane, expand the Libraries and Documents folders, then select Public Documents. You can also choose the Public folder in other libraries.
- On Windows Vista Click Start and select Documents. In the left pane, click the Public link under "Favorite Links". If you don't see the option, click More and select Public. Then, select the Public folder to which you want to add the file.
Add files. You can add, move, copy from another location and paste, or drag and drop files into the Public folder as you normally would. advertisement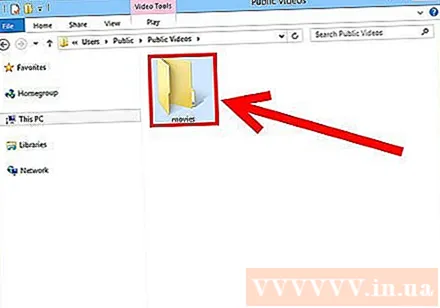
Method 2 of 3: On Mac OS X
Open System Preferences. Click the Apple menu and choose System Preferences. Make sure you are logged in as Administrator.
Click the Sharing button. This option is located in the Internet & Wireless section of System Preferences. The Sharing window opens.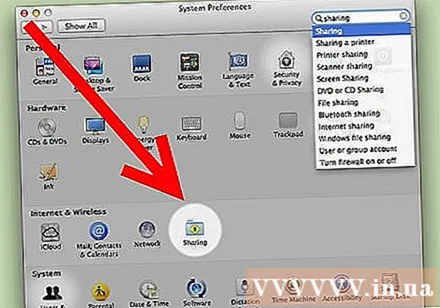
Enable File Sharing. Check the box labeled "File Sharing" in the left pane. File sharing options will be enabled on the Mac, allowing you to share files and folders with other users or computers on the network.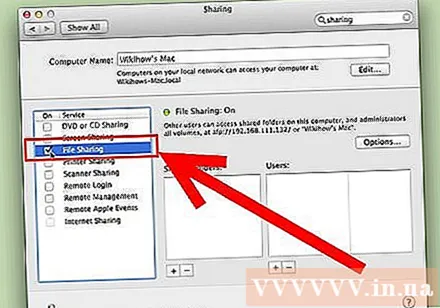
Add the folder you want to share. Click the "+" button to open a Finder window. Browse for the folder you want to share. If you want to share a specific file, you'll need to create a separate folder for that file. Click Add once the folder has been selected.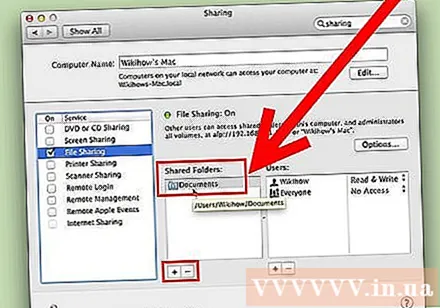
Share folder with Windows computer. By default, the shared folder will be available only to other Mac computers. If you want to share with Windows users, you need to select the folder in the Shared Folders list and click Options. Check the box for "Share files and folders using SMB (Windows)" and click Done.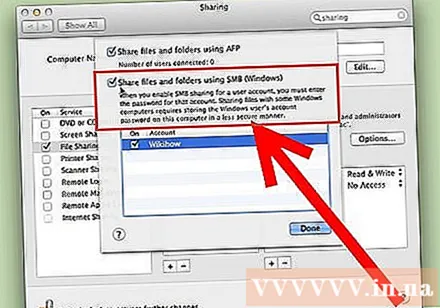
- You can also set directory permissions this way.
Set folder permissions. Select a folder from the Shared Folders list. The Users list on the right will display the users currently allowed to access the directory. Click the "+" "or" - "button to add or remove an audience from your allowed list of users.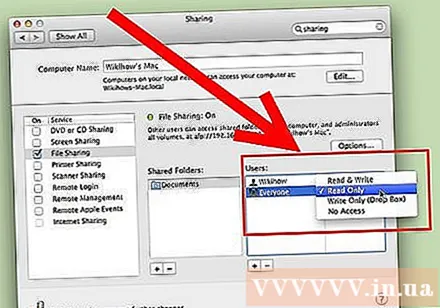
Method 3 of 3: On Linux
Access Windows Shared Folder
Install the software to mount the shared folder. To access shared folders on Windows, you need to have SMB protocol installed on your Mac. Open Terminal (Ctrl+Alt+T) and enter the command sudo apt-get install cifs-utils.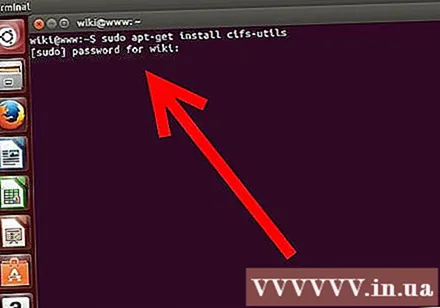
Create the directory to act as the shared directory's mount point. You should create this directory in a place that is easy to access. Please proceed on the UI desktop or use the command mkdir on the terminal. For example, to create a "sharedfolder" folder on your desktop, enter the command mkdir ~ / Desktop / sharedfolder.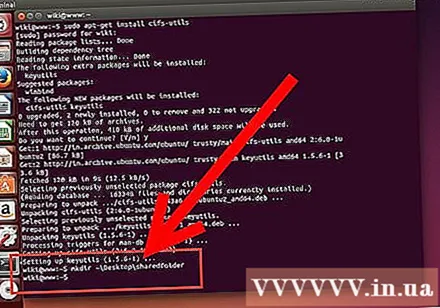
Mount folder. After creating the mount point, you can mount the shared directory to associate with your Linux computer. Open Terminal again and enter the following command (continue with the example creating the "sharedfolder" folder earlier):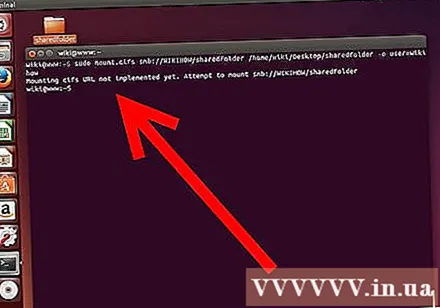
- sudo mount.cifs //WindowsComputerName/SharedFolder / home /username/ Desktop / sharedfolder -o user =WindowsUsername
- You will be asked to enter the master password (or root password) for Linux installation as well as the Windows user's password.
Directory access. Once the mount point is open, you will be able to access the data. You can also add and delete data like any other folder, or use the terminal to access files in the shared folder. advertisement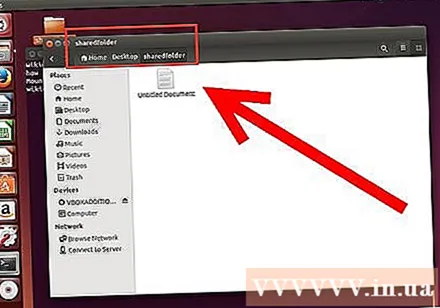
Create shared folders
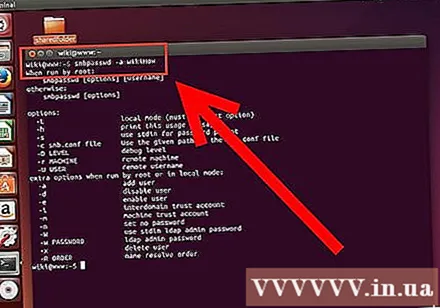
Install Samba. Samba is open source software that allows you to share folders with Windows users. You can install Samba from within Terminal by entering the command sudo apt-get install samba.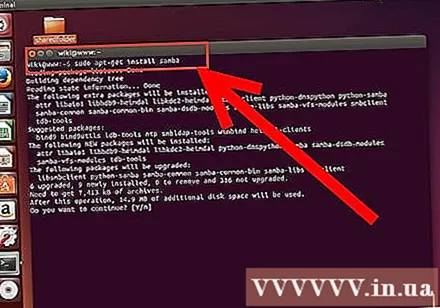
- After Samba is installed, proceed to create a username (username) by typing smbpasswd -a username. You will also be asked to create a password.
Create shared folders. Any existing folder can be used, but it's easier to distinguish a shared folder from another computer when creating a new one. Use command mkdir to create folders.
Open the Samba configuration file. Enter an order sudo en /etc/samba/smb.conf. You can use any file editor, "vi" is just an example. The Samba configuration file will open in a text editor.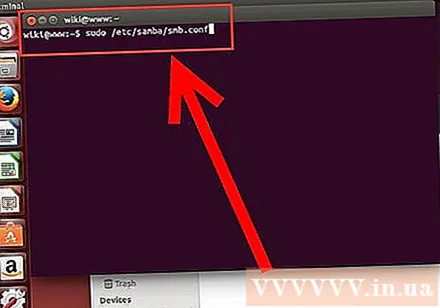
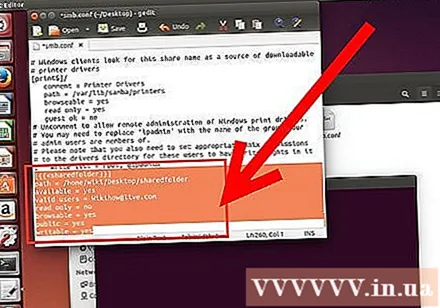
- Scroll to the bottom of the file and add the following line:
- You can change the settings as needed, such as making the directory read only or private.
- You can add multiple lines to a file for multiple shared folders.
Save the file. Save the configuration file and close the editor. Restart the SMB service by typing sudo service smbd restart. The configuration file will be reloaded and the new settings applied to the folder you shared.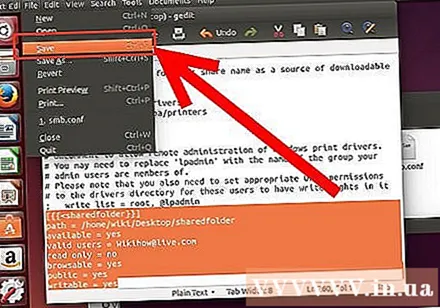
Get the IP address. To link directories on Windows, you'll need the IP address of your Linux computer. Please enter ifconfig Go to Terminal and write down the address.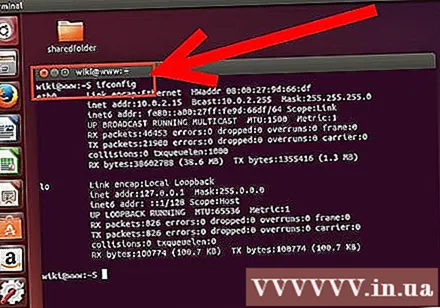
Directory access on Windows. Create a new shortcut anywhere on your Windows computer by right-clicking and selecting New → Shortcut. Enter the IP address of the directory location you created on Linux: \IP addressfolder name. Click Next, give the shortcut a name, and then select Finish. When the new shortcut opens, you will be able to view the contents of the shared folder. advertisement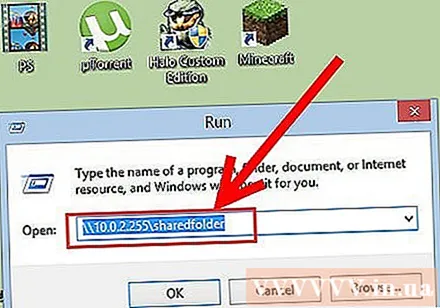
Warning
- Tightly manage who you share folders with. If you have content you don't want to be seen, changed, or deleted by others, you need to disable sharing permissions.
- If the Wi-Fi doesn't have the password, strangers nearby can access the shared folder.


