Author:
John Stephens
Date Of Creation:
2 January 2021
Update Date:
1 July 2024

Content
Dry brushing is a method of brushing dry skin with a long-roll brush. This process will exfoliate the skin, helping to reduce the number of unwanted dead cells on the skin. However, you can cause skin irritation or infection if you brush too often or too forcefully. You need to know the facts of dry brushing and the most appropriate methods before you start.
Steps
Part 1 of 3: Prepare to brush dry skin
Know what will happen. Dry skin brushing, like many other health care trends, is often promised many health benefits; However, not all rumors have a scientific basis. You should be aware of the truth of this approach so you don't do too much or unnecessary.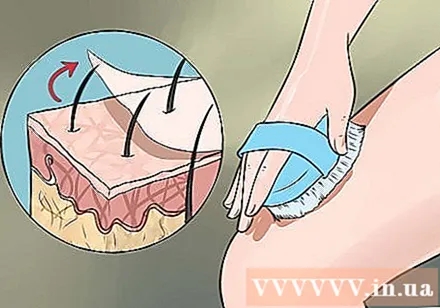
- While the blood circulation stimulating effect of dry skin brushing is controversial, it does exfoliate the skin. Exfoliation is the process of clearing dead skin cells; however, you do not need to exfoliate as often as you are under 30. Your skin is young and has the ability to automatically cleanse dead skin. By the time you reach 30 or older, dead skin may not come off automatically and dry brushing will help.
- Dry brushing can affect cellulite (uneven fat accumulation under the skin causing rough skin, also known as lumpy orange peels), but it cannot be eliminated or even reduced. Dry brushing will temporarily reduce the protrusions in your skin, so brushing dry skin before going to the beach is a great way to make you look better and feel more comfortable, but the effect will only remain in within 24 hours.
- Many health and beauty sites recommend brushing dry skin twice a day, but this can be harmful. The bristles of the brush can cause tiny scratches on the skin if you brush them too hard or too often. These scratches can easily become infected. In addition, brushing dead skin more than once a week breaks the skin barrier, causing dryness and irritation.
- Dry brushing actually has an impact on the skin's condition. People with chronic eczema or skin disease should avoid brushing dry skin, as they are more susceptible to the above complications; however, if you have keratosis (inflammation of the skin with red, nodular nodules) then brushing dry skin can help remove dead skin cells that cause lumps.
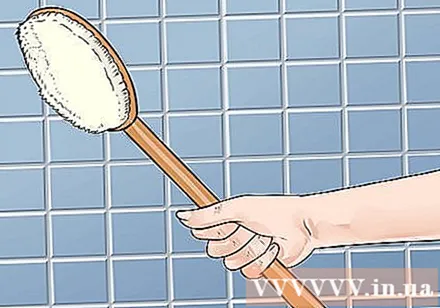
Choose a brush. Once you've weighed the pros and decided that dry brushing treatment is right for you, the next step is to choose the type of brush you will use.- You will need a natural bristle brush, which is free of synthetic materials, and has a long handle. You can find these brushes at health care stores or in beauty salons.
- The longer the brush handle, the better. You will need to reach areas of skin that are difficult to reach, such as the back.
- Choose a bristle brush. A brush bristles made of cactus or plant fibers are ideal. If you are not sure, ask the salesman.
- For thin areas of skin like face, abdomen and chest, you should choose a non-rolling brush and the bristles are a bit softer.

Determine when and how often to brush dry skin. Before you start, you need to decide what time of day you brush your brush.- Many advocates brush dry skin in the morning, before bathing. It is said that dry brushing energizes the body to start the day.
- Remember not to brush dry skin too often. Many people prefer this therapy done daily or twice a day, but this is unnecessary and can lead to dry skin, skin irritation, and infection.
Part 2 of 3: Start the dry skin brushing process
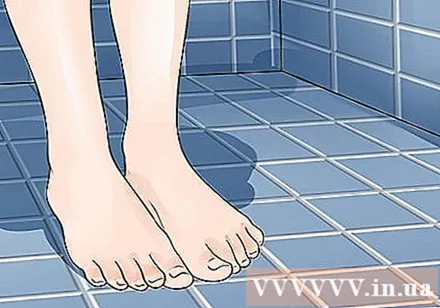
Stand on a tiled surface. Before you start brushing dry skin, stand on a tiled surface. Most people like to brush dry skin in the shower bath. Dead skin flakes will come off the body during the brushing process, and should be done in a place that is easy to clean.
Start with your feet and brush your feet. Use a long-rolled brush to brush these areas of skin. The dry skin brushing process will start from the bottom and move upwards. Bottom-up brushing is thought to help increase drainage to the lymph nodes and increase blood circulation to the heart. This can help flush out toxins in the body and improve blood circulation.
- Use a long, smooth brush. Comb back, each time moving toward the heart.
- If your balance is difficult, place one leg on a footstool or on the edge of the tub.
- Pay attention to areas of thick skin, such as the ankles and soles of the feet. You will need to brush these areas several times to ensure removal of dead skin.
Move to the arm, then to the upper body. Continue brushing the skin with the long-rolled brush. Move up your arms after you've brushed your legs. Remember to do the same thing above, each brushing towards the heart.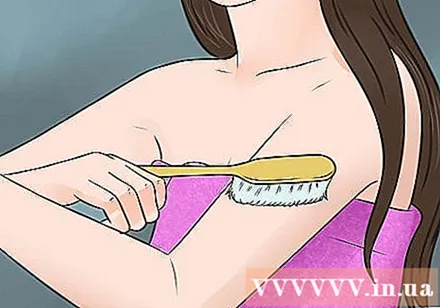
- Start hand and move towards shoulder. Same as above, use a long, smooth brush.
- Pay special attention to thick areas of skin, such as the elbows. Make sure dead skin peels off.
- Move behind. This area is a bit difficult to brush because there are some difficult to reach areas. Make sure your brush has a handle long enough to reach between your back and other hard to reach areas. Move from butt to shoulder.
- Finally, move to the upper body and sides. Brush on chest, toward heart. With the flanks, you will brush from the hips up to the armpits.
Brush in sensitive areas. When moving to sensitive areas, brush with a soft bristle brush.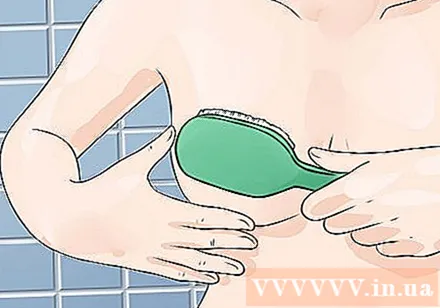
- Brush your face, using a shorter and softer brush. Move from forehead to neck.
- The breasts and nipples also need to be brushed with a softer brush to avoid irritating the sensitive skin.
- If you want to brush the whole body again, you should brush with a soft brush to avoid irritation.
Part 3 of 3: Take the steps after brushing dry skin
Take a shower after brushing dry skin. Taking a shower after brushing dry skin is a good idea, even if you don't brush dry skin in the morning. Any remaining dead skin is washed away in the shower.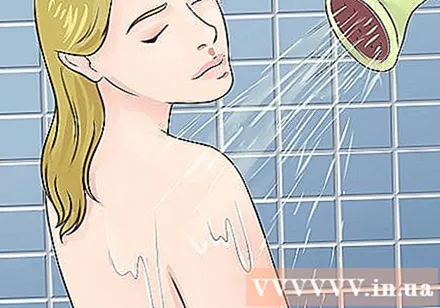
- Some people recommend alternating hot and cold baths to increase blood circulation, but this is not necessary. You can take a hot bath as usual if you like.
- Pat dry instead of rubbing your skin with a towel to dry it. The skin may become more sensitive after dry brushing, and you need to avoid irritation and skin infection.
- Apply natural oils to your skin to replace the oils lost during brushing and bathing. Rosehip oil and coconut oil are good options.
Clean the brush and skin brushing area after brushing dry skin. After you finish brushing, you need to clean the brushing area and the brushing tools.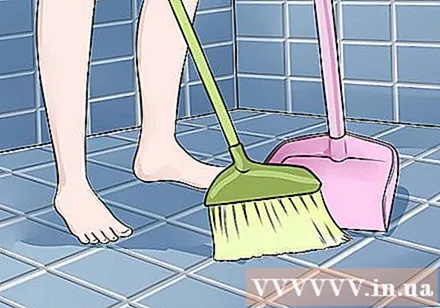
- If you brush dry skin in the bathroom, it's easy to wash it off as dead skin can drift down the drain. On other tiled surfaces, you need to sweep and dispose of dead skin.
- Keep the brush dry. Do not hang in the bathtub, as the brush will get wet and may become moldy. You need to keep the brush away from standing water.
- Sometimes you need to wash the brush. Use a small amount of shampoo or liquid soap to wash off the bristles and dry as much as possible. Hang the brush in a safe place to dry, avoid splashing water.
Track your dry skin brushing time. Don't forget that dry brushing can cause skin problems if done too often. You should mark on your calendar or phone the date of dry brushing and wait at least two weeks before brushing again. Many advocates brushing once or twice a day, but this increases the risk of infection and dermatitis. advertisement
Advice
- You do not need to brush vigorously. A gentle exfoliation is better than a strong hand.
- Brush twice for problem areas, one brush with a long-rolled brush, once again with a softer brush and without rolling. Feet and elbows are particularly susceptible to dryness and cracking.
Warning
- Do not brush on broken, irritated, bruised, or unusual skin. You need to wait until the infection clears up before you continue brushing dry skin.
What you need
- Natural bristle brush with wooden handle


