Author:
Monica Porter
Date Of Creation:
15 March 2021
Update Date:
27 June 2024

Content
This wikiHow teaches you how to jailbreak (also known as jailbreak) your PlayStation 3. The jailbreak technique allows you to install mods (tweaks), cheats, third-party apps, and games. usually not usable on PS3. Note: jailbreaking the PS3 violates Sony's terms of use, so you won't be able to access the network while the jailbreak is active as there is a risk that you will be permanently blocked. Also, it's important to note that you won't be able to jailbreak certain PS3 models, such as the Slim version and all Super Slim versions.
Steps
Part 1 of 6: Preparing to crack
Download the cracked file. Go to the cracked file storage page on your computer, click the button Download (Download) red then select Allow (Allow) if the browser requests to store the file on the computer. Once done, the ZIP folder containing the cracked file will be downloaded to your computer.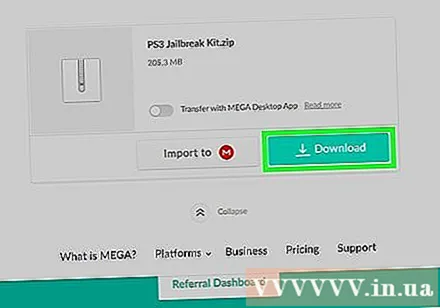
- The jailbroken file can take a while to download, so it's a good idea to start this process first before moving on.

USB format to FAT32 file system. Proceed by selecting "FAT32" from the "Format" drop-down menu. This is to ensure that the flash drive can be used to update the PS3 later, but the formatting process will erase all the data currently on the USB.- The USB must have a minimum capacity of 8 GB.
- Don't rush to unplug the USB drive from the computer after formatting is complete.
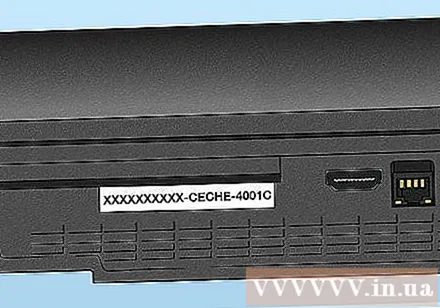
Determine the model number of the PS3. Look at the back or bottom of your PS3 for the serial code that starts with "CECH", followed by a sequence of numbers (or letters and numbers).
Check if the model number of the PS3 is in the supported models. Unlockable PS3 models include:
- Fat - All PS3 Fat models are supported.
- Slim - If the first two digits after the word "CECH" are "20", "21" or "25", and the PS3 version is lower than 3.56, you can unlock.
- Super Slim - No PS3 Super Slim version is supported.
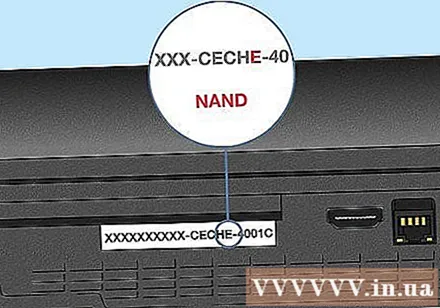
Determine if the PS3 is in NAND or NOR type. Depending on the model number of the PS3 you will be able to determine the model (or the custom firmware CFW to use later):- Fat - If the first letter after "CECH" is "A", "B", "C", "E" or "G" then this is a NAND-type gaming machine; for the rest of the letters the PS3 is of the NOR model.
- Slim - All PS3 Slim models are NOR models.
Part 2 of 6: Creating firmware test drives
Extract the ZIP folder containing the cracked file. This process will vary depending on your computer's operating system:
- Windows - Open the ZIP folder, click the card Extract (Extract), click Extract all (Extract everything) then select Extract at the bottom of the window that appears. The extracted folder will open when the extraction is complete.
- Mac - You just need to double click on the ZIP folder to unzip. The extracted folder will open when the extraction is complete.
Open the Step 1 folder. Double-click the folder PS3 Jailbreak Kit, then double-click the folder Step 1 - Minimum Version Checker.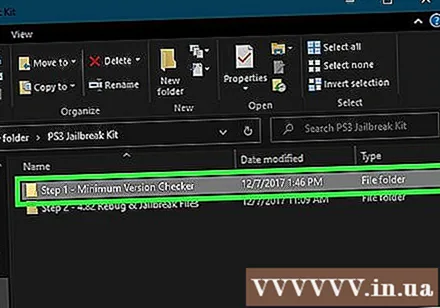
Copy the PS3 directory. Click on folder PS3 then press Ctrl+C (Windows) or ⌘ Command+C (Mac) to copy.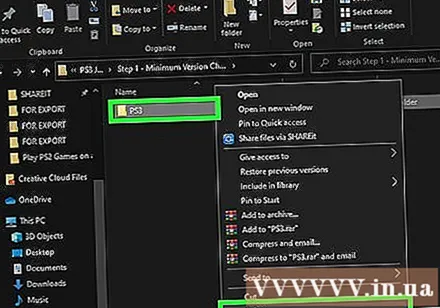
Paste the PS3 folder into the USB. Open the USB flash drive by clicking on the flash drive's letter in the lower left of the File Explorer (Windows) or Finder (Mac) window, clicking in the space and then clicking Ctrl+V (Windows) or ⌘ Command+V (Mac). Once the folder is pasted, you can continue.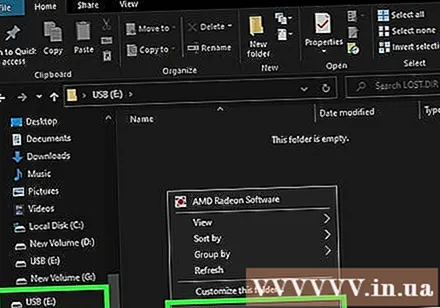
Disconnect the USB properly (select Eject first). Now the USB is ready for you to check out your PS3's firmware. advertisement
Part 3 of 6: Determining PS3 Compatibility
Insert the flash drive into the rightmost USB slot on the PS3 machine. This is important because if you use any other slot it can cause the process to fail.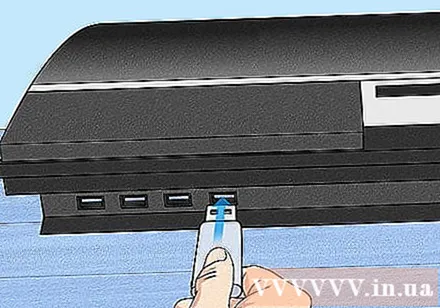
Go to the location of the firmware number. Choose Settings (Settings) on the main menu, select System Update (System Update), select Update via Storage Media (Update via storage media) then select OK when prompted.
Review firmware number. The number shown to the right of the "Update data of version" line should be "3.56" or less.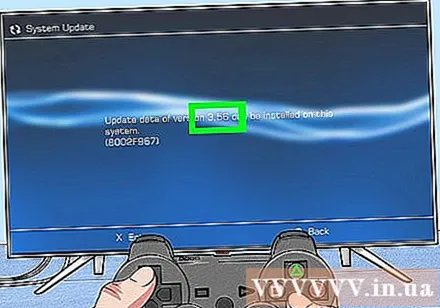
- If the number is greater than 3.56 then you cannot jailbreak your PS3, trying to do it will only cause irreversible damage to the console.
Part 4 of 6: Creating an installation drive
Plug the USB back into the computer. Once you've determined that the PS3 can be jailbroken, proceed with creating an installation drive.
- Again, if the PS3 firmware number is greater than 3.56, do not crack it as this will cause serious damage to the device.
Delete PS3 folder on USB. First, you need to delete the PS3 folder on the USB.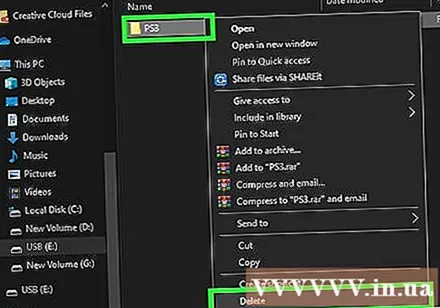
Open the Step 2 folder. In the directory PS3 Jailbreak Kit unzipped, double-click the folder Step 2 - 4.82 Rebug & Jailbreak Files to open.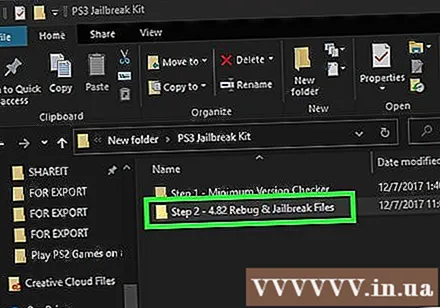
Copy the contents of the Step 2 folder to the USB. Click and drag to select both the "flsh.hex" and "PS3" folders here, press Ctrl+C (Windows) or ⌘ Command+C (Mac), open your flash drive, then press Ctrl+V (Windows) or ⌘ Command+V (Mac).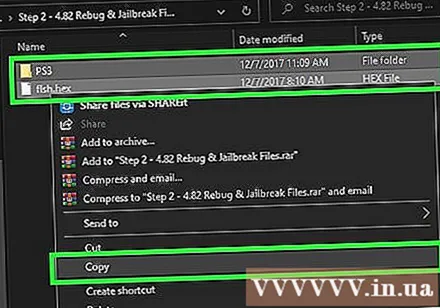
Select Eject and remove the USB from the computer. You will then continue to plug the USB drive into the PS3 one last time and not pull it out until the jailbreak is complete. advertisement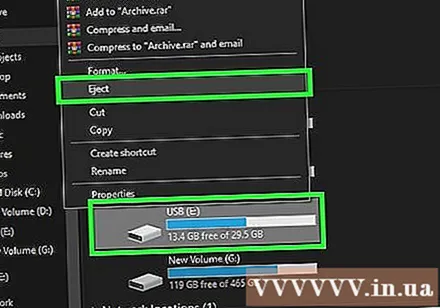
Part 5 of 6: Firmware installation
Plug the flash drive back into the right-most USB port on the PS3. We will not remove the USB drive until the jailbreak is completed.
Open the PS3 web browser. Select an icon www on the main screen of PS3.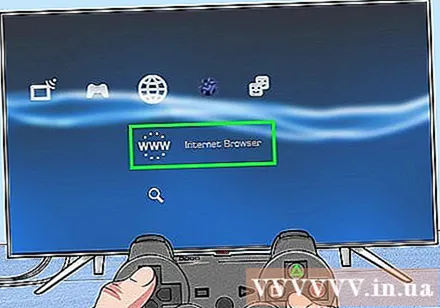
Set the "Blank Page" option as your homepage by: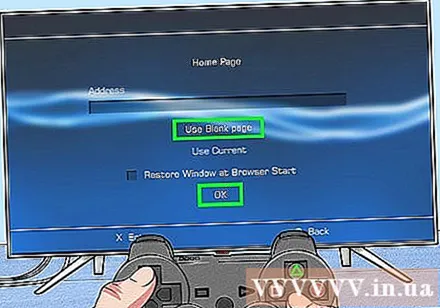
- Press the button triangle
- Choose Tools (Tools)
- Choose Home Page (Home page)
- Choose Use Blank Page (Use blank page)
- Choose OK
Delete temporary files. This step is quite important, if not done, you may get an error while loading custom firmware (CFW). For each type of temporary file, proceed to delete as follows:
- Cookies - Press the button triangle, choose Tools (Tools), select Delete Cookies (Clear cookies) then select Yes when prompted.
- Search History (Search history) - Press the button triangle, choose Tools, choose Delete Search History (Clear search history) and select Yes when prompted.
- Cache (Cache) - Press the button triangle, choose Tools, choose Delete Cache (Clear cache) then select Yes when prompted.
- Authentication Information (Credentials) - Press the button triangle, choose Tools, choose Delete Authentication Information (Clear your credentials) then select Yes when prompted.
Open the address bar. Press the button Select on the PS3 gaming console to open the address bar.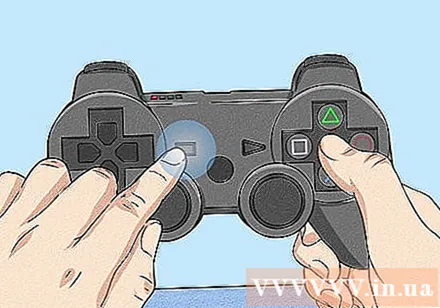
Enter an address. Enter one of the following three addresses in the address bar, then press the button Start. Note: you may need to try each of the below addresses a few times before you find the link that works: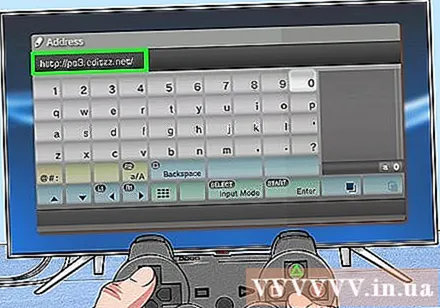
- http://ps3.editzz.net/
- http://redthetrainer.com/ps3/norNandWriter
- http://ps3hack.duckdns.org/
- Be patient when trying to open these websites, as they rarely work the first time you open them with the PS3 browser.
Choose a game console. Choose NAND or NOR depends on the type of PS3 you identified in the beginning.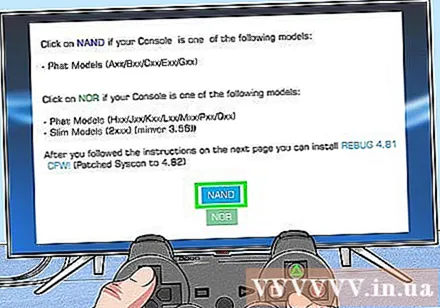
- If you are using the website http://ps3.editzz.net/You need to first select the tab Choose Console at the top of the screen.
Add the download page to the bookmark and close the browser. Press the button Select then choose Add to Bookmarks (Add to bookmarks) from the menu that appears. Then you can close the browser by pressing the button round and choose Yes when prompted.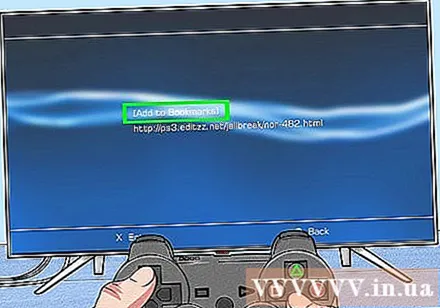
Reopen the download page. Open a web browser, press the button Select, select the URL you just saved and select OK when prompted.
Choose Write to Flash Memory (Overwrite flash memory). This option is at the bottom of the page. The custom firmware (CFW) will begin downloading.
Wait for the installation to complete. When the title "SUCCESS ..." (Successful) appears at the bottom of the screen, CFW is installed.
- If the green "SUCCESS ..." button doesn't appear at the bottom of the screen, you need to select an action Write to Flash Memory Again.
- If the message "SUCCESS ..." appears but PlayStation 3 is frozen, please wait 10 minutes. If the PS3 still doesn't work, you need to shut it down and reopen it, then try reinstalling the CFW firmware for PS3 NOR or NAND.
Allow the PS3 to turn off. Once CFW is installed, the PS3 will emit a "beep" sound and then turn itself off after a few seconds (or sometimes a few minutes). advertisement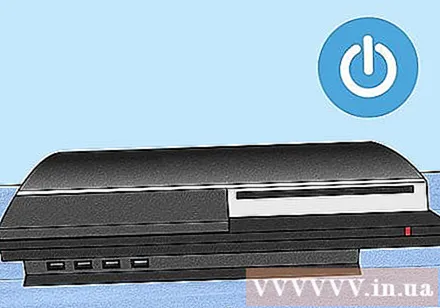
Part 6 of 6: Unlocking PS3
Re-open the PS3. After the PS3 has been turned off for a minute or more, use the gaming controller synced with the machine to turn on the PS3.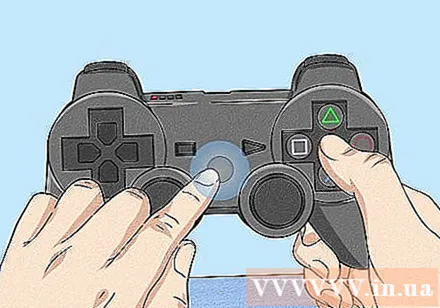
- If you are prompted to allow the PS3 to recover "corrupted" files, choose OK and allows the console to back up data.
Choose Settings (Setting). This option with a briefcase icon is at the top of the screen, but you may need to scroll left to select.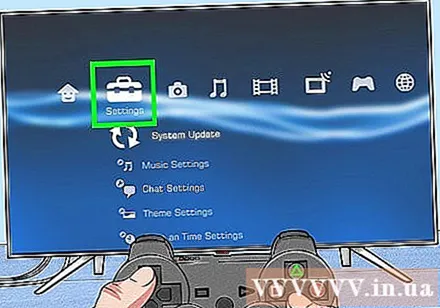
Choose System Update. The PS3 Update menu will appear.
Choose Update via Storage Media. The PS3 will start scanning for the connected flash drive.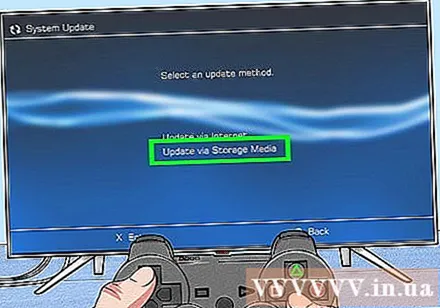
Choose OK when prompted. The update will start with the USB selected as the update installation location.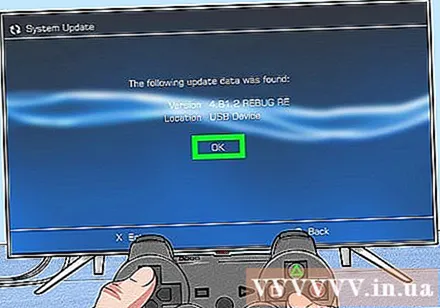
Wait for the firmware to finish installing. This may take about an hour, so be patient. Once the process is complete, the main PS3 page will appear and you can begin to experience the jailbroken console.
- If the PS3 freezes or refuses to install jailbreak files, repeat this entire section at least twice. If all else fails, try downloading the CFW firmware from another website listed under "Installing the firmware".
Advice
- Unlocking your PS3 is a process that has to be tried over and over again. The PS3 is almost certainly unable to successfully install the necessary software the first time you try it; If that fails, try again a few times before giving up.
- You can use your jailbroken PS3 to install anything from home screen apps to classic games.
Warning
- After jailbreaking your PS3, you will not be able to log into the PlayStation network. This could cause your current account (or even game console) to be blocked from using online (eg, multiplayer).
- If you try to download and install a custom firmware on your PS3 even though it is not compatible, the console will stop working and may be permanently damaged.

")

