Author:
Morris Wright
Date Of Creation:
28 April 2021
Update Date:
1 July 2024

Content
- To step
- Method 1 of 3: Color the clay before it dries
- Method 2 of 3: Drawing on dried clay
- Method 3 of 3: Paint dried clay
- Tips
- Necessities
With self-hardening clay you can easily model all kinds of things without the need for an oven, but coloring the clay can be a bit more difficult. Depending on the method you choose, you can color the clay and draw patterns on it before or after drying. To bring your creations to life, you will learn how to color clay before modeling, how to draw on dried clay with a marker and how to paint dried clay.
To step
Method 1 of 3: Color the clay before it dries
- Choose the right kind of clay to give a color. White self-hardening clay gives you the best result. Make sure your clay does not contain dye, as even clay that is off-white can cause the final color to change. Even if you are using white clay, it is important to test a little bit of clay first to see how the dye works and how to get the color of your choice.
 Choose a dye. If you want to give the clay a single solid color, you can do this by treating it with pigment before drying. There are many ways you can color self-hardening clay before drying, so feel free to experiment.
 - Acrylic paint, tempera and gouache paint give the clay a solid, clear color.
- Oil paint also works to easily color the clay, but is more difficult to clean and remove.
- If you want a very deep, vibrant color, try acrylic or artist-grade oil paints.
- With food coloring and frosting coloring, you get a similar result as with acrylic paint and tempera.
- If you want a pastel or very light color, try it with pastels.
- You can also buy ready-to-use clay dyes, but they are available in few colors and can be expensive.
- Prepare your workplace. You can make quite a mess when you color clay. Make sure you protect your hands and your work area so that you don't get stains. Only work over disposable materials or on a washable surface, such as a sheet of waxed paper on a counter or a plastic cutting board. Wear plastic or rubber gloves, especially if you're working with oil paint or food coloring. Disposable gloves are best.
 Knead the clay before adding food coloring. Take the time to knead and squeeze the clay with your hands before adding the food coloring. In this way, the clay becomes softer so that it absorbs the dye faster and more evenly. Kneading means that you keep pushing your fingers into the clay. How long you are kneading will depend on the temperature and altitude you are at, but this shouldn't take more than five minutes. When the clay is evenly colored, you know you have finished kneading.
  Put a small drop of food coloring on the clay and knead the food coloring through the clay. Knead the dye through the clay until the clay is even in color. This can take up to five minutes, so don't worry if the clay doesn't change color right away.
 - If you are using a solid colorant like pastels, put a bit of chalk dust on the clay.
- Keep adding a drop of food coloring until the clay is the color you want. Be careful about adding more food coloring - don't add more than one drop at a time. Make sure to knead the clay thoroughly after each drop.
 Mold the clay and let it dry as usual. After the clay has acquired the desired color, you can continue to work with the clay. Painted clay often dries faster than clay that has not been colored, so you may need to work a little faster than usual.
Method 2 of 3: Drawing on dried clay
- Mold the clay and let it dry as usual. Make sure the clay is completely dry and firm before you start drawing. Moist clay will erase the ink or paint from the markers and ruin your work. White clay is best if you want to make sure your drawing is visible, but you can use any color clay.
- Buy markers. Paint markers with acrylic paint are best for drawing on clay, but you can also use regular felt markers, waterproof markers or watercolor markers. Do not use oil markers as it will take a long time for your drawing to dry and it will smudge easily.
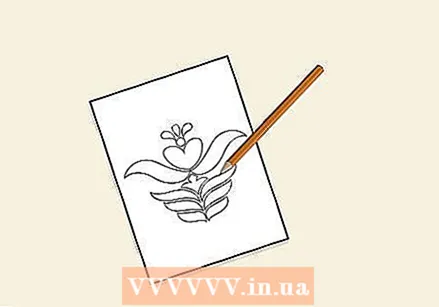
- Create a design. Before you start it is important to think about what you want to draw. If you draw on clay, you cannot erase your drawing and start over. Practice drawing on paper for a few minutes until you can do it perfectly several times in a row.
 Wash and dry your hands completely. If you work with wet hands, you will smear the ink or paint from the markers and it will end up in other places. This is especially true when you work with watercolor markers. Make sure your hands are clean and completely dry before you start.
  Draw your design on the clay. Hold the piece of clay in one hand and draw your design very carefully with your dominant hand. Draw one color at a time to keep the color from bleeding and use lighter colors first. For example, if you have a design with black and yellow, draw the yellow parts first, let the ink or paint dry, then draw the black parts.
 - Let your drawing dry thoroughly. When you are done with a particular color or drawing on one side, lay the clay down and wait for the ink or paint to dry completely before touching the clay again. Check the marker packaging to find out how long to let the ink or paint dry if you don't know how long to wait. Continue until your drawing is ready.
 Paint the drawing to prevent smearing and fading. Check the clay packaging to see which lacquer is recommended. You spray most lacquers on the clay, but you can also use lacquer that you apply with a brush or even transparent nail polish.
 - In the case of store-bought lacquer, follow the directions on the packaging to get the best result.
- If you are using nail polish, work in a well-ventilated area. Paint slowly and carefully, making sure one side is dry before turning the clay over to paint the other side.
Method 3 of 3: Paint dried clay
- Mold the clay and let it dry as usual. It does not work to paint damp clay or to sculpt painted clay, because your drawing will run or be smeared. You will have to wait until your workpiece is completely finished and completely dry before you can start painting. The paint is best visible on white clay.
 Choose acrylic paint or tempera to color your clay. These paints are best for painting self-hardening clays, but you can use gouache or even nail polish if you prefer. Make sure to open the package first to view the actual paint color so that you have the correct color.
 - You can also use watercolor paint or oil paint, but these types of paint are a lot more difficult to apply and do not have the same effect as acrylic paint.
 Choose the right brushes to paint with. Using the wrong paintbrush can ruin your paintwork. If you have made a complicated design, use a very fine brush so that you can paint the details properly. However, if you have a large solid area of color, use a large brush to apply the paint evenly.
 - Make sure your paintbrush is in good condition. An old or damaged paintbrush can cause hairs to come loose and smear the paint.
 Practice painting your design on paper. If you are painting a particular design on your clay instead of painting the clay in a single color, practice a few times on paper or on loose pieces of clay so that the design eventually settles on the clay. This is especially important if you have a complicated design or are not used to painting. You don't get a second chance.
 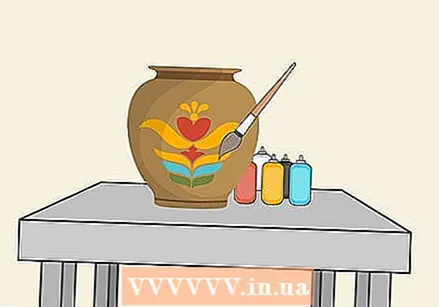 Paint your design on the clay. Hold the piece of clay in one hand and paint it with the other. You can also place the clay on a clean and protected work surface if you prefer not to hold it. Don't forget to apply only one color at a time and apply the light colors first if possible. For example, if you are painting a bee, apply the yellow paint first and then the black paint.
 - Make sure your hands are clean before and during painting.
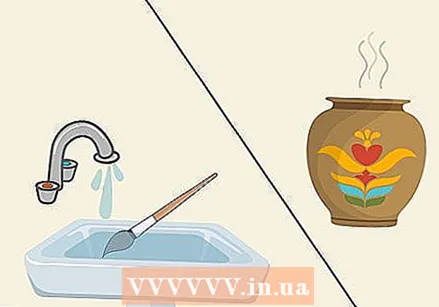 Rinse your brush and wait for the paint to dry after each color you apply. If your brush is wet, the paint may run or even smear. When in doubt, you better wait longer to avoid mistakes. Wait for the paint to dry before starting on another side of your work.
  Apply a coat of lacquer. Check the clay packaging to make sure you are using lacquer that is compatible with the clay. You can use spray paint or paint that you apply with a brush. Read the directions on the package carefully to get the best results.
 - Clear nail polish is a good all-purpose polish, but can be tricky to apply to a larger area. If you choose to do this, apply the polish in a well-ventilated area and wait for one side to dry before starting on the other.
Tips
- Always test the method with which you want to color your clay on a loose piece of clay.
Necessities
- Self-hardening clay
- Coloring agents such as paint, pastels or food coloring (to give all clay a color)
- Paint markers
- Acrylic paint or tempera
- Paintbrush
- Clean work surface with protective material
- Lacquer


