Author:
Charles Brown
Date Of Creation:
2 February 2021
Update Date:
1 July 2024

Content
- To step
- Method 1 of 3: Grate the carrots with a kitchen grater
- Method 3 of 3: Cut carrots à la julienne
Grated carrots taste great in salads and other dishes. The technique is not difficult to learn, but it does take some practice, especially if you need very long strands for your recipe. In a few steps you will learn how to grate carrots manually, how to use the food processor and how to cut julienne for a chic recipe.
To step
Method 1 of 3: Grate the carrots with a kitchen grater
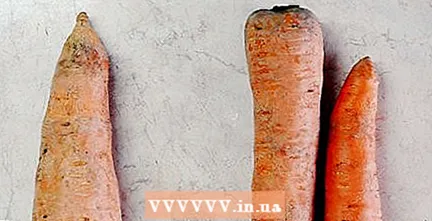 Determine how many carrots you need. The amount of carrot grater is determined by the number of carrots you use. So check how much carrot grater you need for your recipe and remember that you can always grate a carrot with it if you run out of space. In general you can say:
 - a large winter carrot = a cup of carrot grater
- a pound of carrots = two and a half cups of carrot grater
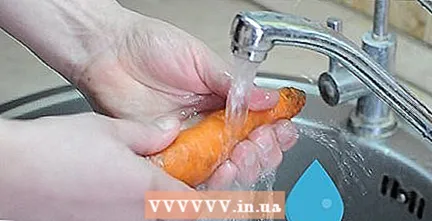 Wash the carrots. Run the roots under a running tap of cold water and use your hands to scrub them clean. This removes dirt, chemical pesticides and germs from the roots.
 - Make sure you have large roots. Small carrots are difficult to grate and you also run the risk of scraping off a piece of your fingers.
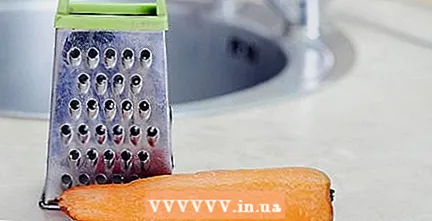 Choose a grater. There are several graters available, two of which are the most commonly used. You have the upright grater and the flat grater. You may already have one in your kitchen cupboard or you might have to stop by a household goods store.
 - Standing grater. This is a fairly large grater with three or four cutting edges and a handle on the top. Each cutting edge has different sized holes. You can use this grater for many different vegetables - but also cheese.
- Flat grater. This is a flat grater with a handle on one side and two different sizes of holes. Determine how fine or coarse the carrot grater should be.
 Put down your grater. You need a clean surface for your grater, such as the counter or a stable kitchen table. You can also place the grater on a cutting board or over a large bowl or pan to collect the carrot grater. In any case, make sure that the carrot grater is collected on a clean surface.
  Determine how many carrots you need for your recipe. It's easy if you know exactly how many carrots to use, but otherwise you can estimate it. If you have too little, you can always grate a little later.
 - Remember, a pound of carrots makes two and a half cups of carrot grater and one carrot is the equivalent of a cup of grated carrot.
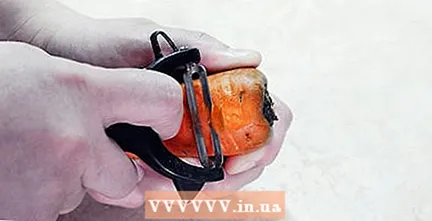 Peel the carrots. Wash the carrots under the cold tap and cut an inch from the top and bottom. Then peel them with a potato or asparagus peeler.
 - Hold the roots under the running water while scrubbing them vigorously with your hands to remove dirt and germs.
- For lack of potato peeler, use a sharp knife to peel the carrots. However, it is more difficult to peel them thinly with a knife.
 Put the correct blade in the machine. Most kitchen machines have different blades and knives for various applications. Find the knife you can use to grate and secure it in the machine. Read the operating instructions of the machine if necessary.
 - The cutting blade is fixed at the top of the food processor, so that the carrot grater can fall down and is collected in the bowl. This way you can keep on grating without the blade getting clogged.
 Put the lid on the kitchen machine. When the correct blade is in the machine, push the cover on and click it into the locked position. The transparent lid has a chimney-like feed channel for the foodstuffs to be processed.
 - The input channel remains open. This will require you to bring the roots in.
 Grate the carrots. Switch on the machine when the lid is on properly. Place the first carrot in the feed channel and press it against the grater blade with the pressure cylinder. Keep it pressed until the entire carrot is shredded. Repeat this until you run out of carrot supply.
 - You should never put your fingers into the input channel to press the roots. This is very dangerous. You even risk losing a finger! Always use the supplied pressure cylinder for this job.
- When you're done, turn off the food processor. Then wait until the blade has completely stopped. Now you can take off the top and take out the carrot grater.
- You can crush carrots even with a small food processor. They are then more chopped than grated, but that doesn't have to matter to your recipe. Make sure the machine is properly locked and watch your fingers. Depending on your machine, you put the carrots in at the same time or one by one.
Method 3 of 3: Cut carrots à la julienne
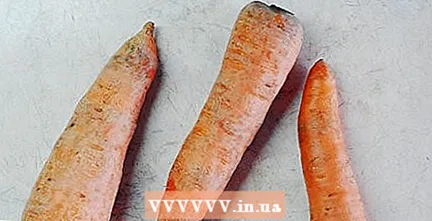 Figure out how many carrots you need. Check if your recipe states how many carrots you need for your julienne. Remember that you can always cut if you unexpectedly have too little. In general, you can equate a large carrot with a cup of chopped carrot.
 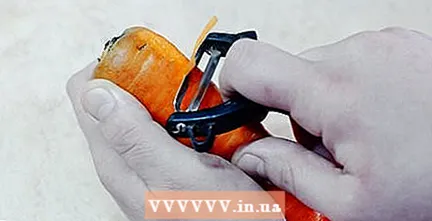 Peel the carrots. Run the roots under cold running water and scrub them with your hands. Cut the top off the top and bottom and use a potato peeler to peel the carrots nice and thin.
 - You can use a knife instead of a potato or asparagus peeler, but it is a lot more difficult to peel nice and thin.
 Cut the carrots into pieces. Take a sharp knife and cut the carrots into pieces of about five centimeters. After this, cut off both convex sides of the carrot so that you can lay it flat and it doesn't roll away while you're cutting.
 - Do not throw away the cut pieces, because you can still use them for cutting back into shape.
 Cut the carrots into julienne strips. Place the carrot pieces on top of each other in a small pile. Make sure they are right on top of each other and cut the pieces into matches with a sharp knife. Cut this julienne about as thick as you cut the slices first, so that they become nicely symmetrical.
 - Continue this until you have cut all the carrots à la julienne.
- Cut slowly and carefully. Always keep your fingers away from the end of the blade. The more you get to the end of your stack, the more difficult it will be, but stay focused.
- There are finger guards for sale that ensure that you do not cut your fingers. This is safe, but it makes cutting more difficult.


