Author:
Charles Brown
Date Of Creation:
9 February 2021
Update Date:
1 July 2024
Content
- Ingredients
- To step
- Part 1 of 3: Getting the watermelon juice
- Part 2 of 3: Preparing the watermelon juice for fermentation
- Part 3 of 3: Siphoning and fermenting the wine
- Tips
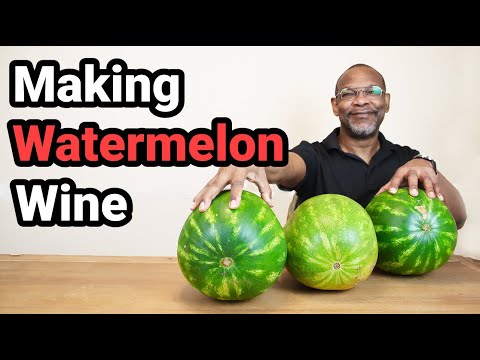
Watermelon wine is a light, sweet wine made from fermented watermelon. These are best made during the watermelon season in late spring and early summer, when they are at their most ripe and juicy. The wine is made by reducing the flesh of the watermelon, after which the juice is fermented and siphoned. Watermelon wine is very easy to make at home if you have the right equipment and has a light, refreshing taste, perfect for those warm summer evenings.
Ingredients
- 1 large, ripe watermelon
- 1.5 kilos of white granulated sugar
- 1 teaspoon of acid mixture
- 1 teaspoon of yeast nutrition
- 1 pack of Champagne brewer's yeast or wine yeast
To step
Part 1 of 3: Getting the watermelon juice
 Choose the right watermelon. Make sure to choose a large, ripe watermelon. If you want to check the ripeness, beat the watermelon. If it sounds like a dull thud, the melon is not yet ripe. If the beating makes an almost hollow sound, the watermelon should be ripe.
 - Make sure the watermelon is round, regular in size and heavy to the touch. When fruit feels heavy for its size, it means it has a lot of water in it and is ripe.
 Remove the skin from the watermelon. Wash the watermelon and place it on a cutting board. Peel the watermelon with a large knife, cutting off the very top and bottom edges first, then stand the watermelon upright and cut down to remove the skin.
 - Make sure to keep your fingers away from where you cut the watermelon. In addition, use a sharp knife, so that you don't have to use a lot of force and accidentally cut yourself with the knife.
- After cutting off the skin, cut off white strips from the watermelon until you are left with only the red flesh.
 Chop the watermelon into 2-3 cm cubes. After removing the skin, chop the red fruits into 2-3 centimeter pieces. This does not have to be done very precisely, because you are going to reduce the pieces anyway, but they must be relatively small.
 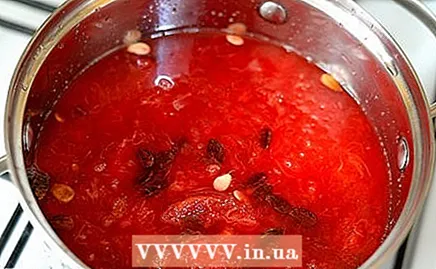 Place the watermelon in a large saucepan to cook. Place the watermelon pieces and juice in a large saucepan and reduce heat to medium heat. You are going to reduce the watermelon so that it becomes liquid and can be converted into wine.
  Stir and puree the watermelon until it has become liquid. As the watermelon is heated, it should start to break down. You can speed up this process by mashing the fruit with a large spoon and stirring the watermelon regularly. When most of the fruit has liquefied (about half an hour), stop and remove the pan from the heat.
 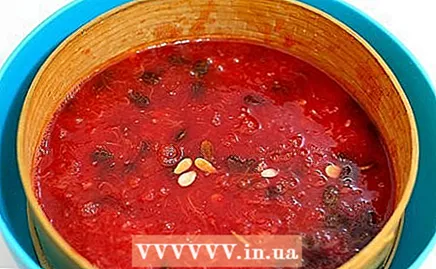 Filter 14 cups of the watermelon juice. Carefully pour 14 cups (3.5 liters) of the watermelon juice through a fine strainer to catch any remaining watermelon seeds and large chunks of pulp.
 - If you have any leftover juice after you have filtered the 14 cups, you can reserve it to drink chilled or to use in cocktails. Store the leftover juice in a sealed container in the refrigerator (up to three days).
Part 2 of 3: Preparing the watermelon juice for fermentation
 Add the sugar to the watermelon juice. After you have finished filtering out the seeds from the watermelon, pour the 14 cups (3.5 liters) of juice into a large saucepan. Add the granulated sugar to the pan and bring it almost to the boil. Stir until the sugar has dissolved. Then remove the pan from the heat.
  Add the acid mixture and the yeast nutrition. Wait for the watermelon and sugar mixture to cool to room temperature, then add the acid mixture and yeast food. Stir with a whisk until dissolved (this will take about thirty seconds).
  Put the juice in a large bottle to ferment and seal. Carefully pour the watermelon juice into a four-liter carboy or other large fermentation vessel. Then cover the top of the bottle with a cloth and let it sit for 24 hours.
 - Examples of a fermentation container are tightly sealable plastic containers, large glass or plastic bottles, and stainless steel vats and tanks. The most important aspect of a fermentation container is its ability to be completely sealed and airtight.
- Before using the fermentation container and other fermentation equipment, purify them by soaking them in a mixture of water and bleach (one tablespoon of bleach for every gallon of water) for at least 20 minutes.
 Drizzle over the yeast and close the container. After the juice has rested for 24 hours, add the Champagne yeast by sprinkling it over the juice. Then use an airtight fermentation container. Let the juice rest overnight.
Part 3 of 3: Siphoning and fermenting the wine
 Siphon the wine and let it rest for three months after the start of fermentation. After allowing the wine to rest for a day, you should notice that the surface of the liquid has become fizzy and foamy, and bubbles have formed in the airlock. This means that the juice will begin to ferment into wine.
 - To transfer the wine, place the end of a siphon hose in the fermentation container about an inch from the bottom. Then you suck on the hose to start the transfer. Once it has started, the wine will start moving through the tube. Place the other end of the tube in the other fermentation vessel, and close the lid when all the wine has been siphoned off.
- You will notice that some of the wine sediment is left in the first fermentation container.
- After the air bubbles and foam have formed, transfer the wine to another one liter fermentation container to get rid of the sediment.
- Close the container and let the wine rest for two months.
 Transfer the wine again after two months. After three months have passed, repeat this siphoning process and transfer the wine to a new fermentation vessel. Close this and let the wine rest for another two months.
  Siphon the wine a third time. After two months have passed, siphon the wine a third time again. This time, let the wine sit for another month or so. After six months of fermentation, the wine should be very clear.
  Transfer the wine to other bottles. After about six months, there should be no more air bubbles in the airlock and the wine should be clear. This means that the fermentation process is over. Siphon the wine one last time, but this time in several sterilized bottles. Fill the bottles to an inch below where the bottom of the cork will be.
  Cork the bottles. After bottling the watermelon wine, soak the corks in warm distilled water for 20 minutes. Then you place each bottle in the hand cork. Place the cork in the opening of the bottle. Then press the cork into the bottle in one smooth movement with the help of the cork.
 - If you have any doubts about using the hand cork, read the included instructions.
- Use corks that are 3.2 cm long.
 Keep the watermelon wine or drink it right away. Now that the wine is corked, it is ready to be consumed! If you want a slightly more nuanced flavor, you can store the wine in a dark place for six months to a year. You can also uncork a bottle on a warm summer evening and drink the wine chilled or at room temperature.
Tips
- Add other fruits like peaches or strawberries when you liquefy the watermelon for a different flavor.
- If you wish, do a gravity test on your wine before and after fermentation for an exact measure of the alcohol content.


