Author:
Tamara Smith
Date Of Creation:
23 January 2021
Update Date:
1 July 2024
Content
- To step
- Method 1 of 4: Filter water when you go camping
- Method 2 of 4: Filter water in an emergency
- Method 3 of 4: Pick and use a home filter
- Method 4 of 4: Making a ceramic filter for your home.
- Tips
- Warnings
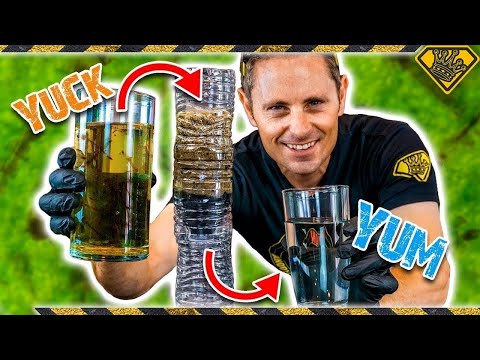
If you are in a survival situation and you do not have clean water to hand, it is important to know how to filter water so that the situation does not get worse by getting sick. If you have the luxury of being able to prepare things in advance, you can choose from convenient options for your camping trip or even install a permanent water filter in your home.
To step
Method 1 of 4: Filter water when you go camping
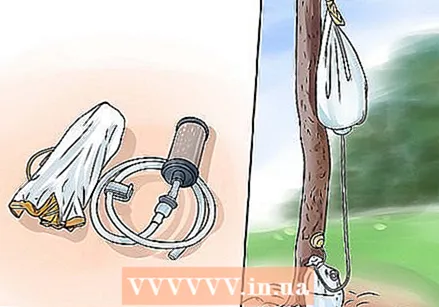 Consider a physical filter. "Pump filters" are probably the cheapest option in this category, but they can be slow and annoying. If you are going to travel for a long time, take a look at "gravity filters", which usually consist of a pair of bags connected by a hose. The bag containing the filter is filled with water, and then hung so that the water can flow through the filter into the clean bag. This is a quick, easy option that doesn't require you to walk around with a large supply of disposable filters.
 - These filters do not protect you against viruses, but against bacteria. But in many areas in Europe, it is not really necessary to protect yourself against viruses. Try to find out from the local tourist information if there are certain risks in that region.
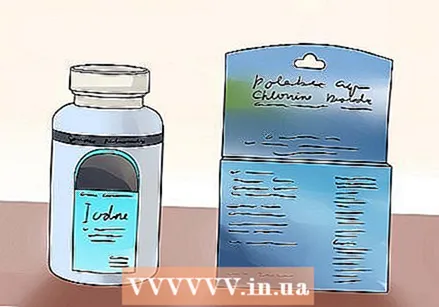 Learn about chemical disinfection. Tablets work slowly, but are cheap and effective against most bacteria and viruses. Tablets come in two types:
 - Iodine tablets should be left in the water for at least 30 minutes. Sometimes the packaging also contains tablets to mask the iodine taste. Pregnant women and people with thyroid disease should not use this method, and the tablets should not be used by anyone for more than a few weeks at a time.
- Chlorine dioxide tablets also have a waiting time of 30 minutes. Unlike iodine tablets, these tablets are also effective in water contaminated with cryptosporidium - but only if you wait 4 hours before drinking the water.
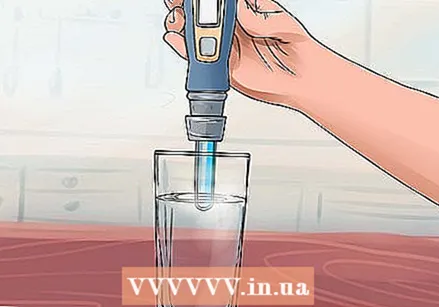 Try UV treatment. UV light can kill bacteria and viruses, but only if the water is clear and it is treated with the light long enough. There are UV lamps and pens of varying intensity, so follow the manufacturer's directions.
  Boil water. This is an extremely effective method of killing germs as long as you let the water boil for at least a minute. Boiling water several times a day may not be very convenient, but you can already boil a whole supply of water while you are busy with your morning cup of coffee or dinner.
 - If you are very high, you should boil the water for at least three minutes, because water boils at a lower temperature when you are in thin air. The high temperature, and not the cooking itself, is what kills the bacteria and viruses.
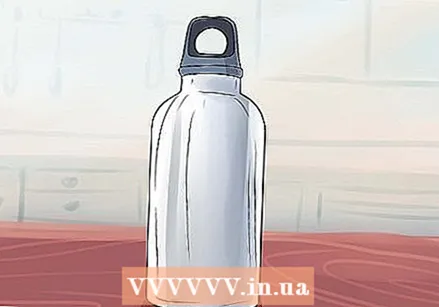 Use stainless steel water bottles. Plastic bottles are made to be filled only once because the plastic can break down over time, allowing harmful chemicals to get into your water, and it can even harbor bacteria. Even aluminum bottles sometimes have a plastic coating on the inside, and you can't put them in the dishwasher, making them difficult to clean.
 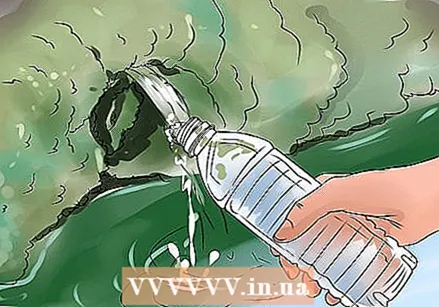 Drink straight from the source. If you are lucky enough to see a mountain stream emerging from the rocks, it is usually safe to drink - but not water even half a meter from the source.
 - This is not a foolproof rule, and it can be dangerous if there is agriculture nearby, if it used to be a mining area, or if you are in a low-lying spot near densely populated areas.
Method 2 of 4: Filter water in an emergency
 Use a quick filter in an emergency. Filter water through a bandana, T-shirt, or coffee filter to remove visible dirt. Let the water sit for a few minutes so that the remaining particles sink to the bottom, then carefully transfer it to another bottle or container. If possible, boil this water to kill germs before drinking it. In the steps below you will learn how to make a more effective filter, but unless you brought your own charcoal, this process can take a few hours.
 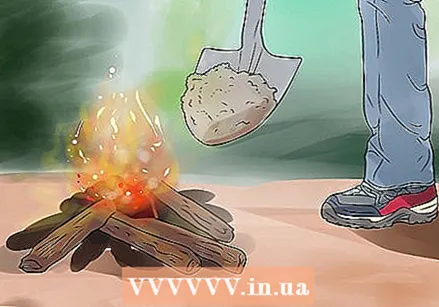 Make charcoal. Charcoal is an excellent water filter, and it is even used in many commercial filters. You can make your own charcoal in the wild if you can make a fire. Make a wood fire and let it burn out completely. Cover it with sand and wait a few hours before digging it up again. When it is completely cool, break the charred wood into small pieces or pulverize it to dust. Now you have made your own charcoal.
 - While not as effective as store-bought "activated charcoal" (Norit), which you cannot make in the wilderness, homemade charcoal is effective enough to filter water.
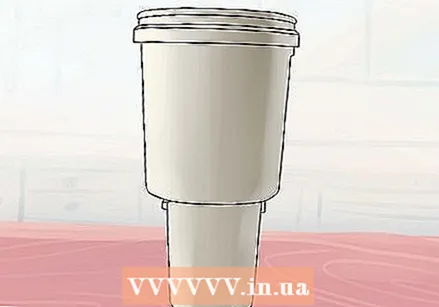 Prepare two containers. You need a "top bowl", with a small hole in the bottom through which the water is filtered, and a "bottom bowl" to collect the filtered water. Here are a few options:
 - If you happen to have a plastic bottle, you can cut it in half and use each half as a container. Poke a hole in the cap so that you can filter the water through it.
- Two buckets also work well if you make a hole in the bottom in one of them.
- In an emergency situation where you have few supplies on hand, you can look for hollow plants such as bamboo or a piece of tree stump.
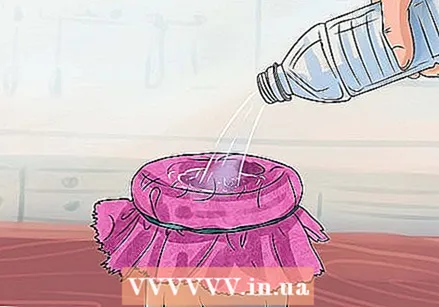
 Place a piece of cloth over the hole in the top bin. Use enough to cover the bottom or else you'll rinse your charcoal away.
 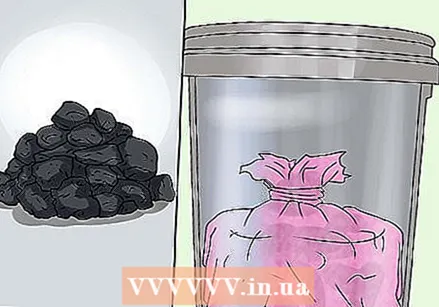 Press your charcoal firmly onto the canvas. The water should be able to drip very slowly through the charcoal, so make sure you press the charcoal well. If the water flows through your filter too easily, try again and put more charcoal on it. In the end, it should be a thick, dense layer - up to about halfway up your top container, if you're using half a water bottle.
 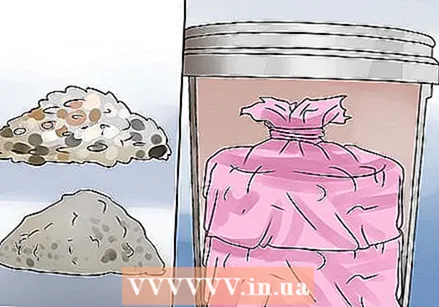 Place stones, sand and more cloth on the charcoal. If you have a scrap of cloth left, cover the charcoal tightly so that it doesn't rise when you pour water into your container. Whether or not you apply a second cloth, it is recommended that you add some small stones or sand to filter out coarse bits of dirt and to hold the charcoal in place.
 - You can also use grass and leaves, as long as you are sure they are not poisonous species.
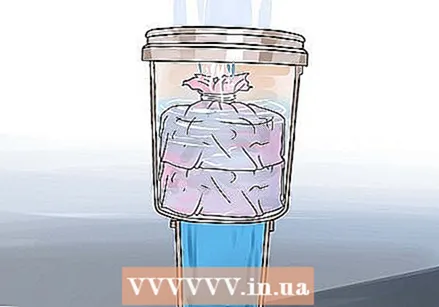 Filter the water. Place the top tray on the bottom tray. Pour the water into the top tray and see if it drips slowly through the filter into the bottom tray.
 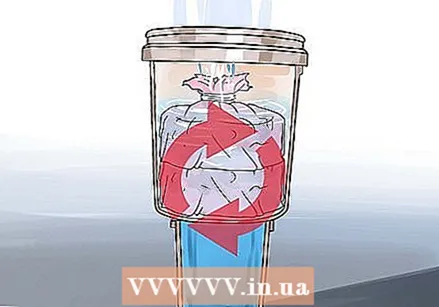 Repeat this until it is clean. Often you have to filter the water two or three times before all the particles are out.
 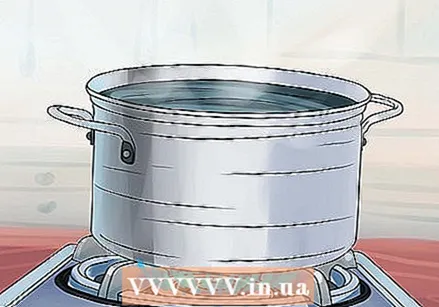 Boil the water if possible. The filtering removes many toxins and odors from the water, but bacteria can sometimes slip through the filter. If possible, boil the water as well for extra safety.
 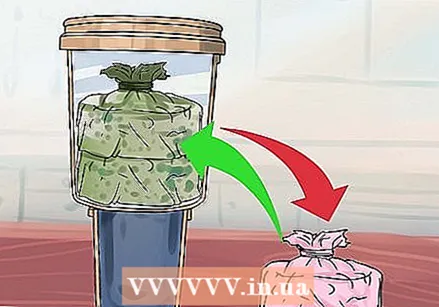 Replace the material in the top tray from time to time. The top layer of sand will begin to contain microbes and other pollutants that can be dangerous if you drink the water. After you have used the filter a few times, discard the top layer of sand and replace it with clean sand.
Method 3 of 4: Pick and use a home filter
 Find out how good the drinking water quality is in your area. In general, drinking water in the Netherlands is very safe to drink. In some cases, however, the standards for certain substances in drinking water have been exceeded, especially after work by the water companies. This can be checked with your local water company.In case of such an overrun, it can be useful to use a filter. Even if you have an espresso machine, it can be better for the machine and for the taste of the coffee to filter the water first.
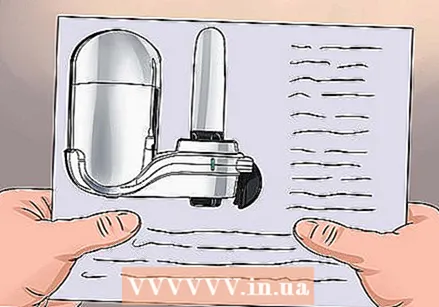
 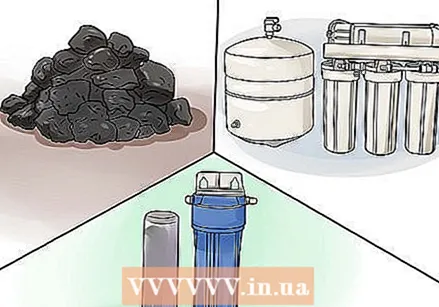 Choose the type of filter. Once you know what you want to filter out of your water, you can read the instructions that come with the different water filter products to see if they are suitable. You can also make the choice easier by following these tips:
 - Charcoal filters are cheap and easily available. They filter most of the organic pollutants from your water, such as lead, mercury and asbestos.
- Osmosis filters filter out non-organic pollutants such as arsenic and nitrates. These are extremely inefficient in terms of water use, so only choose these if you know your water is contaminated with substances that you cannot filter out with a charcoal filter.
- De-ionizing filters remove minerals and soften hard water. They do not remove further contamination.
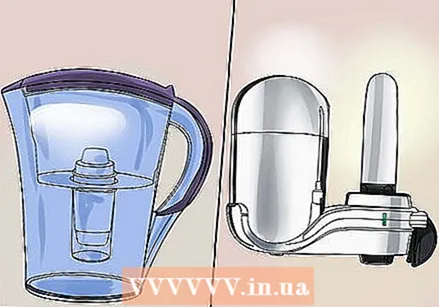 Choose an installation method. There are different types of filters for sale, adapted to different needs. Here are the most common options for use in the home:
 - A water filter jug. These are useful for households where not a lot of water is filtered, because you fill the jug once or twice a day and you can put it in the fridge.
- A filter that attaches to the tap is useful if you want to filter all your tap water, but it can lower the water pressure.
- Water filters placed on the counter or under the sink require some adjustments by a plumber, but they usually last the longest and require little maintenance.
- If you live in an area where the water is seriously polluted and you can't even take a shower with it, you can build an installation that filters all of your tap water.
 Install the filter according to the manufacturer's manual. Each filter has a manual that tells you how to install it so that it works properly. In most cases this is very simple, but if it is difficult you can call the manufacturer to ask for help.
 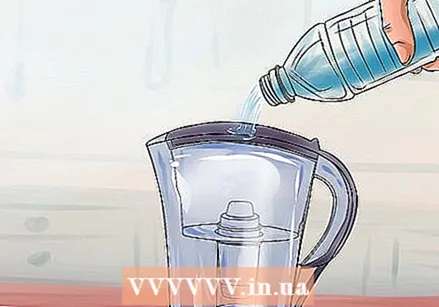 Run water through the filter. Take cold water and pass it through the filter. In most cases you have to run it into the filter from above; then it sinks through the filter mechanism, where impurities are removed. The clean water then flows into the jug or out of the tap, depending on the type of filter you have.
 - Do not submerge the filter when it is flowing through. Water that flows back into the filter may not be purified.
- Some filters cannot withstand hot water; read the manufacturer's instructions.
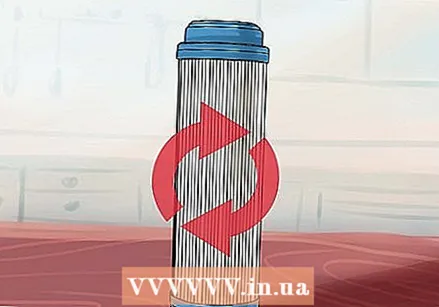 Replace the filter as often as recommended. After a few months of use, a charcoal filter will clog and stop working properly. Buy a filter cartridge from the same manufacturer that owns the filter. Take out the old cartridge, discard it and replace it with a new one.
 - With some filters you take longer than with others. Please refer to the manual for details or contact the manufacturer.
Method 4 of 4: Making a ceramic filter for your home.
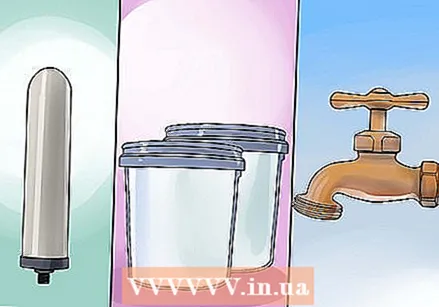 Get all the supplies together. A homemade ceramic filter works by passing the water through a layer of porous ceramic. The holes are small enough to filter out contamination, but water can pass through. For a ceramic filter you need the following items:
 - A ceramic filter element. You can buy a candle filter or a canister filter at the hardware store. Make sure it is suitable for making water drinkable.
- Two buckets for food. One bucket is used to put in the dirty water, and the other to put in the purified water. Food buckets can be found at wholesalers for catering businesses, but you may be able to get two at a local restaurant.
- One tap. This is attached to the bottom bucket so that you can get the filtered water out.
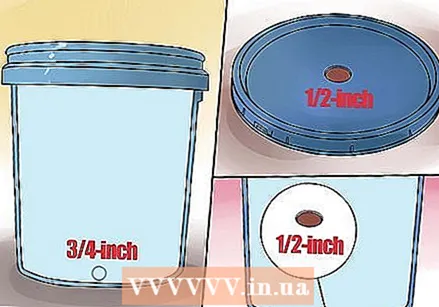 Drill holes in the buckets. You need to drill a total of 3 holes: one in the bottom of the top bucket, one in the lid of the bottom bucket, and a third hole in the side of the bottom bucket (for the tap).
 - Begin by drilling a 1cm diameter hole in the center of the bottom of the top bucket.
- Drill a second hole 1 cm in diameter in the lid of the bottom bucket. This hole should line up exactly with the hole in the top bucket. The water flows from the top bucket through the filter and then drips into the bottom bucket.
- Drill a 1.5 cm diameter hole in the side of the bottom bucket. This is where you attach the tap, so it should be no more than 5 cm above the bottom.
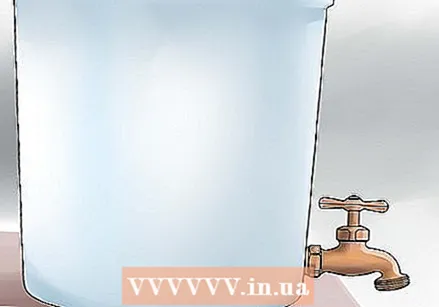 Install the tap. Follow the instructions that come with the tap and secure the back of the tap into the hole you drilled in the bottom bucket. Tighten it from the inside and make sure it is firmly in place.
 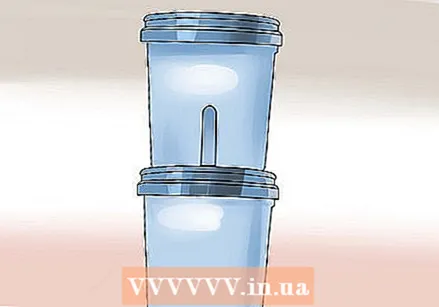 Install the filter. Install the filter element in the hole of the top bucket so that it rests in the hole, with the "nozzle" inserted through the hole. Place the top bucket on top of the bottom one, making sure that the spout on the filter also protrudes through the hole in the lid of the bottom bucket. The filter is now installed.
 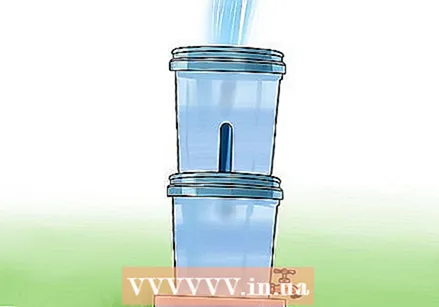 Filter the water. Pour water into the top bucket. It should now go through the filter and flow from the spout into the bottom bucket. Filtering can take a few hours, depending on how much water you want to filter. When you have collected enough water in the bottom bucket, you can run clean water into a cup through the tap. The water is now purified and ready to drink.
  Clean the water filter. The impurities in the water will remain at the bottom of the top bucket, so this should be cleaned from time to time. Take the filter apart and clean the buckets with bleach or vinegar every few months, or maybe more often if you use the filter a lot.
Tips
- After a while you may start to see black specks if you have a charcoal filter. That is probably charcoal that came out of the filter. It's not dangerous, but your filter will probably need to be replaced.
Warnings
- Filtered water from a homemade filter may still not be safe to drink. If you feel sick after drinking it, see the doctor right away.
- You cannot filter seawater into drinking water, although scientists are working hard to make that possible.


