Author:
Tamara Smith
Date Of Creation:
20 January 2021
Update Date:
1 July 2024

Content
- To step
- Method 1 of 3: Drying onions for the winter
- Method 2 of 3: Dry in the oven
- Method 3 of 3: Drying with a drying oven
- Necessities
- Drying onions for the winter
- Dry onions in the oven
- Dry onions in a drying oven
You can keep onions longer by air drying them, or dry them for use as a seasoning or snack using an oven or dehydrator. Each process is fairly simple, but does require a slightly different set of steps.
To step
Method 1 of 3: Drying onions for the winter
 Choose tart onions. Mild onions don't dry well, so if you want to air dry or harden onions for winter storage, tart onions are a better choice.
 - As a general rule, mild onions are usually quite large and have a papery skin that is easy to peel. When cut open, the onions are juicy and the rings quite thick.
- Sharp onions are considerably smaller and have a dense skin. When cut open, the rings are significantly thinner and your eyes will likely start to water.
- Mild onions will be dried or hardened, and will keep for a month or two at most. Spicy onions, on the other hand, can keep well all winter under ideal conditions.
- The sulfur-like compounds that cause tears to your eyes when you cut a sharp onion also slow down the rotting process.
- Popular varieties of tart onions include Candy, Copra, Red Weathersfield, and Ebenezer.
 Cut the leaves off. Cut away shriveled leaves with scissors and gently brush large clumps of soil from the roots to clean them.
 - This step is only necessary once the onions have been harvested from your garden. If you buy them at the store, chances are the leaves and dirt have already been removed.
- Note that the onions should not be harvested until the leaves on the plant begin to weaken and "fall over," indicating that the plant has stopped growing. Only fully ripened onions should be dried for winter storage.
- For best results, make sure to dry your onions immediately after harvesting.
 Move the onions to a warm, sheltered place. Place the onions in a single layer in a shed or utility room with temperatures of 15-27 degrees Celsius.
 - Let the onions dry for a full week at this initial stage.
- If the weather is still dry and warm outside, and you don't have to worry about animals getting into your onion crop, you can usually leave them in the garden for the first few days. Most of the time, though, you'll have to move them to a garage, shed, or covered porch.
- Be careful when moving the onions. They can bruise if you knock them together too roughly. You should also avoid touching them during this initial drying phase.
- Do not place the onions in direct sunlight as this can cause uneven drying.
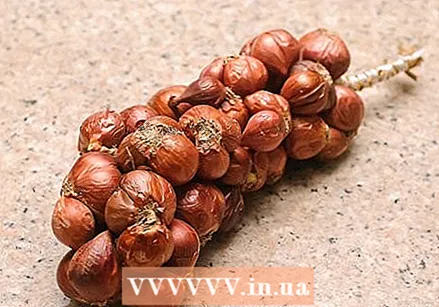 Consider drying the onions in a braid. You can finish drying the onions by laying them flat, or you can put them in a braid.
 - Braid the onions together by cutting off all but the three newest leaves. Tie or braid these leftover leaves to the leaves of other onions being dried and hang them vertically to complete drying.
- This is usually a matter of personal preference or lack of space, as research has shown that onions do not dry better or worse when braided or laid flat.
- Let the onions dry in this way for a total of four to six weeks.
 Cut the tops off. As the onions get drier, cut the tops back two or three times as the stem shrinks. Cut off the rest of the necks when the onions are completely dried. The roots must also be cut.
 - Cut the tops back two or three times during the drying process.
- After the onions have finished drying, cut off the narrow parts completely.
- After the first week or two weeks of drying, you should also cut the roots of the onion to 6 mm with scissors.
 Store the onions in a cool, dry place. During the winter, you can usually keep the onions in your cellar.
 - Place the onions in mesh bags, a basket or a flat cardboard box with holes punched in it. Place only three or three onions in a small space so they have plenty of air circulation.
- At a temperature of zero degrees Celsius, tart onions can be kept for 6-9 months and mild onions for 2 weeks to a month.
Method 2 of 3: Dry in the oven
 Preheat the oven to 71 degrees Celsius. Prepare two or more baking trays by lining them with parchment paper.
 - On average, you will need one to two standard baking trays for each onion you want to dry with this method. If you're only drying one onion, prepare two baking trays. If you dry two onions, prepare three or four baking trays, and so on. It is better to give the onions too much space than too little.
- Do not let the temperature exceed 71 degrees Celsius during the drying process. If the oven does rise above this temperature, you may burn or roast the onion dry, rather than dry it.
- The baking trays you use should be about 2 inches (5 cm) narrower than the inside of your oven to allow for adequate air circulation.
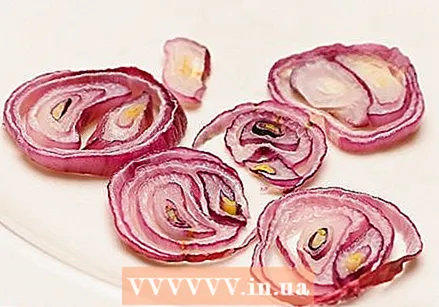
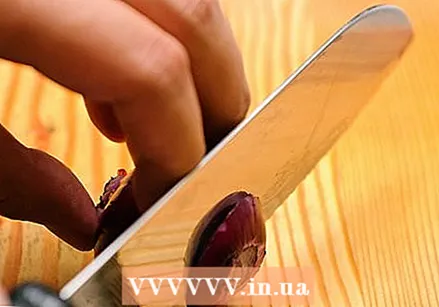 Cut the onions into thin slices. Remove the carrot, the top and the membranes and cut the onions into rings of 6 or 3 mm.
 - The easiest way to slice onions for this purpose is with a mandolin. However, if you don't have these utensils, you can also cut the onions as thinly as possible with your sharpest kitchen knife.
 Spread the onions on the baking trays. Place the onions on the baking sheets and spread them in a single layer.
 - If you stack the onions on a baking tray, it will take longer to dry and they may dry unevenly. This can cause problems later if you accidentally keep a few onions that have not been properly dried.
 Dry the onion in the preheated oven. Place the onion in the oven and dry for six to 10 hours, turning the baking trays over if necessary to reduce the risk of searing.
 - If possible, keep the oven door open about 10 cm apart to prevent the inside of the oven from becoming too hot. If you do this, you can also place a fan near the opening to help circulate the air inside.
- Keep about 7-8 cm of empty space between the baking trays and between the top baking tray and the top of the oven. There must be adequate air circulation.
- Keep a close eye on the onions as they near the end of the drying process as they can scorch if left in the oven for too long. Searing can ruin the flavor and make the onions less nutritious.
 Crumble the onions when they are ready. When the onions are done, they are brittle enough to crumble with your hands. You can make onion flakes this way.
 - For onion flakes, you probably just crush the onions with your hands. For onion powder, put the onions in a plastic bag and roll over them with a rolling pin.
- You could leave the onion slices whole, but make sure they are brittle and tender so that they can easily fall apart if handled roughly.
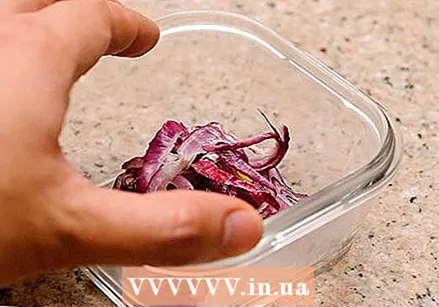 Keep them in a cool, dry place. Place the onion flakes in an airtight container and keep them in a pantry or similar storage area.
 - Dried onions can be kept for up to 12 months if vacuum sealed. In slightly less airtight conditions, the onions can be stored for 3-9 months.
- Pay attention to moisture. If you find moisture in the packaging of the onions during the first days of storage, take the onions out, dry them, and dry the container before putting them back in. Moisture can cause the dried onions to spoil more quickly.
Method 3 of 3: Drying with a drying oven
 Prepare the onions. The onions must be peeled and cut into rings of 3 mm thick.
 - Cut the root end of the onion and peel the onions.
- Use a mandolin to slice the onion, if you have one, on the smallest or next-to-smallest setting. If you don't have a mandolin, use your sharpest kitchen knife to slice the onion as thinly as possible.
 Place the onions on the drying trays. Place the onion slices in a single layer on the drying trays, ensuring they have adequate air circulation.
 - The onion slices or rings should not overlap or touch each other. Keep them fairly spaced to maximize air circulation.
- The drawers should also be placed far apart in the drying oven. Leave at least 5 to 87 cm of space between drawers to maximize air circulation.
 Let the drying oven run for about 12 hours. If your dryer has a thermostat, run it at 63 degrees Celsius until the rings are dry.
 - If you have an older or cheaper drying oven without a thermostat, you need to keep a closer eye on the drying time. You may need to increase or decrease the time by an hour, and you can monitor the temperature with an oven-safe thermometer to measure the time difference to consider.
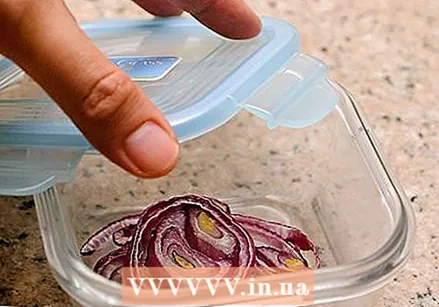 Store the dried onions in an airtight container. Store the onions in a cool, dry place. Use them in your kitchen or eat them like that.
 - If you vacuum-pack the dried onions, they can be kept for up to 12 months. Under slightly less airtight conditions, the onions can be kept for 3-9 months.
- Pay attention to moisture. If you find moisture in the packaging of the onions during the first days of storage, take them out, dry them further, and dry the packaging before putting the onions back in. Moisture can cause the dried onions to spoil more quickly.
- You can also grind the onions into flakes or powder for culinary purposes.
 Ready.
Necessities
Drying onions for the winter
- Knife or scissors
- Mesh bags, baskets, or flat carton
Dry onions in the oven
- Baking trays
- Baking paper
- Sharp knife or mandolin
- Airtight container
Dry onions in a drying oven
- Drying oven
- Sharp knife or mandolin
- Light-tight container


