Author:
Eugene Taylor
Date Of Creation:
12 August 2021
Update Date:
1 July 2024

Content
- To step
- Part 1 of 4: The basics and terminology
- Part 2 of 4: Major scales
- Part 3 of 4: Minor scales
- Part 4 of 4: Other useful scales
- Tips
Scales are one vital part of every musician's repertoire. They provide essential building blocks for composition and improvisation in almost every style and genre. Taking the time to master the most basic scales can mean the difference between being an average player and an excellent musician. Fortunately, with the guitar, learning scales is usually just a matter of memorizing patterns through practice.
To step
Part 1 of 4: The basics and terminology
Do you already know a thing or two about music theory? Then you can skip the scales as they are discussed here.
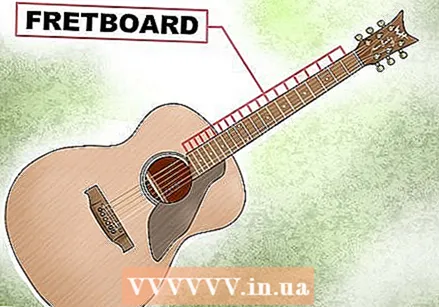 Understand what the keys of the guitar are. On a guitar, the longest part you place your fingers on is called the fingerboard (or fretboard). The metal thresholds on the fingerboard are called the frets or fretwire and divide the fingerboard into segments. Scales are formed by playing the notes just behind the fret in different patterns, so it's important to learn to recognize them. See below:
 - The frets are numbered from the top of the neck to the body of the guitar. For example, the fret at the end of the neck is called the first fret (or "fret 1"), next is the second fret, etc.
- Holding down the string just behind a certain fret and striking that string with your other hand above the body of the guitar produces a sound, a note. The closer the frets are to the body of the guitar, the higher the notes.
- The dots in the segment associated with a fret are just a reference point - making it easier to know where to place your fingers without having to keep counting which fret you are at on the fretboard.
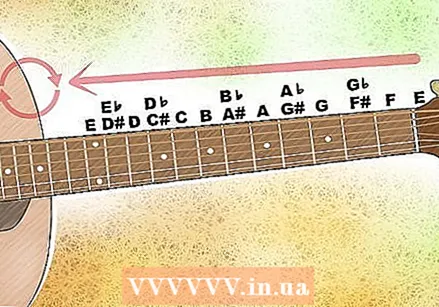 Learn the names of the notes on the fretboard. Each fret on the guitar plays a note with a name. Fortunately, there are no more than 12 notes - after that the names are simply repeated. You can play the following notes. Note that some notes have two different names:
 - A, A # / Bb, B, C, C # / Db, D, D # / Eb, E, F, F # / Gb, G, G # / Ab. After this sequence, the next note is simply called A again, and it repeats.
- Learning the positions of the different notes is not very difficult, but it would take a little too much space to cover that in this article. If you need help with that, read the article on wikiHow on this topic.
 Learn the names of the different strings. You can refer to the different strings by names like "thickest, second thickest," etc., but it is a lot easier to talk about scales if we know the correct names for the strings. This is also useful because the strings are named after the note they sound when no strings are pressed. On a regular guitar with 6 strings in standard tuning, the strings are called:
 - E (thickest)
- a
- D.
- G.
- B.
- E (thinnest) - Note that this has the same name as the thickest string, so many people refer to it as the "low" and "high" E to tell them apart. Sometimes you also see a small letter "e" to indicate the thinnest string.
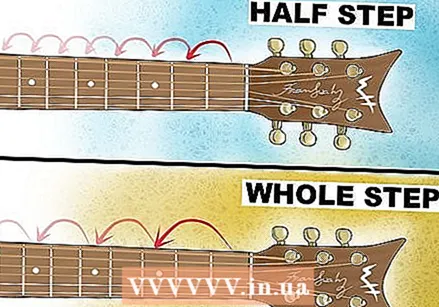 Understand the concept of whole and half tone distances in a scale. In simple terms, a scale is simply a series of notes that sound beautiful when you play them in sequence. When learning the scales below, we see that all scales are made up of patterns or "whole steps" and "half steps." This sounds complicated, but it's just a way of describing the different distances on the fretboard:
 - A half step is a distance of 1 fret up or down. For example, if you're playing a C (A string, third fret), moving 1 fret up will give you a C # (A string, fourth fret). We can say that the C and C # are half a step apart.
- A whole step is the same, except that the distance is equal to 2 frets. For example, if we start on the C and go up 2 frets, we play a D (A string, fifth fret). So, C and D are quite a step apart.
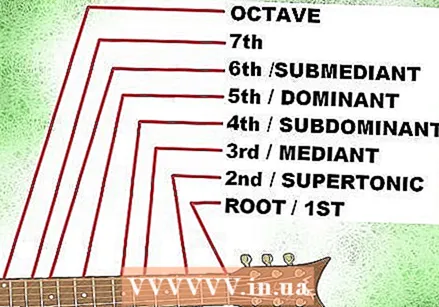 The steps of a scale. We are almost ready to start learning scales. The last concept to learn has to do with the fact that the notes of a scale are given special numbers to aid in the recognition of the notes, called "kicks," because scales are sequences of notes that are supposed to be arranged in a certain order. played. The stairs are listed below. Learning the numbers for each stage is very important - the other names are less commonly used.
 - The note you start with is called the root note or prime. Sometimes it is also called the tonic.
- The second note is called the second or second.
- The third note is called the third or third.
- The fourth note is called the fourth or subdominant.
- The fifth note is called the fifth or dominant.
- The sixth note is called the sixth or sixth.
- The seventh note is called the seventh - it has a few other names depending on the scale, but that is beyond the scope of this article.
- It is called the eighth note octave. It is sometimes also called the tonic because it's the same note, but higher.
- After the octave you can start over from the second or continue counting from the ninth. For example, the note after the octave can be called the "ninth" or the "second", but it is the same note.
Part 2 of 4: Major scales
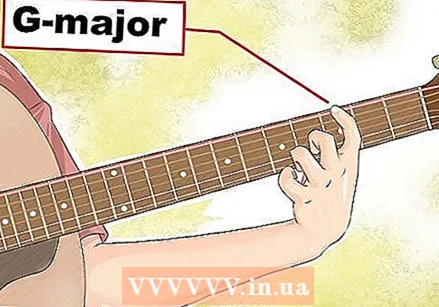 Choose a note for the scale you start with (root note). The kind of scale we're going to learn in this part is the major. This is a good ladder to start with because many of the other scales are based on the major. The nice thing about the scales is that you can start them on any note. To start, pick a note below the 12th fret on the low E or A string. Starting on one of the lower strings gives you plenty of room to move up and down the scale.
 - For example: we start on the G. (low E string, third fret). In this section, you'll learn how to play the G major scale - scales are named after the root.
 Learn the pattern of the steps of the major ladder. All scales can be written as full and half step patterns. The step pattern of a major scale is extra important to learn, because many of the other scale patterns are derived from it. See below :
 - Start with the root, then follow these steps:
- Whole step, whole step, half step, whole step, whole step, whole step, half step.
- For example, if we start on the G, then we first go a whole step to the A. Then there is another whole step to the B. Then a half step to the C. Following the above pattern, we continue up on the scale with the D, E, F # and finally the G.
- Start with the root, then follow these steps:
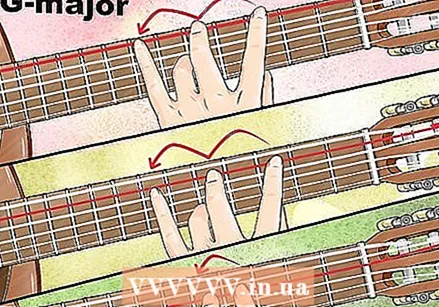 Learn the fingering for major ladders. You can play an entire scale on one string, but this is kind of strange - you won't see a guitarist doing this very often. It is much more common to play the scales across different strings so that you can minimize the number of movements with your left hand.
 - The G major scale we just learned starts on the third fret of the low E string. We play the A and B in the fifth and seventh position (frets) of the E string.
- Then we play the C on the third fret of the A string. The D and E on frets five and seven of the A string.
- Then the F # follows on fret four of the D string. We finish with the G on the fifth fret of the D string. Note that it was not necessary to move the left hand up or down the neck to do this - just switch strings and straighten your fingers.
- All together this looks like this:
- Low E string: G (fret 3), A (fret 5), B (fret 7)
- A string: C (fret 3), D (fret 5), E (fret 7)
- D string: F # (fret 4), G (fret 5)
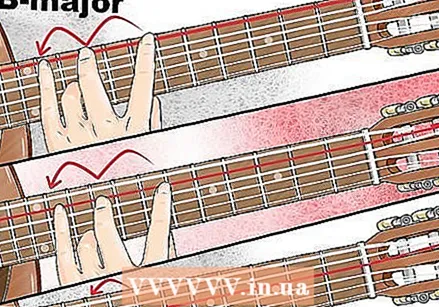 Try this pattern in different positions on your guitar. As long as you start on the low E or A string, you can play the major scale pattern you just learned anywhere on the guitar neck. In other words, shift all notes up or down by the same number of frets / steps to play a different major scale.
 - For example, if you want to play a B major scale, move the entire pattern to the seventh fret of the low E string. Then use the same fingering as before to play the following scale:
- Low E string: B (fret 7), C # (fret 9), D # (fret 11)
- A string: E (fret 7), F # (fret 9), G # (fret 11)
- D string: A # (fret 8), B (fret 9)
- Again, you are using the same pattern for your fingers as with the previous scale. Simply move the pattern up or down to play different major scales.
- For example, if you want to play a B major scale, move the entire pattern to the seventh fret of the low E string. Then use the same fingering as before to play the following scale:
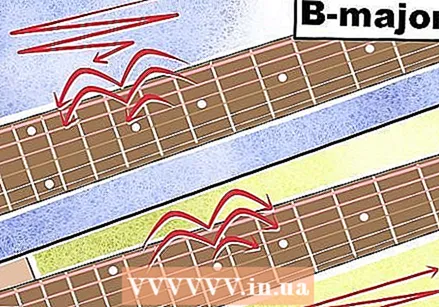 Learn the scale up and down. Usually you don't play scales in one direction. Once you've mastered the major scale, try to play it down from the octave as well. All you have to do is play the same notes in reverse order - no changes necessary.
 - For example, if you want to play a B major scale up and down, you play the following notes:
- Up: B, C #, D #, E, F #, G #, A #, B
- Down: B, A #, G #, F #, E, D #, C #, B
- If you want to play the scale in a 4/4 time, play each note as a quarter or eighth. Strike the octave twice or go to the ninth (just a whole step above the octave), then down again. This way you have the correct number of notes ahead so that the scale runs "in time".
- For example, if you want to play a B major scale up and down, you play the following notes:
Part 3 of 4: Minor scales
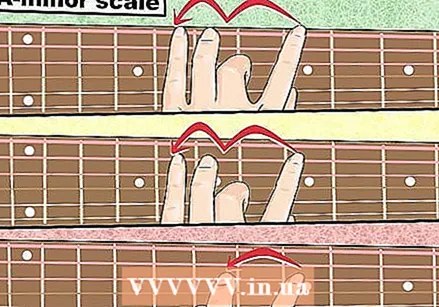 Learn to recognize the difference between a minor and a major scale. A minor scale has many similarities with the major scale. Like a major scale, it is named after the root (such as E minor, A minor, etc.). Most of the notes are even equal. There are just a few changes you need to make:
 - The minor scale has one lowered third stage.
- The minor scale has one lowered sixth stage.
- The minor scale has one lowered seventh stage.
- You lower a note by moving it half a step down. This means that the third and seventh notes of the scale are one fret lower than in the major scale.
 Learn the steps to take for a minor ladder. A lowered third, sixth, and seventh in a minor scale changes the step pattern of the major scale. Incorporating this new pattern is important in learning the different minor ladders.
 - The pattern of the minor scale, starting from the root note, is:
- Whole step, half step, whole step, whole step, half stepwhole step, whole step.
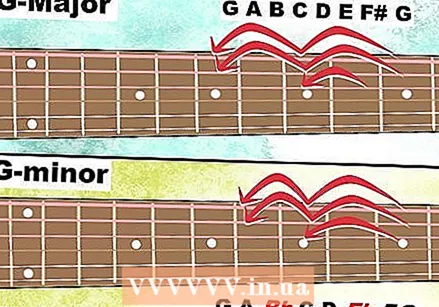
- For example: if you have a G minorladder, you start with a G major scale and move the third, sixth, and seventh steps each half a step. A G major scale is:
- G, A, B, C, D, E, F #, G
- ... so a G minorladder:
- G, A, Bb, C, D, Eb, F. G.
- The pattern of the minor scale, starting from the root note, is:
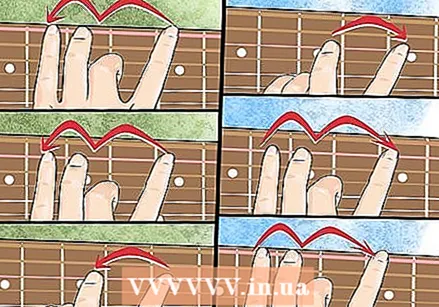
 Learn the fingering for minor scales. As with the major scales, the notes in the minor scales are played with a certain pattern of frets that you can slide up or down the fingerboard to play different minor scales. As long as you start on the low E or A string, the minor pattern will remain the same.
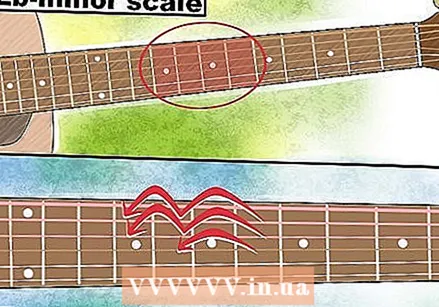
 - For example, let's play an Eb minor scale. You do this by taking an Eb minor scale and sliding the third, sixth and seventh steps down one fret, as follows:
- A string: Eb (fret 6), F (fret 8), F # (fret 9)
- D string: Ab (fret 6), Bb (fret 8), B (fret 9)
- G string:Db (fret 6), Eb (fret 8)
- For example, let's play an Eb minor scale. You do this by taking an Eb minor scale and sliding the third, sixth and seventh steps down one fret, as follows:
 Practice playing the scale up and down. As with the major scales, you play them both ways, in the same pattern, but down in reverse.
 - For example, if you want to play an Eb minor scale up and down, do this as follows:
- Up: Eb, F, F #, Ab, Bb, B, Db, Eb
- Down: Eb, Db, B, Bb, Ab, F #, F, Eb
- As with the major scales, you can add a ninth (the F above the octave in this case) or play the octave twice to keep the pattern in 4/4 time.
- For example, if you want to play an Eb minor scale up and down, do this as follows:
Part 4 of 4: Other useful scales
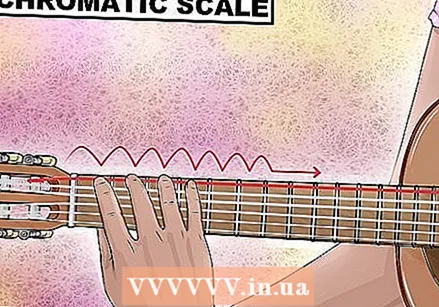 Practice chromatic scales for technique and speed. One particular scale that is useful for practice is the chromatic scale. Stand in this ladder, all stairs half a step apart. This means that a chromatic scale can be created by simply moving up and down all frets in sequence.
 - Try the following chromatic exercise: First, strike one of the strings on your guitar (it doesn't matter which one). Starts counting in a 4/4 measure. Play the first quarter note with the string open (not pressed), then on the first fret, then the second, then the third. Without stopping you play the first fret, the second, third and then the fourth. Keep playing in time and move on to the second fret, the third, fourth, and fifth. Continue this pattern until you reach the 12th fret, then go down!
- For example, if you play the high E string, this chromatic exercise will look like volts:
- Size 1: E (open), F (fret 1), F # (fret 2), G (fret 3)
- Size 2: F (fret 1), F # (fret 2), G (fret 3), G # (fret 4)
- ... etc. up to the 12th fret (and then down again).
 Learn the pentatonic ladder. The pentatonic scale has only 5 notes that all sound great together, so this scale is often used for soloing. Especially the pentatonic minor is widely used in rock, jazz and blues music. It is so often used that it is also referred to as the "pentatonic". This is the scale we are going to learn below.
 - The pentatonic minor consists of the following degrees: Root, lowered third, fourth, fifth and lowered seventh (plus the octave). Essentially it is the minor scale without the second and sixth.
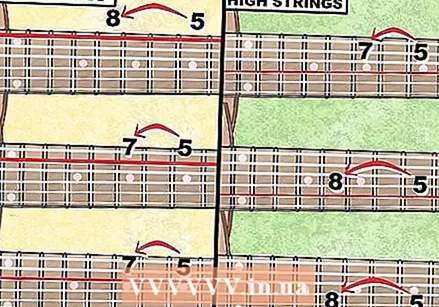
- For example, if we start on the low E string, the pentatonic A minor scale becomes:
- Low E string: A (fret 5), C (fret 8)
- A string: D (fret 5), E (fret 7)
- D string: G (fret 5), A (fret 7)
- From this point we can move on and play the same notes on a higher string:
- G string: C (fret 5), D (fret 7)
- B string: E (fret 5), G (fret 8)
- E string: A (fret 5), C (fret 8)
 Learn the blues scale. If you know the pentatonic minor scale, it is very easy to play a related scale, the "blues scale." All you need is the following: add the lowered fifth to the pentatonic minor. This gives you a 6-note scale - everything else is the same.
 - For example, if you want to convert the pentatonic scale in A minor to a blues scale in A, you would play the following:
- Low E string: A (fret 5), C (fret 8)
- A string: D (fret 5), Eb (fret 6), E (fret 7)
- D string: G (fret 5), A (fret 7)
- G string: C (fret 5), D (fret 7), Eb (fret 8)
- B string: E (fret 5), G (fret 8)
- E string: A (fret 5), C (fret 8)
- The lowered fifth note is also known as the "blue note." Even though it's in the scale, it still sounds a bit strange and out of tune, so if you're going to be a soloist, use this as leading tone - that is, play it "on the way" to another note. Do not keep the blue note on for too long!
- For example, if you want to convert the pentatonic scale in A minor to a blues scale in A, you would play the following:
 Learn all scales over two octaves. Once you've reached the octave of a scale, you don't always have to descend again. Just think of the octave as the new root and use the same pattern for a second octave. We've had a taste of this before with the pentatonic minor scale, but this is something you can learn with almost any scales. Starting with the bottom two strings makes it generally easier to play two whole octaves on the same frets. Note that the second octave usually has a different fingering, even though the steps are the same.
 - Let's learn a major scale in two octaves - if you know this, it is easy to figure out the two-octave versions in minor. Let's try the G major (the first scale we learned in this article). At this point, we know the following:
- Low E string: G (fret 3), A (fret 5), B (fret 7)
- A string: C (fret 3), D (fret 5), E (fret 7)
- D string: F # (fret 4), G (fret 5)
- Continue like this, using the same pattern: whole step, whole step. half step, etc ...
- D string: G (fret 5), A (fret 7)
- G string: B (fret 4), C (fret 5), D (fret 7)
- B string: E (fret 5), F # (fret 7), G (fret 8)
- ... and then down again!
- Let's learn a major scale in two octaves - if you know this, it is easy to figure out the two-octave versions in minor. Let's try the G major (the first scale we learned in this article). At this point, we know the following:
Tips
- Looking for an easy way to learn fingering for a variety of scales? Take a look at this handy site, with which you can quickly browse scales by root and type.
- The above instructions started with the scales on the low E and A strings. In reality, you can also start them on the higher strings - this is especially useful if you want to solo. Look at the different variations of the scales on the site above to see how many different ways the same set of notes can be arranged on the guitar's fingerboard!


