Author:
Frank Hunt
Date Of Creation:
13 March 2021
Update Date:
1 July 2024

Content
- To step
- Method 1 of 4: With the camera in Messages
- Method 2 of 4: With Snapchat
- Method 4 of 4: With Facebook Messenger
This article will teach you how to add stickers and shapes to your photos on an iPhone or iPad. You can use the built-in camera in the Messages app to add stickers to new photos, or you can use third-party apps such as Snapchat, Instagram and Facebook Messenger to edit photos from your Gallery.
To step
Method 1 of 4: With the camera in Messages
 Install a sticker pack (optional). Messages contains built-in text stickers, but free stickers / GIFs search apps, such as GIPHY, give you a choice of thousands of different stickers. To install GIPHY (or another sticker pack if you prefer):
 - Press the icon
 Open Messages on your iPhone or iPad. This is the green icon with a white speech bubble inside.
 - The camera in the Messages app makes it possible to add stickers to photos you take with the app.
- If you have an iPhone X or iPad Pro, you can add Memoji stickers to your photos without downloading additional apps. You must create a Memoji before this option becomes available in the camera.
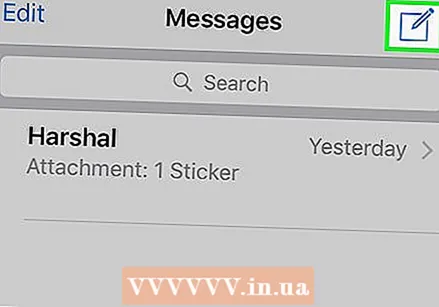 Tap the New Message icon and select a recipient. Type the name of the person you want to send the photo to or press the "+" to select someone from your contacts list. Although you will need to select a recipient, once you are done editing, you can save the image without sending.
  Tap the gray icon with a camera. This is in the lower left corner of the message. This will open the camera screen.
 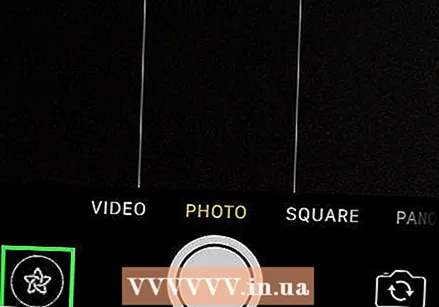 Press the Camera Effects button. This is a star inside a circle and it is in the lower left corner. This will open the Messages camera, which is a bit different. You will see that there are several icons under the viewfinder.
 - If you have a sticker pack installed, an icon for it will appear in the row of icons at the bottom of the screen.
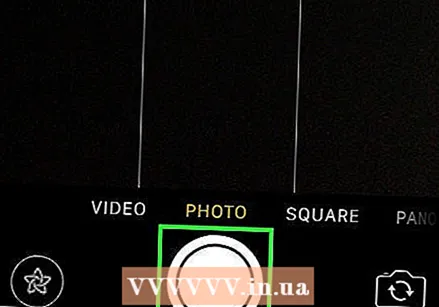 Press the round shutter button to take a photo. This is central at the bottom of the screen. A preview of your photo will appear.
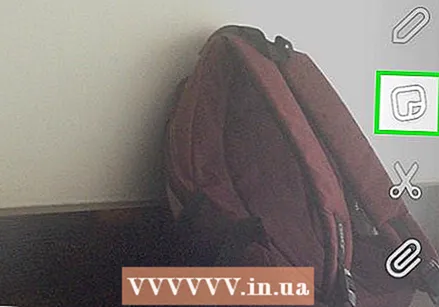
 - Press Aa to open the sticker panel for text. This will open a panel that contains all kinds of sticker options for your photo.
- If you have GIPHY installed, press the icon with the multi-colored outline of a sticker (a rectangle with a creased corner) instead. You may have to swipe left above the icons to find this.
- If you want to use a Memoji, press the monkey icon.
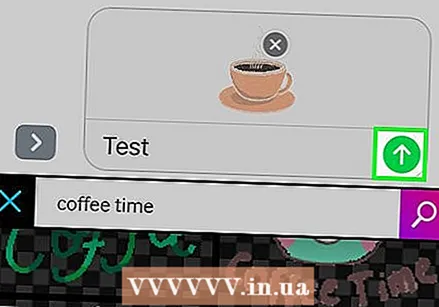
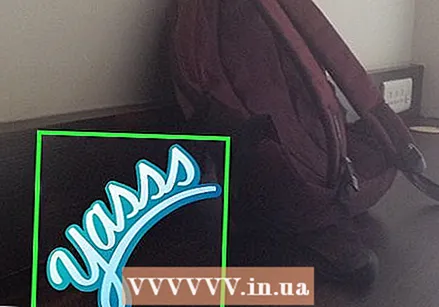
 Find a sticker and press it. If you're adding a text sticker, swipe up the panel at the bottom of the screen to see what's available, then tap the one you want to use.
 - If you're using GIPHY, use these tips to find a sticker:
- Browse: Below the search bar there are several tabs (POPULAR, FAVORITES, ACCESSORIES, etc.). Above the tabs, swipe left to view all categories, then tap a tab that interests you. Scroll down to see which stickers are available, then press a sticker to add it.
- "Search": Type a keyword in the "Search Stickers" bar at the top of the screen and press Search. Tap the sticker you want to add.
- If you're using GIPHY, use these tips to find a sticker:
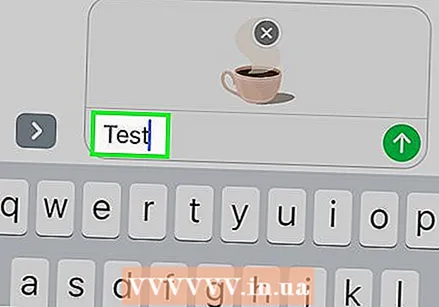 Add text to your sticker. If you selected a text sticker, the word "Text" will appear in the center, and the keyboard will also be displayed. Type the text you want to see on the sticker, then press a blank area on the photo to return to the sticker panel.
 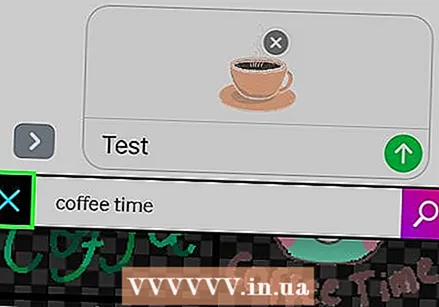 Press X to minimize the sticker panel. This is located at the bottom right of the screen.
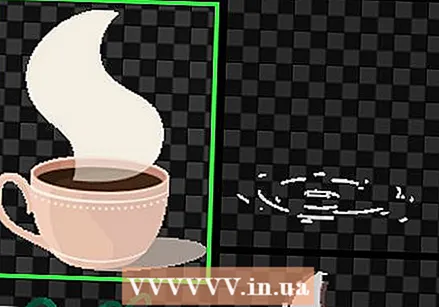
 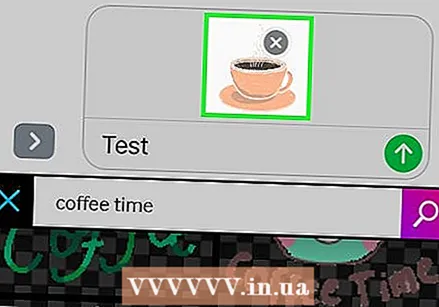 Drag the sticker to the desired location. Simply place your finger on the screen to the right of the top of the sticker and move it wherever you want.
 - To enlarge the sticker, place two fingers on it at the same time and then move your fingers away from each other.
- To make the sticker smaller, you need to bring two fingers together on the sticker.
- To flip the sticker place two fingers together on the sticker and rotate your fingers left or right as needed.
- To remove the sticker from the photo, press and hold it, then drag the sticker to the trash can at the bottom of the screen.
 Add more stickers if you wish. You can add as many stickers (from as many sticker packs) as you want.
 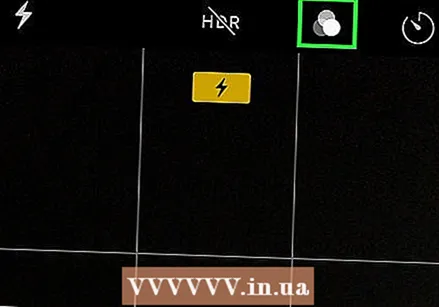 Add other effects, text or shapes. The camera in Messages also offers other optional features:
 - To add a stylized color and / or light filter to your photo, press the icon with the three colored circles under the bottom left of the photo. This will open the filter menu. Press a filter to select it, then press the "x" in the top right corner of the filter menu to exit.
- To add shapes to the image, tap the red squiggly line icon below the photo and then tap a shape. You can drag it wherever you want and then press the "x" to exit the Shapes menu.
- You may need to press "Done" in the top right corner in some versions once you are done editing the photo.
 Send or save the photo. You have three options:
 - If you want to save the photo without sending it, press the "x" in the top right corner to return to your message, then press the "x" in the top right corner to remove the attachment from the message. The photo is now saved to your Gallery in the Photos app.
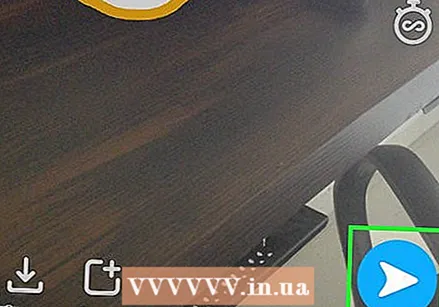
- To immediately send the photo to the recipient, press the button with the blue and white arrow in the lower right corner.
- To add a message to the photo, press the "x" in the top right corner, type your message in the blank field, then press the blue and white arrows to send.
- Press the icon
Method 2 of 4: With Snapchat
 Open Snapchat
 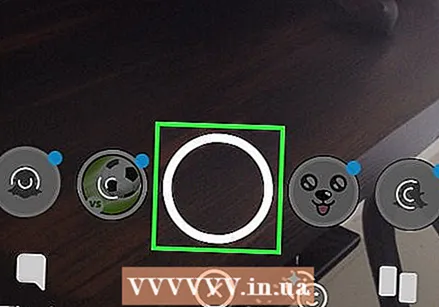 Snap a new photo or video. Press the shutter button (the large circle at the bottom of the screen) to take a photo, or press and hold the shutter button to record a video. When you are done, a preview of the photo or video will appear.
 - To add stickers to a photo in your gallery, press the MEMORIES icon (the two overlapping photos) below the shutter release button, press "GALLERY" and then a photo to open it. Press "Edit Photo" to enter edit mode.
 Press the sticker icon. This is the square creased corner icon on the right side of the screen. This will open the sticker menu.
  Select a sticker. You can search the stickers by swiping left through the categories and then scrolling to see all the options. You can also search for keywords using the Search bar at the top of the screen. When you see a sticker you like in the menu, press it to add it to your photo.
 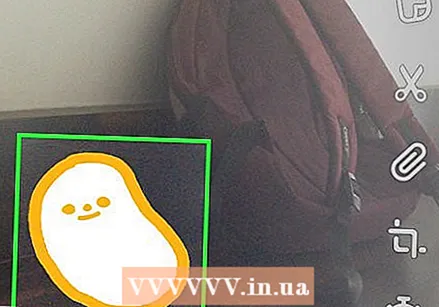 Adjust the size and position of the sticker. Use a finger to drag the sticker to the desired location and use the following tips to adjust its size and position:
 - To enlarge the sticker, place two fingers on it at the same time and then move your fingers away from each other.
- To make the sticker smaller, you need to bring two fingers together on the sticker.
- To flip the sticker place two fingers together on the sticker and rotate your fingers left or right as needed.
- To remove the sticker from the photo, press and hold it, then drag the sticker to the trash can at the bottom of the screen.
 Share the image or video.
- Tap the blue and white paper airplane in the lower right corner of the screen to share your creation on Snapchat. You can choose a specific person or group of people to share with or include it in your story.
- If you choose an image or video on your phone or tablet, you can press the Share icon
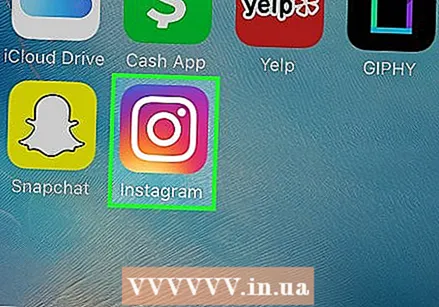 Open Instagram on your iPhone or iPad. This icon is orange and purple and has a white camera inside. You can use Instagram's Stories feature to add stickers to photos.
 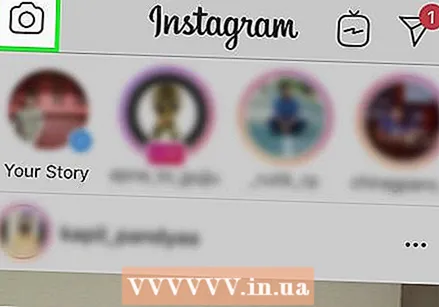 Press the icon with the camera at the top left. This will open the Stories camera.
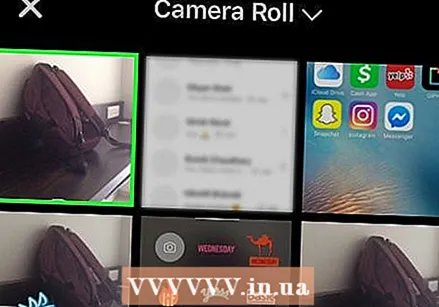
 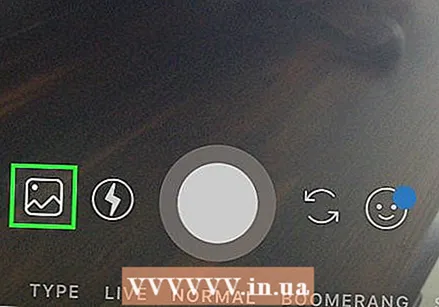 Tap the Gallery icon. This is the square in the lower left corner of the screen. This will open a list of photos recently added to the Gallery.
 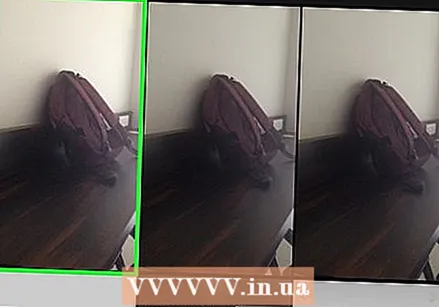 Tap the photo you want to edit. Scroll through the photos and press one of them to select it. If you don't see the photo, press the drop-down menu near the top left corner to browse other folders.
 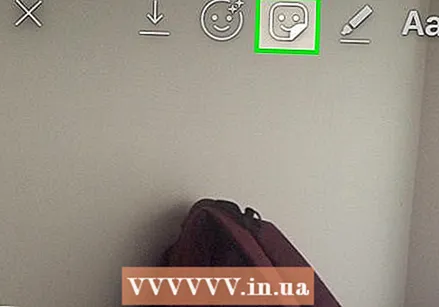 Press the sticker icon. This is the square smiley sticker with a creased corner at the top of the screen. This will open the Sticker menu.
 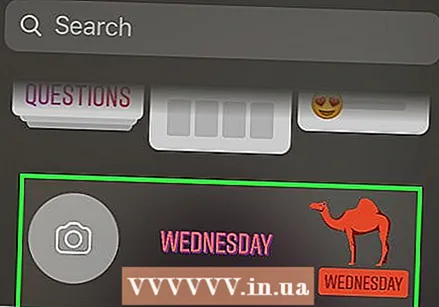 Find a sticker. Scroll down to see all available options, then press a sticker to select it.
 - To search for a specific sticker, you have to type a keyword in the Search bar at the top of the menu.
- For more animated options, press the "GIF" button in the Sticker menu (in the second row) to open GIPHY's search engine and then look for a sticker. Note that when you save the image, it will be saved as a short video instead of an image.
 Adjust the size and position of the sticker. You can drag the sticker anywhere on the photo with your finger. If you need to resize the sticker, do the following:
 - To enlarge the sticker, place two fingers on it at the same time and then move your fingers away from each other.
- To make the sticker smaller, you need to bring two fingers together on the sticker.
- To flip the sticker place two fingers together on the sticker and rotate your fingers left or right as needed.
- To remove the sticker from the photo, press and hold it, then drag the sticker to the trash can at the bottom of the screen.
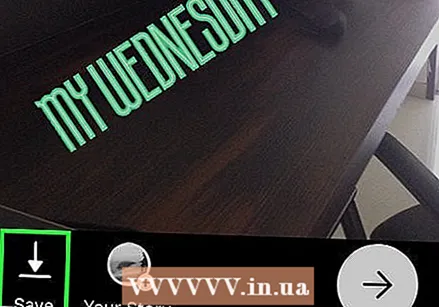
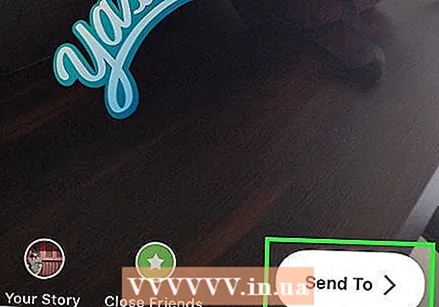 Share or save the photo.
- If you want to save the photo without sharing it, tap the Save icon near the top of the image to save it to your gallery.
- To share the image with others, press 'Send to' in the lower right corner and then 'Share' next to 'Your Story' (to share your story), or 'Send' next to the contacts you have this with. want to share immediately.
Method 4 of 4: With Facebook Messenger
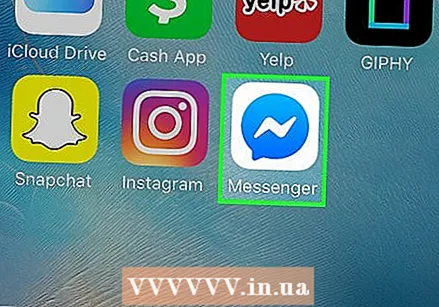 Open Messenger on your iPhone or iPad. This is the blue speech bubble with a white lightning bolt inside.
 - If you don't have Messenger, you can open the Facebook app and tap the camera icon at the top left. This allows you to use the same stickers.
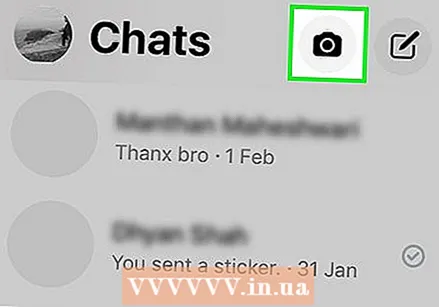 Press the icon with the camera. It's in the top right corner of the screen.
 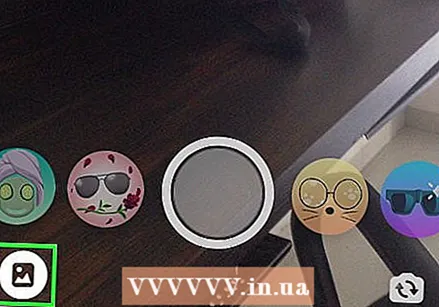 Tap the Gallery icon to select a photo from your phone or tablet. This is in the lower left corner.
 - If you'd rather take a new photo, press the large circle at the bottom center of the screen to do so now.
 Tap the image you want to edit. This will open the image in edit mode.
 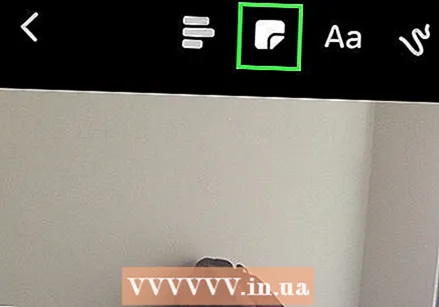 Press the sticker icon. This is the square smiley sticker at the top of the screen with a creased corner. This will open the Sticker menu.
  Select a sticker. Browse the options and then press the sticker you want to add.
  Adjust the size and position of the sticker. You can drag the sticker anywhere on the photo with your finger. If you need to adjust the size of the sticker, do the following:
 - To enlarge the sticker, place two fingers on it at the same time and then move your fingers away from each other.
- To make the sticker smaller, you need to bring two fingers together on the sticker.
- To flip the sticker place two fingers together on the sticker and rotate your fingers left or right as needed.
- To remove the sticker from the photo, press and hold it, then drag the sticker to the trash can at the bottom of the screen.
 Press Save. This is in the bottom left corner. This will save a copy of the photo to your Gallery.


