Author:
Judy Howell
Date Of Creation:
5 July 2021
Update Date:
1 July 2024

Content
Face painting is fun for any occasion, whether you're painting faces for a birthday party or preparing faces for Halloween. For some, face painting can be a hobby or even a full-time career for many talented artists. Whatever your goals, the possibilities for exciting and original designs are as wide as your imagination! Follow these steps to learn how to paint.
To step
Part 1 of 2: Gathering the materials
 Buy the right face paint. Having the right face paint should be your first consideration. Having an eye for safety, variety and quality will help you paint the face of your dreams.
 - First, be safe. Only use make-up that complies with the Commodities Act, so that it does not cause damage to the person whose face you are painting. Improper make-up can cause rashes or allergic reactions, and even in extreme cases cause permanent damage. Avoid the following products:
- Watercolor pencils, markers or pens. They can be "washable" on fabric, but that doesn't mean they're okay for the skin.
- Craft acrylic paint. They may be "non-toxic," but that does not mean they are suitable for face painting.
- Avoid oil-based paints. They are difficult to remove and stain easily.
- Collect a variety of colors.
- At the very least, you will need black, white, red, blue, and yellow paint. You can mix these colors to create any color in the spectrum.
- If you don't have time to mix colors, choose a color palette with at least 8-14 colors.
- First, be safe. Only use make-up that complies with the Commodities Act, so that it does not cause damage to the person whose face you are painting. Improper make-up can cause rashes or allergic reactions, and even in extreme cases cause permanent damage. Avoid the following products:
 Make sure you have the right brushes. Without the right brushes, the hard work of choosing the right color will have been in vain. The right brush can go a long way in helping you paint a face that is as accurate and detailed as possible.
 - Variety is key. At least three types of brushes are crucial for a balanced look:
- A round brush # 2 should be used for the fine details.
- A round brush # 4 is needed for greater detail.
- A 2.54 cm wide flat brush can help you choose multiple colors.
- Expanding your repertoire will allow brushes of different thickness to finish your design more precisely.
- Variety is key. At least three types of brushes are crucial for a balanced look:
 Buy makeup sponges. Make-up sponges are useful for quickly applying make-up to large areas or for adding a base color.
 - Start with at least three sponges. You can halve them to have six.
- Having different sponges for different colors can help you avoid washing out the sponges during a make-up session. The same goes for the brushes.
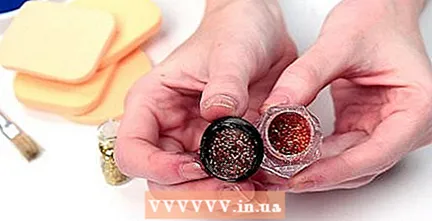 Buy glitter to add some sparkle to your art. Gel glitters are recommended for their ease of use and controlled application. But keep in mind that glitter can get a little messy and get on your face paint or areas of the face where you didn't want to apply glitter.
 - Don't forget about safety. Your glitter must also comply with the Commodities Act. The only safe glitter for face painting are made of polyester.
 Buy templates, stamps, and temporary tattoos for variety. Having these extra embellishments can add a bit more spice to your finished product.
 - Templates are ideal if you are unsure of your face painting skills, or if you are just short on time. Some classic templates are hearts, flowers, and moons. Make sure you have different sizes so that you can apply the templates to different faces.
- Face stamps can be filled in with glitter or make-up and can be a great addition to a make-up face.
- Temporary tattoos can be used even faster than stencils. However, some people's skin does not respond well to the tattoos, and it may take longer to remove them.
 Collect other materials for special effects. Sometimes the perfect look requires texture or something else that face paint cannot provide.
 - To make bumpy noses, soak a little cotton wool in the make-up, apply it to the face and cover with a tissue paper before applying make-up around it.
- For warts, just cover some wheat or puffed rice with a little face paint.
- For an extra spooky effect, apply a thin layer of flour to the person's face after you finish painting.
 Have the right furniture. It is important to have the right furniture to store your paint and make you and the person to be painted comfortable.
 - Provide a flat work surface for your make-up material, such as a table or desk.
- Also provide two chairs, one for the person who is making up and one for the person who needs to be painted, so that you can both sit comfortably during the make-up painting.
 Be prepared for the cleaning. It is just as important to be ready to clean the mess as to have the right materials for the face painting.
 - To avoid splashing the person with excess paint or water, use a plastic garbage bag with two holes in it for protection. Just cut the plastic garbage bag at the end of the process to avoid ruining your work.
- Have garbage bags and towels to clean during face painting.
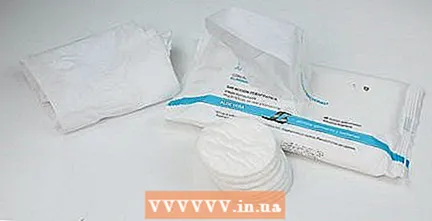
- Have washcloths and make-up remover for your customers.
- Make sure you have access to a sink or water so you can wash your hands between customers to prevent the spread of disease.
- Provide soapy water or disinfectant to clean your brushes and sponges.
 Don't forget the mirror. The person would like to see what your masterpiece looks like - a mirror is crucial not only for displaying your finished work, but also for showing the person your progress in the process.
Part 2 of 2: Face painting
 Have a finished product in mind. Once the person makes a decision, it's important to have an idea of what the final face will look like.
 - If you plan on using any glitter, special effects, or tattoos, make a note of it so you don't add it too late in the process.
- Think fast. Children are impatient and can change their mind if you delay too long.
 Let the make-up dry before starting the next layer. Having patience will keep you from mixing or smudging the makeup you worked so hard on before.
 - Let the first color dry before applying the second color. If you don't wait, the two colors may mix and you have to start over.
- After you've waited, apply the colors slowly, making sure they don't mix and avoid smudging.
- Instead of applying one thick color coat, apply several thin coats of color to prevent cracking.
 When done, give the face time to dry. Any time you spent creating the perfect look will be ruined if you don't give it enough time to let it dry.
 - Instruct the person you painted not to touch their face for about 5 minutes, until their face is dry.
- Alternatively, you can use a portable fan to make the face paint dry faster.
 Hold a mirror in front of your client to show the result. He or she will be impressed with your efforts and ready to show off his or her new look.
 - Take a photo of your customer to show to future customers.
- Let the person show off his or her look to your customers or potential customers. This will help you gain credibility as a face paint artist, whether you want to make a career out of it or are just looking for potential clients for fun.
Tips
- If you plan on doing face painting professionally, it would be advisable to take out liability insurance.
- To make sure you can apply a new design neatly and quickly, practice it before applying it to someone's face.
- Look at art from another face paint artist online and sketch a simplified version in pencil.
- Mixing the make-up with a little water on a saucer makes it flow more easily.
- Experiment with different utensils such as cotton buds and cotton balls to achieve different effects.
Warnings
- Only use make-up that is clearly marked ONLY for use on the skin, which complies with the Commodities Act. Using acrylic, oil, or craft paint on the skin is not safe.
- Very small children don't usually like the feel of face paint as it is cold and can tickle them a bit, so just pop a dollop of red paint on their little nose and you have an instant clown!
Necessities
- Make-up
- Brushes
- Sponges (natural sea sponges are the best)
- Glitter
- Lots of clean water
- Plate or saucer
- Towel or washcloth
- Mirror
- Paper tissues
- Portable fan (to help dry the face paint)
- Display board (to show people your designs)
- Hair bands (to keep hair out of the face if necessary)


