Author:
Charles Brown
Date Of Creation:
9 February 2021
Update Date:
1 July 2024

Content
Painting is a medium in which many people feel that they can express their emotions and thoughts.It is not necessary to have experience, and if you have ever taken a drawing class, even if it was finger painting in elementary school, then you have had an introduction to painting.
To step
- Choose your paint. Try using watercolor or acrylic paint for your first painting. Both are water based and easy to use. In the future, after you've painted for a while, you may want to experiment with oil paint.
- Watercolor paint is available in tubes or cubes of pressed pigment. When used without water, it is thick and opaque and cannot spread over a large area. When used with water, it thins out and becomes translucent. Water color is used on paper made specifically for watercolor painting; any piece of scrap paper will not necessarily work very well. If you're having trouble finding the right type of paper, an employee of a drawing & painting specialist will be more than happy to show you the different blocks of watercolor paper.
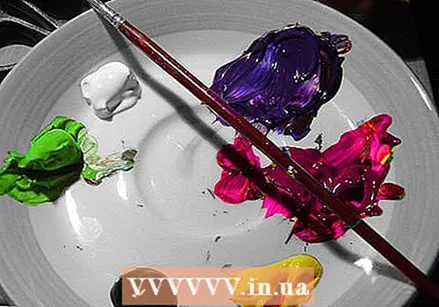 Acrylic paint are tubes of paint for immediate use. They don't need to be thinned, but they can be used to achieve the desired effect such as shades and better coverage, as well as making your paint last a little longer. Unlike watercolor paint, acrylic paint will not be editable after drying, so don't squeeze out extra paint than necessary. If you have leftover paint that you would like to reuse, seal the tray or cup tightly with plastic wrap or aluminum foil. It will last for a few days up to a week. Acrylic paint is used on a canvas panel, a canvas with a cardboard back, or a canvas stretched over a wooden frame.
- Buy a canvas panel. Beginners may feel more comfortable with a canvas panel than painting on a stretched canvas. Canvas panels are cheap and just as good for painting, although some artists argue that stretched and mounted canvas is more professional. The only downside is that if too much water or thick coats of paint are applied, the canvas will curl inward. This can be remedied by painting a large X from corner to corner on the back to counteract the curl. You will have the same problem with watercolor paper, and you can do the same, but just make sure your X is applied with white paint to prevent a dark color from showing through your painting.
- Select brushes.
- The bigger the brush, the wider the stroke. The smaller the brush, the finer the stroke. Therefore, a larger brush will finish painting large areas of the canvas faster. A smaller brush is easier to add detail. For example, if you are painting a landscape, you can use a large brush to capture the base color of the sky. Then with a smaller brush you can add clouds of different shades, sun rays, sky gradient or even stars or birds.
- When considering brushes, it's not just the size that matters, but the material. Most of the brushes you will come across and probably use the most are made of synthetic hair. Make sure to rinse the paint from the brush when you are done. When acrylic paint dries, it turns into plastic and will ruin your brush. While working, keep your brushes in a cup of water to prevent hardening.
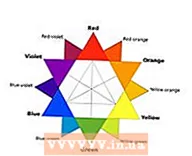 Familiarize yourself with the color wheel, a circle of the primary and secondary colors.
- The primary colors are: red, blue and yellow. These are colors that come straight from a tube, they cannot be obtained by mixing other colors. However, secondary colors (purple, green, and orange) can be made from the primary colors.
- red + yellow = orange
- yellow + blue = green
- red + blue = purple
- Mix the two primary colors in equal amounts to get a clean color, or add a little more of one color than another. For example, making purple with a little more blue than red will result in a dark blue color, while mixing with more red will result in a deep maroon.
- Adding a small amount of white or black to a color will lighten or darken the color. With certain colors, mixing more white or black will drastically change the color, as red mixed with white will make the color pink.
- If a color is too light for your taste, mix the color with its opposite color to dull the vibrancy. The opposite color is the one directly opposite the color on the color wheel, that is, the opposite color from red is green, from yellow is purple, and from blue is orange.
- The primary colors are: red, blue and yellow. These are colors that come straight from a tube, they cannot be obtained by mixing other colors. However, secondary colors (purple, green, and orange) can be made from the primary colors.
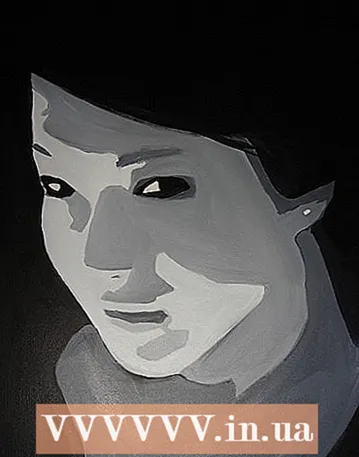 Only paint with white and black. Or just choose two colors to use in combination with white and black. Paint a picture with just these colors.
- Pick a subject and deliberately distort and distort its anatomy. In this case, paint a cat with legs longer than the length of its body, a house with its typical features that bends in a spiral, etc.
 Illustrate a dream you have had before.
- Ask someone to write down 3 - 5 random words and paint what comes to mind when you read them.
- Try painting water. It can be anything from an ocean to running water from a tap.
- Practice techniques.
 When painting with acrylic paint, paint in layers. This means you start with the furthest thing in the background, for example, painting the sky, then the mountain, then the plain in your background, then the trees, the grass, and the subject or object in front of your foreground. This will avoid having to paint around anything.
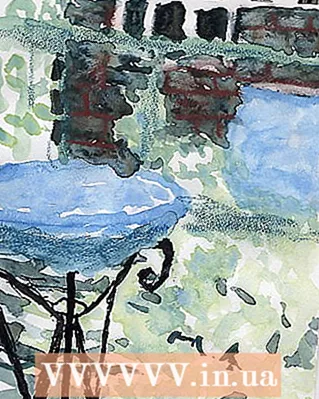 When painting with watercolors, you should always start from the lightest to the darkest. Traditionally, there is no white in watercolor paint. But these days you can cheat because it is possible to buy a white watercolor paint, but for best results, start with very, very light colors for your sketch before painting with the dark ones. An example of this could be painting something shiny, such as a blue bowl. Take a very watered down light blue and roughly sketch the shape of the bowl, then outline, not fill in, the sketch where the bowl's light reflections are so that it gives shape and looks more realistic.
Tips
- Take a look at some classic examples of paintings, such as the work of Pablo Picasso, Johannes Vermeer, Vincent van Gogh, Salvador Dali, Frida Kahlo, Jackson Pollock, Edvard Munch and Pierre-Auguste Renoir. They will give you an idea of different styles of painting.
- Visit art museums in your area. If there are no museums, check with art departments in colleges or schools in the area to see if they exhibit anything.
- Creating skin tone doesn't have to be tricky, but if you just mix orange and white for a peachy hue, you'll find that it looks dull and unrealistic. Take a moment to look at your own skin. The underlying veins make the difference in colors. For light skin tones, just add a touch of green and for dark skin tones, add a touch of blue.
- Watch films about art such as:
- Girl with a Pearl Earring, which portrays Vermeer's art. Several scenes are about color theories and painting methods.
- Frida, about the life and art of Frida Kahlo, provides excellent examples of illustrating vision and expression, as well as painting techniques.
- Try to have other painters as a friend. In some art schools or municipal art schools they have an open studio session in which artists can use the same space to work. Talk to others about their methods and preferred style. Seeing other people work can show you what options there are.
Warnings
- Don't give up too quickly. Painting is a typically long and repetitive hobby and can take anywhere from half an hour to months to complete a piece. Always remember that most art looks bad until it's done. If you're not happy with the way it looks, just give it some time and keep working. While working too much on a watercolor drawing can make the drawing muddy, painting a new layer on an acrylic drawing will correct, hide, or enhance the layer beneath.
Necessities
- Paint, watercolor paint or acrylic paint
- The most suitable base material for your medium: watercolor paint - watercolor paper, acrylic paint - stretched canvas, canvas panel, acrylic paper or even masonite
- Synthetic fiber brushes in different sizes
- A cup of water
- Source of information (physical model, photo, an image from a publication, etc.)
- A pallet
- Pencil and eraser for sketching a preliminary design (optional)
- Sketchbook for collecting ideas (optional)
- An easel (optional)


