Author:
Roger Morrison
Date Of Creation:
22 September 2021
Update Date:
1 July 2024

Content
This wikiHow explains how to restore Microsoft Outlook to its original settings in Windows or MacOS. The easiest way to do this is to create a new profile and set it as the default.
To step
Method 1 of 2: Windows
 Open the Windows search bar. To do this, click on the magnifying glass or circle to the right of the Start menu.
  Type control panel in the search bar. A list of search results will appear.
  click on Control panel.
 Type mail in the search bar of Control Panel. You can find this in the top right corner of the screen.
 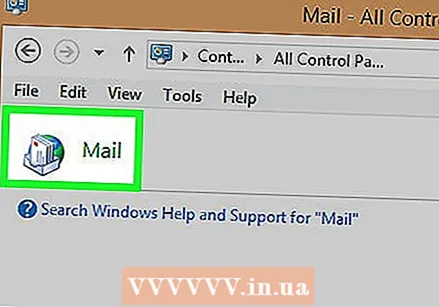 click on Mail (Microsoft Outlook 2016). You will have a different version number on your computer.
  click on Show profiles. You can find these under the heading "Profiles".
  click on Add. This is the first button below the list of profiles.
  Name the profile and click OK. The name of the profile goes into the "Profile Name" box.
 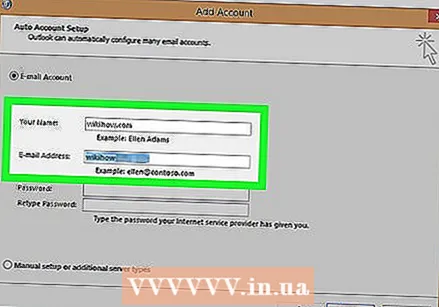 Enter your account details and click Next one. These are the login and password information that you use to connect to your mail server. Outlook tries to connect to the server.
  Enter your Windows password and click OK. If you don't see this option, just go to the next step.
  click on Complete. This option can be found at the bottom of the window. This will save your new profile.
  click on Always use this profile and select a new profile. This tells Outlook to open a new, empty profile.
  click on OK. Your settings have now been saved. When you open Outlook, you will see that everything has been reset. Your email and calendar information is synchronized with the server so that you can access your messages.
Method 2 of 2: macOS
 Open Finder
  Double click on the folder Programs. A list of installed apps will appear.
  Press Ctrl and click on Microsoft Outlook. A menu will open.
  click on Show package contents. Additional folders will appear.
  Double click on Content.
 Double click on SharedSupport.
 Double click on Outlook Profile Manager.
 click on + Create new profile.
 Name the new profile and click OK. This is usually your first and last name.
  Select the new profile. After creating the new profile, click it once to select it.
  Click on the menu Set the default profile and select Set as Default. Now that you have a new default profile, Outlook will look empty. You must add your account to this new profile to start using it.
  Open Outlook and click on the menu Utilities. You can find this at the top of the screen.
  click on Accounts.
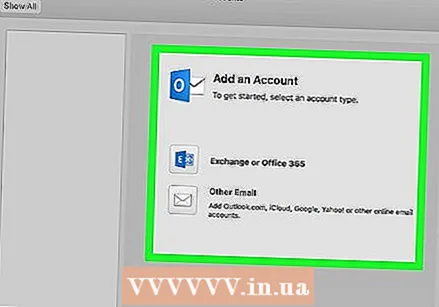 Add your new account. The steps to do this depend on your email provider. To make sure you're adding it correctly, ask your network provider for the server and login information.
 - After re-creating your account, click Always allow when asked to sync your email and calendar with the server.


