Author:
Roger Morrison
Date Of Creation:
26 September 2021
Update Date:
1 July 2024

Content
- To step
- Part 1 of 5: Preparing to go gray
- Part 2 of 5: Bleach your hair at home
- Part 3 of 5: Showing your hair at home
- Part 4 of 5: Dyeing your hair gray at home
- Part 5 of 5: Taking care of your gray hair
- Tips
- Warnings
- Necessities
Gray is a popular hair color, but unless you are naturally blonde, gray hair takes a lot of time, money, and dedication. If your hair is naturally black, expect several bleaches and weeks of waiting before you can achieve the color you want. While you will likely get better results by going to a salon, it is possible to dye black hair gray at home.
To step
Part 1 of 5: Preparing to go gray
 Choose a method. Think about whether you will be using a boxed home dye kit or professional hair dyes, or if you will be going to the hair salon. Think carefully about the costs, processes and risks that come with each method.
 - If you choose the salon method, familiarize yourself with the hair salons in your area. Costs and products will differ between salons. Check their websites or call to get an idea of the products they are using and how much the process costs. Speaking to a stylist in person will give you a clearer idea of what your process and costs will be.
- Only think about the paint kit method from a box as a last resort. When you make an extreme color change, especially one that requires a lot of bleaching, there is a risk of ending up with a color that is very different from what you want, or even seriously damaging your hair.
- For the dye kit method, read online reviews to find out which dye boxes work best on black hair specifically. A popular hair dye kit is L'Oréal Paris Preference Les Blondissimes LB01: Extra Light Ash Blonde. It won't dye your hair platinum blonde, but some people say it made their hair ash blonde in one go.
- Using professional quality products (bleach, developer, red gold corrector, and toner) is the best choice and preferred method for those who choose to bleach their hair at home. This method gives more flexibility and strength than box paint kits, and also allows you to purchase larger quantities of products to save money in the long run.
 Be prepared for the costs. Regardless of the method you choose, it will likely take several bleaches to achieve the shade of gray you want.
 - Keep time and cost (multiple salon visits, multiple purchases of paint kits, or professional hair dye supplies) in mind before deciding which method to use.
 Keep the quality of your hair in mind before dyeing it. One DIY expert says that unless your hair is light to medium-colored, moderately short, thick, and healthy, it's best to go to a salon to get your hair bleached. However, after it has initially been bleached, you can do the outgrowth yourself at home.
 - Either way, bleach will damage your hair. That's why it's so important to start with hair that's as healthy as possible, regardless of whether you're bleaching your hair at home or getting it done at a salon.
- Even though your hair feels healthy now, you can make it healthier by avoiding the use of chemicals and heat in the weeks / months before bleaching it. You can even try using a deep conditioning hair mask on a weekly basis.
 Build the health of your hair. In the weeks or months before bleaching your hair, avoid using harsh hair products, chemicals, and heat styling tools. If your hair feels damaged, use deep conditioning masks weekly until it feels healthy enough to be bleached.
 - Experts recommend that you wait at least two weeks between the times you apply chemicals to your hair. This time period can be shortened or extended depending on how healthy your hair looks and feels.
- Use good quality shampoos and conditioners that moisturize your hair without creating build-up or stripping your hair's natural oils. Look for: low pH, oil (argan, avocado, olive), glycerin, glyceryl stearate, propylene glycol, sodium lactate, sodium PCA, and alcohols starting with "c" or "s".
- Avoid: highly scented products, alcohols that contain the word "prop", sulfates, and any products that are believed to add volume to your hair.
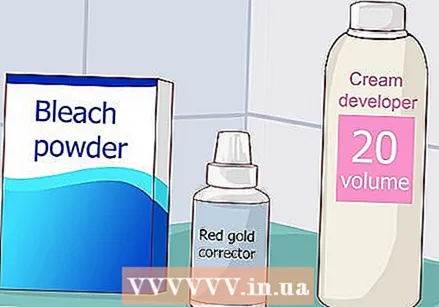 Gather your materials for bleaching your hair at home (optional). If you decide to dye your hair gray at home, you will have to start bleaching it. The following materials can be purchased online or at a beauty supply store:
 - Blonde powder: This is sold in bags or jars. If you plan on bleaching your hair more than once, a jar is the cheaper long-term option.
- Cream developer: cream developer reacts to the blonde powder to bleach your hair. Developer is sold in a variety of strengths, from volume 10 (the weakest) to volume 40 (the strongest); the higher the volume, the faster your hair will be bleached, but also the more the bleach will damage your hair.
- Many stylists recommend using volume 10 to 20. The mixture will take longer to lighten your hair, but it will also be much less damaging to your hair than higher volumes.
- If you have thin, fragile hair, use a volume 10 developer. For dark, thick hair, volume 30 or 40 may be needed.
- A volume 20 developer is the safest choice to be safe and gentle on your hair, so if you're not sure, go for it! Do not use a volume 50 developer at home.
- Red Gold Corrector (Optional): Gold gold correctors are often sold in small packages that you can mix into your bleach mix to help reduce oranginess. This is an optional step, but it is recommended because the whiter your hair, the better the gray will turn out.
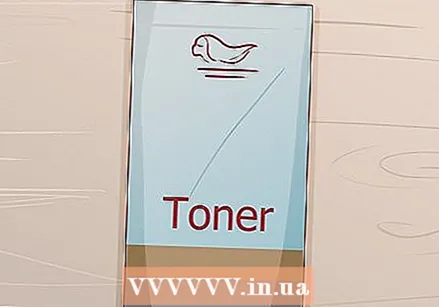 Buy a toner (if you are bleaching / dyeing at home). Toners are what will take your hair from yellow to white; the ideal basis for gray. They are sold in a variety of shades such as blue, silver and purple. Even if you don't dye your hair at home, you can use a toner every few weeks to maintain your hair color.
 - You can use toners to neutralize unwanted colors in your hair and remove oranginess. For example, to neutralize hair that is too golden, you can choose a toner that has the opposite shade on the color wheel, such as a blue or ash-based toner.
- Some toners need to be mixed with developer before applying to your hair, while others are sold ready to apply. Both types are effective, so just choose the one that appeals to you the most.
 Buy a gray hair dye (if you dye your hair at home). You should be able to find this at your local beauty supply store, but if you can't, online retailers like Amazon sell professional-quality gray hair dyes from brands. If you buy your hair dye online, pay attention to the reviews.
 - If the veins on the bottom of your wrist look blue or purple, choose a cool white-gray shade; if your veins look green or yellow, go for a warmer, steely shade of gray.
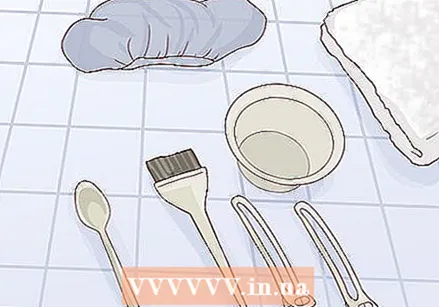 Buy hair dyeing tools (if you dye your hair at home). If you are bleaching, toner, and dyeing your hair at home, you will need a hair dye brush, plastic mixing bowl, plastic spoon, gloves, plastic hairpins, towels, and plastic wrap or a plastic shower cap. Avoid metal tools as they will react to the bleach.
 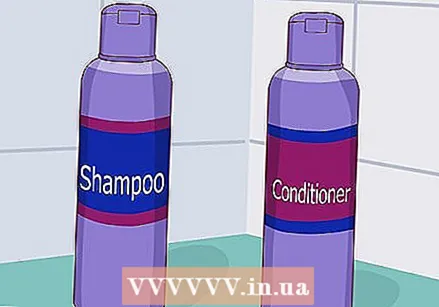 Buy good quality shampoo and conditioner. Purple shampoos and conditioners made specifically for gray hair can help your hair stay toned and reduce the chances that some of your hair will fade to yellow / blonde. If these aren't available to you, at least buy shampoos and conditioners made for colored hair.
 - Your best bet is to buy professional shampoos and conditioners, rather than buying drugstore brands. Ask your stylist to recommend products made for gray or bleached hair.
- Some shampoos can even deposit color in your hair when you use them. If you'd rather not use a color-depositing shampoo, at least buy a color-depositing hair treatment to keep your hair color fresh and reduce the amount of money you have to spend on dyeing your hair gray again.
Part 2 of 5: Bleach your hair at home
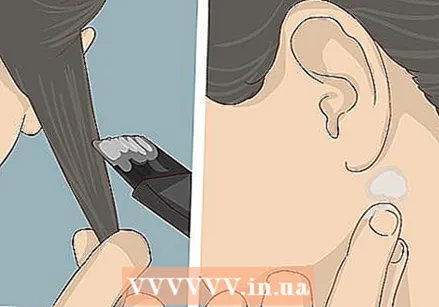
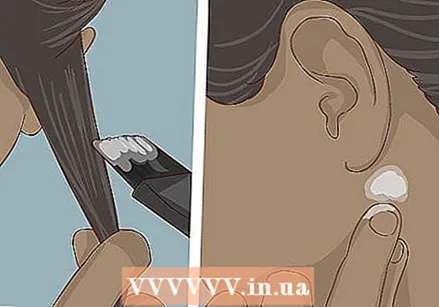 Do skin and hair tests before you start bleaching. A skin test (or patch test) is necessary to make sure you are not allergic to anything in the bleach mixture. A hair test will help you figure out how long to leave the bleaching mixture on your hair.
 - To do a patch test, prepare a very small amount of the mixture that you will be using on your hair and place a small amount behind your ear. Let it sit for 30 minutes, wipe off the excess bleach, then try not to touch or get the area wet for 48 hours. If that patch of skin still feels fine and healthy after 48 hours, continue bleaching your hair.
- To do a hair test, mix a little bit of the bleach mixture and apply it to a section of your hair. Check the piece every 10 to 15 minutes until it reaches the desired color. Note how long it took to achieve the desired shade so that you have an idea of how long it will take to bleach your entire head.
- If you only take one test, take the skin test. A severe allergic reaction can be fatal.
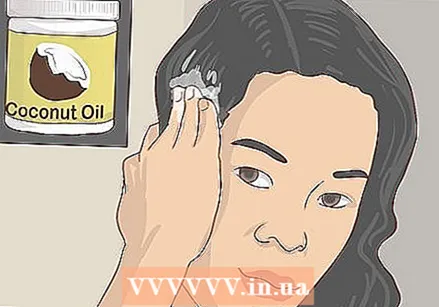 Apply coconut oil to your hair before bleaching (optional). Rub some extra virgin coconut oil between your palms to warm it up, then massage the oil into your hair and scalp. You don't have to wash out the oil before bleaching.
 - Let the coconut oil sit in your hair for at least 3 hours before bleaching. If possible, leave it in your hair overnight, the night before bleaching your hair.
- Coconut oil is an effective hair moisturizer because it is made up of molecules small enough to penetrate hair cuticles.
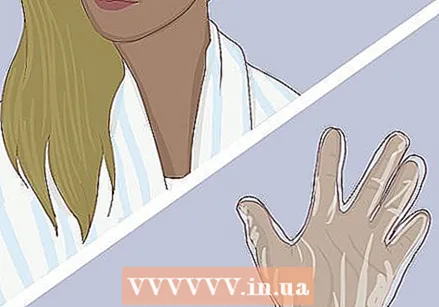
 Protect your clothes and skin. Wear old clothes that you don't mind staining and wrap an old towel around your shoulders. You will also need to protect your skin from the bleach mixture, which can cause irritation and burning. Wear flexible disposable gloves to protect your hands.
 - Have a small stack of old towels ready in case you need to wipe the bleach mixture off your skin or elsewhere.
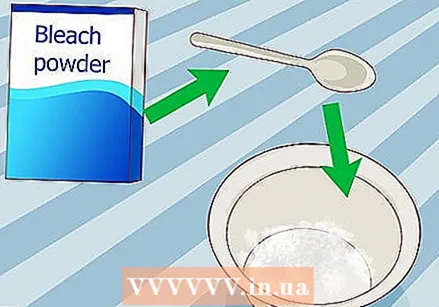 Put the blonde powder in the mixing bowl. Use a plastic spoon to place as much bleaching powder as you need in a plastic mixing bowl. The powder should come with easy to follow instructions.
 - If the powder does not come with instructions, use an approximately 1: 1 ratio of powder to cream developer. Add one scoop of powder and one scoop of developer while mixing until you have made enough bleach.
 Combine the blonde powder with the cream developer. Add the correct amount of developer to the bowl containing the powder and mix the two with a plastic spoon. Go for a thick, creamy texture, a bit like a thick sauce.
 - Unless otherwise stated on the package, the developer to powder ratio should be about 1: 1 - 1 scoop of powder per 1 scoop of developer.
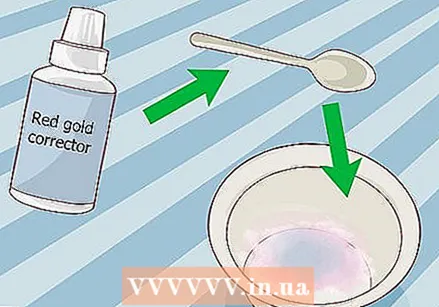 Consider adding red gold corrector to the mixture. This step is optional, but it can help reduce oranginess and whiten your hair, which will help you achieve a better gray color. When the powder and developer are mixed, add some red gold corrector to the blonde mixture. Read the instructions on the package to know how much to add.
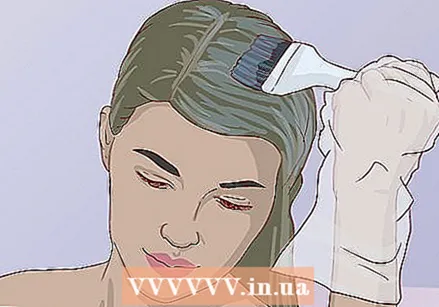
  Apply the mixture to dry hair that has not been washed for 24-48 hours. Use a hair dye brush to apply the mixture to your hair. Work into 2-4cm lengths of hair starting at your ends, working the mixture upward. Leave about 2 cm at the roots of your hair (you will do this at the end).
 - It is important to leave your hair roots for the end. The heat from your scalp will cause your roots to lighten faster than the rest of your hair.
- Work from the back to the front of your head. This will make it much easier to keep track of which hair you have already applied the bleach to. It will also help keep the bleach from getting on your clothes.
- Unless your hair is very short, use hairpins to divide your hair as you work. Make sure to use plastic (not metal) pins, as metal can react to the bleach mixture.
 Check that the mixture is evenly distributed throughout your hair. Once you have applied the bleach to all of your hair, including your roots, make sure your hair is completely saturated with the mixture.
 - You can do this by massaging your hair over your head while feeling for areas that are drier than the rest of your hair. When you discover these areas, add a little more of the bleach mixture and massage it into your hair - just avoid massaging the mixture into your scalp as this can cause irritation.
- Use a mirror to help you have a clearer view of the back of your head.
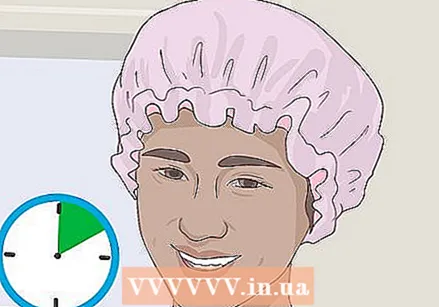
 Cover your hair with plastic wrap. You can also use a clear plastic shower cap. While the bleach is working, your scalp may sting and itch. This is normal.
 - If the tingling and stinging sensation on your scalp starts to get too painful, remove the plastic wrap and wash the bleach from your hair. If your hair is still too dark, you can try bleaching it again with a lower volume developer after 2 weeks if your hair is healthy enough.
- Avoid the urge to apply heat to your hair at this point, as applying heat can cause your hair to fall out of your head completely.
 Check your hair regularly. Check a section of hair after 15 minutes to see how far the bleaching process has gone. Spray the hair area with water from a spray bottle and use a towel to wipe away some of the bleach so you can see the color of the hair.
 - If your hair still looks too dark, reapply some more bleach to the section of hair, replace the plastic wrap, and let the bleach sit in your hair for another 10 minutes.
- Keep checking your hair every 10 minutes until it has turned completely blonde.
 Do not leave the bleach in your hair for more than 50 minutes. If you do, you may break it and / or fall out completely. Blonde agent can dissolve hair, so be very careful with it.
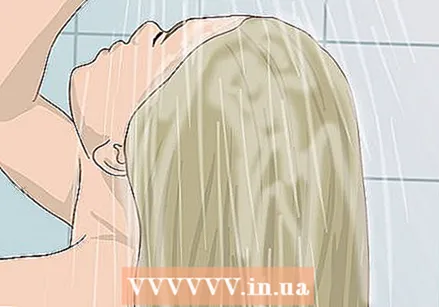
  Wash out the bleach. Remove the plastic wrap / shower cap and run your head under cool water until all traces of the bleach are gone. Wash, condition, and rinse your hair, then gently squeeze out the water with a clean towel.
 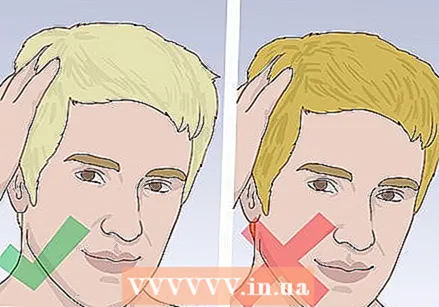 Decide whether or not to re-bleach. Your hair should be a light or bright yellow color. If it is yellow, continue with the instructions to use toner. If your hair is orange or still dark, you will need to bleach it again, but wait at least 2 weeks between bleaches.
 - Remember that the darker the blonde, the darker the gray will be, so blonde your hair as light as you want the gray tone.
- Keep in mind that you will not have to reapply the bleach to your roots if your roots are whiter than the rest of your hair. Apply the bleach only to the areas of your hair that you want to lighten further.
- You may even want to stretch the bleaching process over the course of several weeks. Depending on how dark and thick your hair is, it can take up to 5 bleaches to turn your hair light yellow.
Part 3 of 5: Showing your hair at home
 Prepare yourself to use toner. Just like during the bleaching process, you will need to wear old clothes and gloves. Have a stack of towels ready and dampen your hair slightly before starting (unless the toner you are using tells you to apply it to dry hair).
 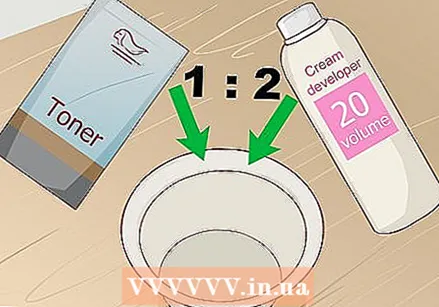 Mix the toner. If your toner is premixed and ready to use, you can skip this step. Mix the toner and developer in a clean plastic mixing bowl according to package instructions.
 - The ratio is usually 1 part toner to 2 parts developer.
 Apply the toner to your hair when it is damp. Use your hair dye brush to coat your hair with the toner, following the same technique as when you applied the bleach (from the tips to the roots, from the back to the front).
  Make sure the toner is evenly applied. Work your hands through your hair to make sure the toner has saturated your hair and is applied evenly.
 - Use a mirror to view the back of your head to make sure your hair is completely covered with toner.
 Cover your hair with plastic wrap or a shower cap. Leave the toner in your hair for as long as indicated on the package. Depending on the strength of the toner and the color of your hair, it can take as little as 10 minutes for your hair to turn white.
  Check your hair every 10 minutes. Depending on the type of toner you are using and how light your hair already is, the toner may work faster or slower than expected.
 - Check your hair every 10 minutes to make sure you don't get blue hair: use a towel to wipe some of the toner off a small section of your hair to get an idea of the color it is starting to get. If your hair has not yet achieved the color you want, reapply the toner to the section of hair and put it back under the plastic wrap / shower cap.
 Wash out the toner. Rinse your hair under cool water until all of the toner has been removed. Use shampoo and conditioner as usual, and gently squeeze the water out of your hair with a clean towel.
  Check your hair. Let your hair air dry, or blow dry your hair on the coolest setting on your hair dryer if you're impatient. Now that the bleaching and toner processes are complete, your hair should be white.
 - If you miss a spot, wait a few days and then repeat the process on the area of hair that has not been toned.
Part 4 of 5: Dyeing your hair gray at home
 Do skin and hair tests before dyeing. If you are not very precise about the shade of gray your hair should be, you can skip the hair test. However, the skin test is necessary as an allergic reaction can be fatal.
 - To take a skin test, you will need to follow the manufacturer's instructions for the specific hair dye you purchased. This usually means rubbing a little bit of the developer (or all of the mixture, in some cases) on a patch of skin behind your ear, then leaving it there for 48 hours.
 Protect your clothes and skin. Wear old clothes and an old towel over your shoulders, and put on rubber gloves (vinyl and disposable latex gloves are popular). Have some old towels nearby in case you need to wipe hair dye off your skin.
 - You may even want to apply a little petroleum jelly or thick moisturizer around your hairline to keep the hair dye from staining your skin.
 Prepare the hair dye mixture. It will depend on the specific type of gray hair dye you have purchased what exactly you need to do to prepare your hair dye mixture. There are a number of boxes of gray hair dye kits available, although most DIY hair dye enthusiasts only use professional quality products.
 - Just like when bleaching your hair at home, use a plastic bowl and hair dye brush to mix your hair dye.
 Prepare your hair for dyeing. Read the instructions on the box to know if your hair should be wet or dry during application as this will vary depending on the paint you are using. If your hair is long, divide it with pins.
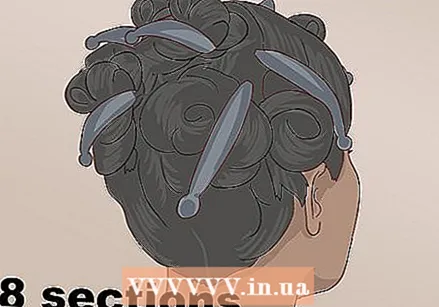
 - Consider using plastic pins to divide your hair into 8 sections - 4 on each side, vertically from the back of your neck to your forehead. If your hair is particularly thick, you may even need more sections (at least 2 extra sections at the front of your head).
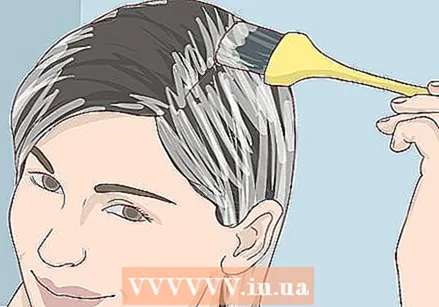
 Apply the hair dye to the length of your hair. Use the hair dye brush to apply the hair dye to about 4 cm sections of hair, working from your ends to your roots. Stop about 1-2 cm from your roots.
 - The heat from your scalp makes the color work faster near your roots, so you won't be applying the dye to your roots until last.
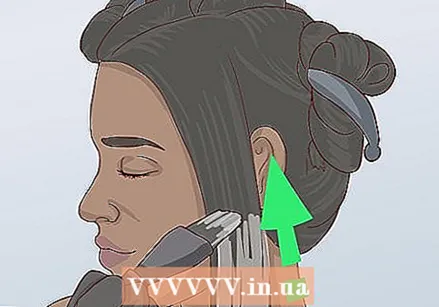
 Apply the dye to your roots. When the length of your hair is covered in hair dye, start over from the back of your head to cover all of your hair roots.
  Check that the hair dye has been applied evenly. When you've covered all of your hair, use a mirror to check the back of your head and make sure the hair dye is evenly applied throughout. Gently run your hands through your hair, feeling for even distribution.
 - If you find areas that feel dry, add more hair dye.
 Cover your hair and wait. Cover your hair with plastic wrap or a shower cap and wait while the hair dye does its job. The processing time will differ depending on the paint you use. Thirty minutes is an average processing time.
  Check your hair. Some hair dye manufacturers will indicate a general processing time - between 20 and 40 minutes, for example. After 20 minutes, you can wipe a little bit of hair dye off a piece of hair and check its color.
 - If you are happy with the color, you can wash out the paint. If you would like the color to be more intense, reapply the hair dye to the area of hair you checked and let it sit longer. Just make sure you don't wait longer than the recommended length of time, as this can damage your hair or even make it fall out of your head.
- If you are unsure of how long to leave the dye on your hair, taking a hair test beforehand is the best choice. This will give you a good idea of how long to leave the dye in your hair to achieve the desired color.
 Wash out the color. Once the color has set, rinse your hair with cool water, then shampoo and conditioner as usual.
 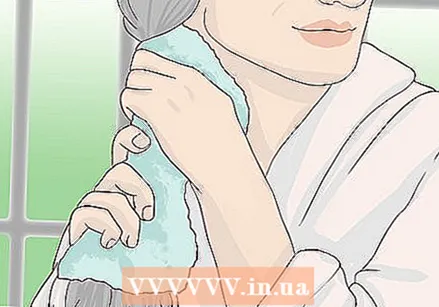 Be careful with your hair. After you wash your hair, gently squeeze out the water with a towel - don't rub your hair too quickly or otherwise rough with your hair while drying it. You'll also want to avoid heat styling for as long as you can after dyeing.
 - It's ideal for avoiding heat styling on your hair altogether.
 Enjoy your gray hair! Remember that you will need to actively take care of your hair now that it is bleached. After the gray has been added, some more life will have been brought back to your hair, but it will still be fragile.
Part 5 of 5: Taking care of your gray hair
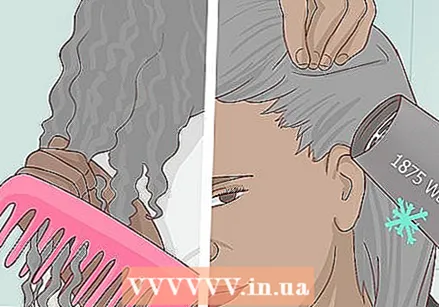 Be very careful with your hair. Bleached hair is fragile and damaged hair, even if it is in the best condition it can be. Take good care of your hair, don't shampoo if it feels dry, and don't go too far with brushing, straightening and curling.
 - Most of the time, you'll want to let your hair air dry. If you get your hair must blow dry, make sure to keep your blow dryer on its coolest setting.
- Avoid applying heat or otherwise manipulating your hair's natural texture as much as possible, as this can cause your hair to break - you could end up with large strands of hair sticking out of your head and only inches long to be.
- If you really like your hair must styles, you can create a straightening effect with a hair dryer and round brush. Do this as an alternative to using a flat iron. When done correctly, the technique should eliminate the need for a flat iron.
- You will want to use a wide comb.
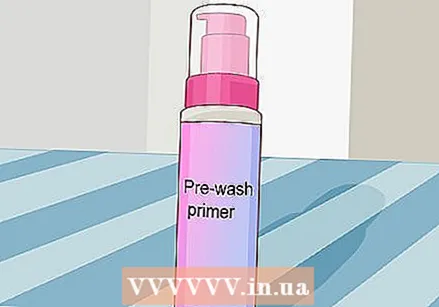 Treat your hair with a pre-wash primer (optional). Blonde hair is porous and can be discolored more easily by water. Applying primer to your hair before washing will repel water to protect your color.
 - Pre-wash primers can be purchased online and at salons, beauty stores and drug stores. They often contain oils, such as coconut or almond oil, to help boost the moisture in your hair before washing.
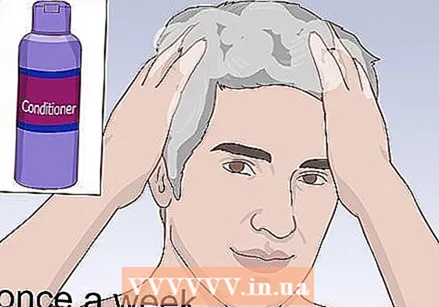
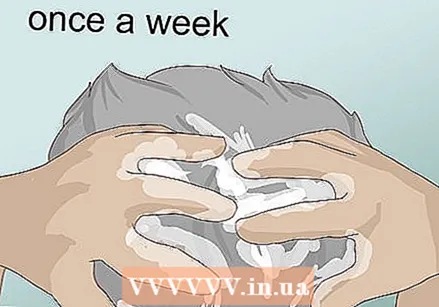 Leave time in between washes. Many specialists recommend that you wash your hair only once a week after bleaching it. Shampoo removes all natural oils from your hair, and your bleached one will likely need all the oils it can get.
 - If you regularly exercise / sweat or use a lot of products in your hair, you can probably increase this up to twice a week. You can also swap a wash for dry shampoo.
- When you dry your hair, pat it gently and squeeze it out with a towel - don't rub the towel over your head too quickly as this can cause more damage to your hair.
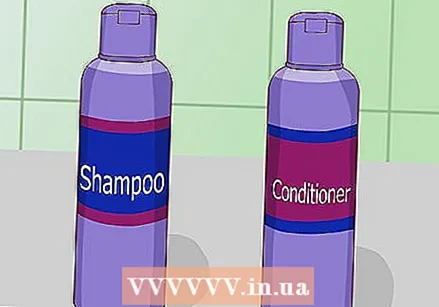 Know which products to use on your hair. Use products specifically made for bleached, damaged hair that has been color-treated: at least a purple toner shampoo and a deep conditioner. Avoid products that add volume to your hair as they can dry it out.
 - A good hair oil will make your hair look softer and less frizzy. Some people swear by extra virgin coconut oil to reduce frizz and help condition hair.
 Use deep conditioner on your hair at least once a week. Purchase a high quality deep conditioner treatment from a salon or beauty supply store. Avoid drugstore brands as these may only cover your hair, making it feel waxy and heavy. Ask your stylist to recommend a professional deep conditioner treatment.
 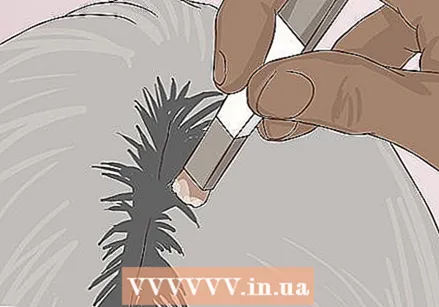 Try not to let your roots grow out too long. Try to refresh your hair color when your roots are up to 2 inches long. This will help your hair look smooth. If you let your roots grow out longer, it can be difficult to update them without creating a stark contrast to the rest of your hair.
 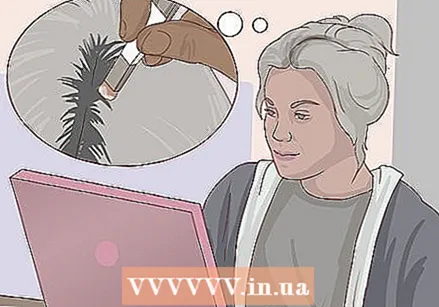 Know how to update your roots and hair. The process of bleaching, toning and dyeing your roots is almost exactly the same as what you did for your entire head. The only difference is that you will only dye your roots and not the rest of your hair.
 - If the rest of your hair color needs a refresh, you can apply toner to all of your hair after bleaching your roots, and then apply gray hair dye to all of your hair after rinsing. This time, however, start at your roots, then work your way down, as the roots will need more color.
- Some experts recommend that you leave a little bit of hair root at all times to keep your scalp and cuticles healthier. If you choose this, you will never apply the bleach to your entire hair root, as you will want to keep it off your scalp.
Tips
- It may be more expensive to go to the salon, but it is especially recommended if you have thick, dark hair that may require multiple bleaches and / or you have never bleached your hair before.
- The whiter your hair, the brighter your shade of gray will be, so make your hair as white as you can before dyeing it gray!
- Before dyeing your hair gray, consider using a hair coloring app or website to see what you will look like with gray hair. It takes a lot of time and money to turn black hair gray, so make sure you really want it before doing anything so expensive and damaging to your hair.
- Dye your hair during a period when you have enough time to correct mistakes without having to go through an important job interview, your first day at school, a wedding, etc. have. No important occasions!
- Take your time with the dyeing process. Schedule long periods of time between bleaches / dyes and use these times to condition your hair to keep it in the best possible condition.
- You may need to apply toner to your hair several times.
- Gray, like any hair color that requires regular bleaching, needs time and money to keep up. Think carefully about whether you are prepared to put a lot of effort into your hair color before dyeing it.
- If you do eventually want a different look, wait at least 2 weeks before dyeing your hair with a permanent hair color.
- If you decide to dye your hair a different color after bleaching, you may need to use a filler to fill in the missing pigment in your white hair before applying the color.
- If you do use heat styling tools, make sure to use a good heat protectant spray on your hair first. These are sold as sprays, creams and mousses and will be available at your local beauty supply store or salon.
- The bleaching process will work best on healthy hair that has not been previously dyed, permed, or otherwise chemically treated.
- If you are dyeing your hair at home, the amount you will need of each product will depend on how much hair you have and what products you purchase. Always buy a little more than you think you need to be safe.
Warnings
- Do your best to keep hair dye off your skin as it can leave stains.
- Keep bleach off your skin at all costs, as it can irritate and chemically burn you.
- If you don't use gloves, the bleach will irritate any exposed skin it comes into contact with, give it a nasty white color, and make it feel very dry and itchy.
- Blonde can damage your hair - be careful and keep your hair well conditioned!
- If you start the bleaching process with hair that is already damaged or weak, you run the risk of more serious damage and breakage. Do not style your hair with heat products and do not shampoo your hair too regularly before bleaching.
- Swimming in water that contains chlorine can give your bleached and dyed hair a greenish color. If you must before going into the water, apply conditioner to your hair and put it in a swim cap.
- Don't blonde your hair right after you wash it. After shampooing, you have removed all the oils that protect the hair, which can damage your scalp and hair much more than if you wait at least 24 hours.
- Be patient with your hair. If you try to get white hair too quickly, you can end up with hair breakage, hair loss, or chemical burns. It can take several weeks to reach gray hair safely.
- To keep your hair as healthy as possible, only use styling products that will moisturize your hair. Avoid products that add lift or volume as they will dry out your hair.
Necessities
- Blonde powder
- Developer
- Red gold corrector
- Hair toner (plus possible developer)
- Gray hair dye
- Toner shampoo
- Hair dye brush
- Plastic mixing bowl
- Gloves
- Towels
- Plastic foil


