Author:
Judy Howell
Date Of Creation:
28 July 2021
Update Date:
1 July 2024

Content
- To step
- Method 1 of 3: Remove wet mortar
- Method 2 of 3: Remove dry mortar with a chisel
- Method 3 of 3: Use hydrochloric acid to remove dried mortar
- Necessities
- Remove wet mortar
- Remove dry mortar with a chisel
- Use hydrochloric acid to remove dried mortar
Dried mortar on a brick wall looks ugly and can ruin the wall itself. The easiest way to get clean bricks is to avoid mortar spatter while installing the wall, but you can also remove the mortar with a chisel once it has dried. In the case of stubborn mortar that cannot be removed in any way, using hydrochloric acid can be a good solution. Whatever the situation, it is important that you follow proper procedures and take precautions when removing mortar from bricks.
To step
Method 1 of 3: Remove wet mortar
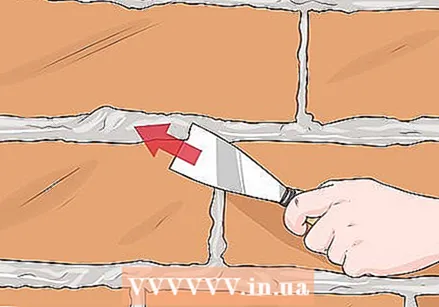 Use the edge of a trowel to smooth out the mortar so it doesn't stick out between the bricks. Use the short side of your trowel to make a forward upward and rolling motion to level the mortar so that it no longer sticks out between the bricks. Keep doing this while laying new bricks to prevent mortar from building up and large pieces from sticking to the bricks.
 - You can also use a large, clean sponge to even out the mortar.
 Wipe off all mortar dust with a medium-hard brush. The goal is to sweep all dust off the bricks instead of pushing them deeper into it. Do not apply pressure to the brush and wipe off the surface of the wall. Make back-and-forth movements until all of the mortar dust on the wall has been removed.
  Place scaffolding two inches away from the wall to avoid mortar splashes. If you are using scaffolding, set it two inches from the wall to prevent mortar from splashing on the bottom of the wall. The scaffolding planks closest to the wall should be slightly angled downward from the wall.
 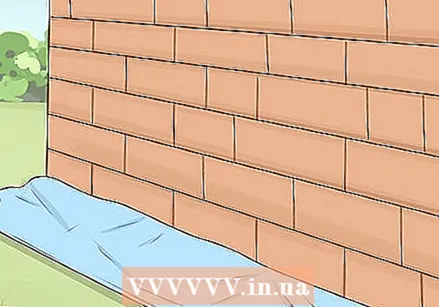 Protect the lower part of the wall with a tarpaulin or sheet of plastic. Place straw, cloth covers, or sheets of plastic against the bottom part of the wall to prevent mortar from splashing on the bottom of the wall. Make sure that the tarpaulins extend from the wall one to five feet.
 - You can also use plywood or OSB boards. If mortar drips onto the wood plate, you can reuse it if it has not become dirty.
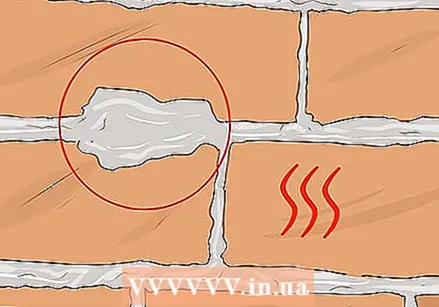 Let larger clumps of mortar dry before removing them. If you have taken all precautions but still have large lumps of mortar on your wall, let them dry and try to remove the mortar with a chisel or hydrochloric acid.
Method 2 of 3: Remove dry mortar with a chisel
 Wet the bricks with a garden hose. Allow the mortar to dry for at least seven days before attempting to remove it. Wetting the wall before chiseling will make the mortar easier to remove and will not damage the bricks. Make sure to wet the bricks completely with a garden hose or buckets of water before starting work.
  Tap with the chisel parallel to the bricks to remove the excess mortar. Hold the chisel at an angle of 20 to 30 degrees against the wall in areas with dried mortar. Lightly tap the end of the chisel and try to chop the dried mortar into pieces off the wall. Start at the top and work your way down. Continue to work slowly and carefully until most of the mortar is removed from the wall.
 - Chop larger pieces of mortar into smaller pieces that are easier to handle rather than trying to remove the pieces in one sitting.
- Lime mortar is easier to remove with this method than cement mortar.
 Wipe off the excess mortar with a wire brush. Wipe the bricks in a back and forth motion to remove the pieces of mortar and grout dust. Also scrape off any stubborn pieces of mortar that you were unable to remove with the chisel. Do not sweep too long in one area, or the bricks in that area may discolor.
 - Buy the same type of mortar from a hardware store if the mortar is cracked and damaged. Use a chisel or stiff brush to remove a piece of mortar and take it to a hardware store or building supplies wholesaler. There they can find you mortar of the same color and texture so you can mix more. Mix your mortar and fill in any damaged spots with a grout bag. Allow the mortar to harden for 20 minutes before shaping with jointing tools.
Method 3 of 3: Use hydrochloric acid to remove dried mortar
 Wear proper protective equipment. Hydrochloric acid is very poisonous and corrosive, so it is important that you take proper safety precautions when using it. Wear acid resistant gloves, goggles, closed shoes, protective clothing and an approved respirator with the appropriate acid filter when working with hydrochloric acid. You can buy these personal protective equipment at the hardware store and online. Place plastic sheets along the bottom of the wall to collect the acid.
 - Have a box of baking soda handy to sprinkle on yourself if any acid splashes on your skin. Caustic chemicals in the hydrochloric acid can cause chemical burns.
 Read the directions on the hydrochloric acid packaging. Read the information and warnings on the packaging of the product you have purchased. Dilute the hydrochloric acid with the correct amount of water, following the process described on the packaging. You usually make a mixture of one part hydrochloric acid and nine parts water.
 - Never mix hydrochloric acid with other chemicals.
- Do not use hydrochloric acid on light-colored and cream-colored bricks. The acid can discolour them and weaken the joints.
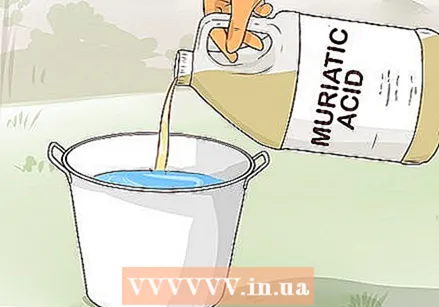 Dilute the hydrochloric acid. Fill an acid-resistant bucket with water and then add the hydrochloric acid. This will prevent acid from splashing out of the bucket, which could end up on your body.
 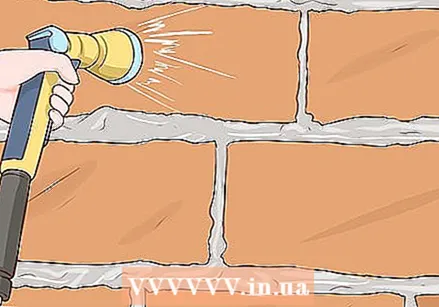 Wet the bricks with water. Before applying the hydrochloric acid to the wall, it is important to soak the wall. Applying the hydrochloric acid to dry bricks can damage the wall.
  Apply the acid with an acid-resistant brush. Buy an acid-resistant brush online so that the bristles don't fall apart when you apply the hydrochloric acid to the bricks. Dip the brush in the hydrochloric acid and water mixture you have prepared and coat a small area of the brick you want to clean. Apply the acid to a small area to check if the brick in the wall reacts badly to it.
  Let the acid work for five minutes. Let the acid in the mortar settle on the bricks and break it down. The acid starts to bubble as it works and fizzes when it comes into contact with the mortar. Don't let the acid dry on the bricks, or it could damage them.
 - If you notice discoloration on the bricks, stop using hydrochloric acid.
 Scrub off the mortar with a brush. Use a medium-hard brush and scrub the bricks vigorously with it. Be careful not to scrub the grout or you could weaken the mortar that holds the bricks in place. Scrape the remains of mortar and acid onto the tarpaulin. Keep scrubbing until you have removed all of the dried mortar.
  Rinse off the hydrochloric acid with several liters of water. Do not let the acid dry anywhere on the bricks. Dried hydrochloric acid can weaken and discolor the bricks. Always keep a garden hose or bucket of water handy and rinse off the acid when you are done scrubbing.
 - Once you have thoroughly rinsed off the acid, store the remaining acid in a place where pets and children cannot reach it.
Necessities
Remove wet mortar
- Trowel
- Medium-hard brush
- Tarpaulins or sheets of plastic
- Scaffolding
- Bucket
- Sponge
- Light brush
- Cloths
Remove dry mortar with a chisel
- Garden hose
- Bucket
- Chisel
- Wire brush
Use hydrochloric acid to remove dried mortar
- Medium-hard brush
- Hydrochloric acid
- Approved breathing mask
- Bucket
- Water


