Author:
Judy Howell
Date Of Creation:
27 July 2021
Update Date:
1 July 2024

Content
- To step
- Part 1 of 3: Draw an image on the shrink wrap
- Part 2 of 3: Baking the shrink wrap
- Part 3 of 3: Making your own plastic crafts
- Tips
Shrink wrap is a popular plastic material that people use to make crafts. It was very popular with children in the 1980s. Shrink wrap is still sold by large department stores, hobby stores and web shops. You can use the foil to make colorful works of art or even jewelry. You can make the same plastic crafts using household products.
To step
Part 1 of 3: Draw an image on the shrink wrap
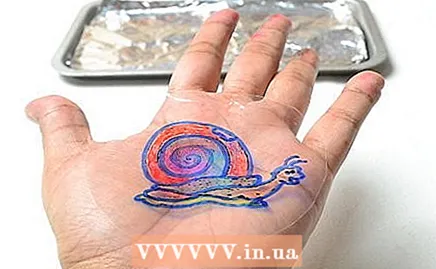
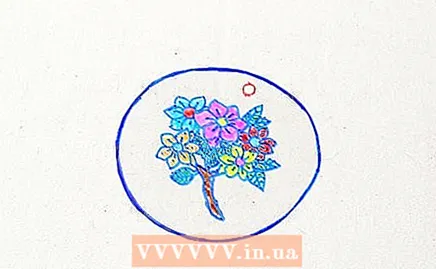
 Draw or copy an image onto a sheet of shrink wrap, or trace an object around it. Shrink wrap is often sold in sheets of 20 by 25 centimeters.
 - Use colored pencils, markers and ink on the shrink wrap. Use colored pencils on the rough side of the sheets, and use felt-tip or waterproof markers on the smooth side. Some sheets of shrink wrap are already cut to size and have pre-printed designs. Other sheets are just blank.
- Do not use materials that contain oil and wax on shrink wrap, such as wax crayons and oil paint. These materials melt because of the heat when you start baking the shrink film. Some sheets are machine-matted and roughened, and are sold in packs of 10. Other shrink-wrap sheets are not roughened. With that variant you use waterproof markers.
- It is also possible to print an image on a sheet of shrink wrap with a printer. This works very well for photos. Print letters mirrored so that you can read them on the nicer, shinier side of the foil after shrinking the foil. Outlines is also a popular method.
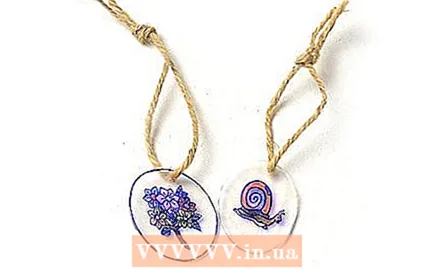
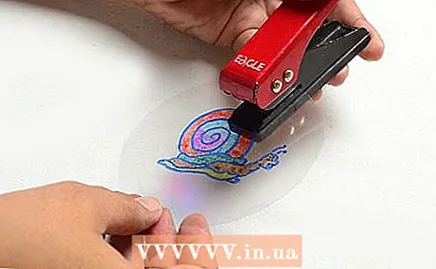 Draw a picture or poke holes in the plastic. You can give the plastic a decorative border, cut out your image or poke holes in the plastic to make a necklace or a charm for a bracelet.
 - Use a hole punch if you want to punch holes in the plastic. You may want to make holes when making jewelry or just to decorate the image. Make holes in the shrink film before baking the sheet.
- Cut out your image with regular scissors or scissors with a certain pattern.
Part 2 of 3: Baking the shrink wrap
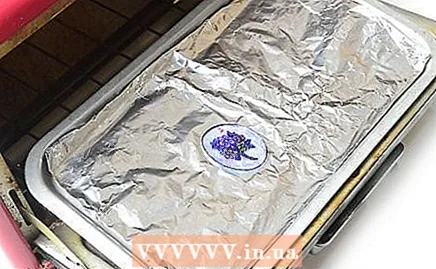
 Line a baking tray with non-stick aluminum foil or parchment paper. You can also fold a sheet of aluminum foil into a baking tray.
 - Place the cut-out shrink-wrap images on the baking sheet with the rough side up. Leave space between the plastic shrink wrap shapes, or they may stick together.
- Only use an oven under adult supervision.
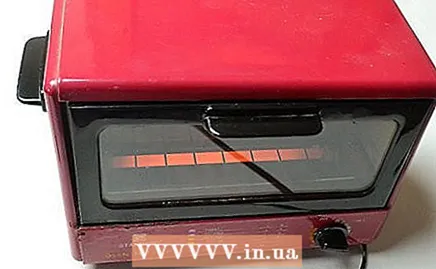 Preheat the oven to 160 ° C. You probably only need to preheat the oven for 1-3 minutes. You can use a mini oven or a regular oven.
 - When the oven is preheated, place the baking tray with the images of shrink film in the oven.
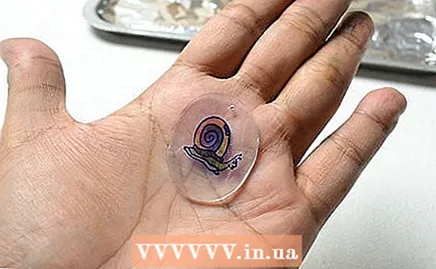
- You only need to bake the shrink wrap for 1-3 minutes. The images will curl at first, but they will flatten later. When the images flatten again, bake them for another 30 seconds.
 Remove the baking tray from the oven. Use potholders or oven gloves so you don't burn yourself. Be careful.
 - You can make the shrink wrap even flatter by flattening it with a piece of folded paper. This step may not be necessary.
- Let the shrink wrap images cool for a few minutes before handling them. The baked images will have shrunk to a third of their original size, but become 9 times thicker. The image will have brighter and brighter colors, and you can easily keep it looking good.
Part 3 of 3: Making your own plastic crafts
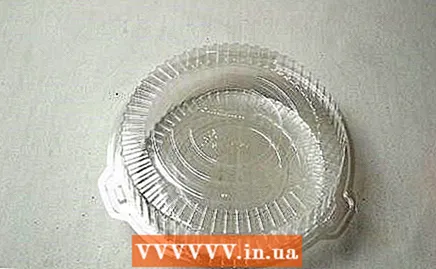 Find a piece of plastic with recycling code 6. This type of plastic is often used as a packaging material, for example for salads.
 - Look for the number 6 on the bottom of the plastic. The plastic must be relatively thick for this to work.
- Cut away the extra plastic until you are left with a flat square.
 Draw an image on the plastic with a permanent marker. It is better not to use colored pencils with this type of plastic.
 - When the plastic is baked, the image will be only a third of its original size and will have thickened.
- Cut out the image and / or make holes in it with a hole punch. Round the corners a bit, as the edges can get sharper during baking.
 Preheat the oven to 160 ° C. Slide the baking tray into the bottom groove in the oven. The reason you can use this plastic instead of shrink wrap is because it is polystyrene, just like shrink wrap.
 - Make a baking tray out of aluminum foil by folding the foil until it is thick enough to lay the plastic on. Place the plastic with the picture on the baking tray.
- Bake the image for about 3.5 minutes. The plastic will curl and then flatten again. Remove the plastic from the oven and let it cool.
 Ready.
Tips
- Use a hole punch to make holes. Small holes will shrink, so try to find something that makes large holes.
- Do not use a microwave.
- Make charms for jewelry and earrings.
- Water-based markers do not work.
- Give your crafts to your friends as gifts.
- Make name cards.
- Scrapbooking supplies such as rubber stamps with matching metal shapes are very suitable to use for this.
- You can also use a heat gun to shrink the shrink wrap. You may need to hold the plastic with the tip of a pencil so it doesn't get blown away.
- If you are using crayons, use frosted plastic. You can also roughen the plastic yourself with a nail file or a piece of sandpaper.
- Use the rough side for crayons and the plastic side for felt-tip pens and other waterproof markers.


