Author:
Judy Howell
Date Of Creation:
28 July 2021
Update Date:
1 July 2024

Content
- To step
- Method 1 of 4: Choose clothes
- Method 2 of 4: Wear shirts with a front closure
- Method 3 of 4: Put on shirts without a closure
- Method 4 of 4: Put on a sling
- Tips
- Warnings
After major shoulder surgery, such as a shoulder cup repair, you may not be able to move your shoulder during the recovery period. The simple daily activities, such as getting dressed, will be quite a challenge because of this. Fortunately, there are certain items of clothing you can wear and steps you can take to make dressing easier.
To step
Method 1 of 4: Choose clothes
 Go for garments that open at the front. Shirts, jackets, dresses and other garments are easier to use with one arm if they open all the way at the front. Therefore, go for clothes that have buttons, zippers or Velcro over the entire length in the front, so that dressing can be done easily and as quickly as possible.
  Wear pants with an elastic band during recovery. It is usually much easier to put on and take off loose-fitting sweatpants or elastic leggings than jeans or slacks. During the recovery period, choose pants made of stretch material to make dressing easier.
 - By wearing these types of pants you also don't have to worry about closing buttons or zippers on your lower body.
 Opt for loose-fitting clothing. Loose clothes are much easier to put on when you can only use one arm. Choose clothes that are a few sizes larger for easy putting on.
 - For example, if you normally use a T-shirt in size M, it is better to wear T-shirts in size XL immediately after surgery.
 Wear camisoles with built-in bras. Bras are difficult to put on and take off daily while your shoulder heals. If you can, skip your regular bra and wear a camisole with a built-in bra underneath your shirt. Alternatively, you can also wear a form-fitting camisole under your shirt.
 - If you need more support than a form-fitting camisole or one with a built-in bra can provide, choose underwired bras with a front closure or a regular underwire bra with a back closure and ask someone who lives with you to tie it up.
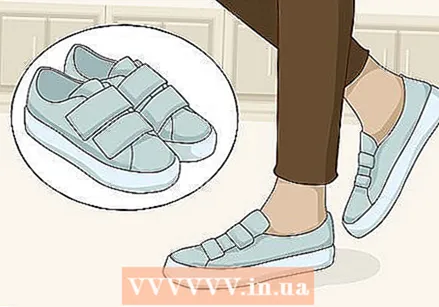 Wear slip-on shoes. Tying shoes is rather difficult, if not impossible, when you only have one hand. Save yourself any headaches and only put on shoes where you can walk easily while you are recovering. Some examples of these types of shoes are:
 - Flip flops
- Velcro sports shoes
- Clogs
Method 2 of 4: Wear shirts with a front closure
 Place the shirt on your lap and your affected arm in the sleeve. Sit down and make sure the garment is completely unbuttoned. Place it over your lap with the inside facing up. Let the sleeve that your affected arm will go in hang between your legs. Put the sleeve in this arm using the arm that has not been operated on.
 - Just let your affected arm hang and do nothing with it.
 Use your right arm to put the correct sleeve in your other arm. Stand when you are almost done putting the sleeve over the affected arm. Continue gently to slide the sleeve all the way over the affected arm and onto your shoulder.
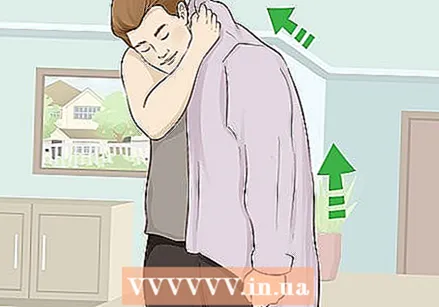
 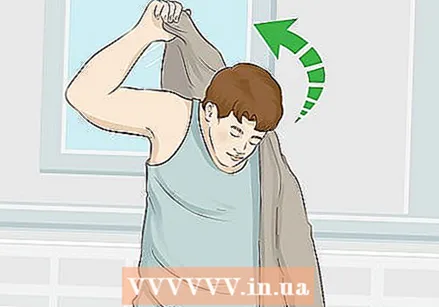 Bring the garment over your back with your good arm. Grab the rest of the shirt with your good arm. Gently throw the shirt over your back behind you so that the remaining sleeve ends up at the arm.
 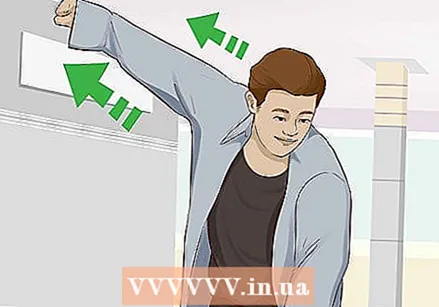 Put your good arm through the other sleeve. Reach up to the sleeve hole with the unoperated arm. Work your arm up through the sleeve until you push your hand through the hole at the end.
  Try on the shirt and button it up. Use your unoperated arm to pull on the garment in the areas that are not right on your body. Then use the hand of the same arm to pull both sides of the garment out in front of you. Button each button one by one.
 - If you have trouble buttoning your shirt, try holding the buttonless lace with your little finger and ring finger. Use your thumb, index and middle fingers to hold the other side of the shirt and push the buttons through the holes.
 Reverse to take off the garment. When you want to take the shirt off, unbutton it with the fingers of your good arm. Pull out the sleeve containing your good arm with your good arm and throw the shirt through your back towards the operated arm. Then use your good arm to gently push down the sleeve of your other arm.
Method 3 of 4: Put on shirts without a closure
 Bend your hips and hold the garment in your hand. Bend over and let the operated arm hang passively. Then grab the garment with the hand of your good arm, from the bottom to the neck hole.
  Use the right arm to slide the affected arm through the correct sleeve. Without using your operated arm, use your right arm to pull the correct sleeve onto the operated arm. Pull it all the way over the arm and over the shoulder.
  Slide the shirt over your head and stand. It is usually easier to slide the shirt over your head while standing. Use the unoperated arm to pull the garment down over your head through the neck hole while standing.
 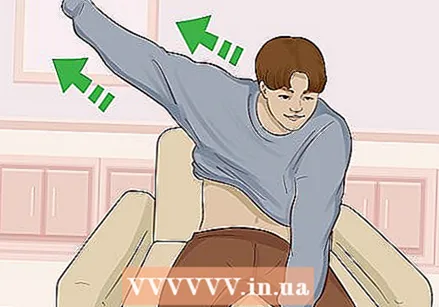 Push your good arm through the other sleeve. Put your good arm up through the inside of the garment to the remaining sleeve. Push your arm all the way through the sleeve.
  Pull the garment down with your good arm. At this point, the shirt is probably fine, but curled up around your stomach. Only use the unoperated arm to grasp the bottom of the shirt and gently pull it down so that it is no longer wrinkled.
 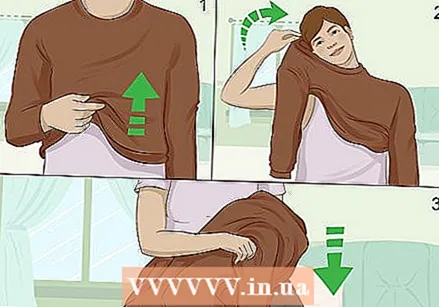 Do the reverse to take the shirt off. To take the garment off, use your good arm and grasp the bottom of the garment and wrinkle it up towards your chest. Then bring the same arm to the inside of the shirt to get it out of the sleeve. Bend your hips forward while pulling the garment up over your head with your good arm. Finally, slide the garment down over your affected arm with your good arm.
Method 4 of 4: Put on a sling
 Get dressed. It is a lot easier to put on your clothes first and then the sling than doing this in reverse. At the very least, put on your shirt before putting on the sling as it will go over the shirt, but probably not over all other items of clothing, such as your pants.
 - Always put on heavy coats after putting on the sling and don't bother tucking your affected arm into the sleeve. Instead, let the sleeve hang down by your side.
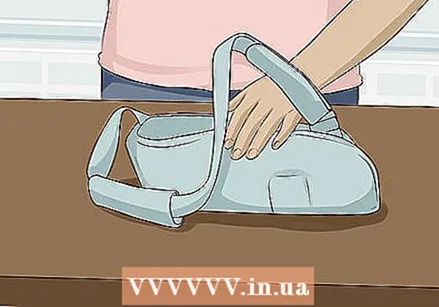 Place your sling on a table. Place your sling or sling on a table roughly level with your thighs. Make sure the cushion is attached to the sling and that the clamps and / or straps are loose.
  Bend your knees to bring the affected arm towards the sling. Use the unoperated arm to position the operated arm at a 90 degree angle. Your arm should be in a natural position across your body, just below your chest. Bend your hips and knees to get the operated arm down into the sling.
  Attach the wrist and front bracelets. There should be buckles or straps that go over your wrist and forearm to secure the sling. With the hand of your good arm you fix these straps or clamps.
  Use your good arm to secure the shoulder strap. Reach over the front of your body with your good arm and grasp the shoulder strap. With the same arm, pull the band behind your affected shoulder and around your neck. Attach this strap to the sling.
 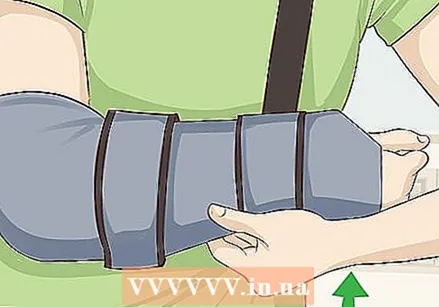 Support your affected arm with your good arm as you stand. Slide the hand of your good arm under the sling as soon as you get off the table. Use this arm to hold the affected arm as you stand the rest of the way up.
  Secure the hip belt with your right arm. Once you are upright, put your good arm behind you and grasp the hip belt. Bring it around to the front of your body to attach it to the sling.
Tips
- If necessary, ask someone to help you.
- Always dress the operated arm first.
- Always put on your clothes before putting on the sling.
- To make dressing even easier, you can buy clothes online that are intended for people who have undergone shoulder surgery.
Warnings
- Wait until your doctor gives you the go-ahead to take off your sling or sling - you could be injured otherwise.


