Author:
Morris Wright
Date Of Creation:
26 April 2021
Update Date:
26 June 2024
Content
- To step
- Method 1 of 4: Using eyeshadow to enhance your eye color
- Method 2 of 4: Temporarily change your eye color with contact lenses
- Method 3 of 4: Change your eye color with Photoshop
- Method 4 of 4: Get surgery to change your eye color
- Tips
- Warnings
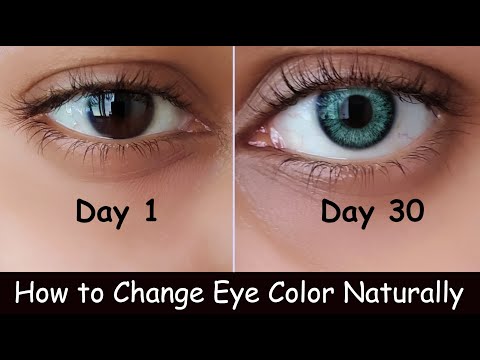
Your eye color is unique and difficult to change without special contact lenses. It is possible to enhance the existing color by using certain shades of eyeshadow. You can also completely change your eye color by wearing colored lenses. Surgery is also possible, but at the time of writing this article it is only in the testing phase. This article will show you how to change your eye color a bit, as well as information about colored contact lenses and surgeries.
To step
Method 1 of 4: Using eyeshadow to enhance your eye color
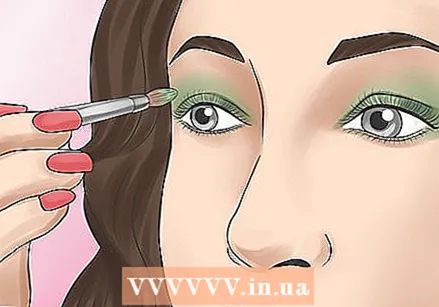
 Know how to change the color of your eyes with makeup. You cannot make your eyes brownish blue with eyeshadow or vice versa. But you can use eyeshadow to enhance the eye color you already have. Depending on the eyeshadow you use, you can make your eyes brighter, duller or lighter. Some eye colors, such as hazel brown and gray, can also take over some of the shade of the eyeshadow. This section teaches you how to use eyeshadow to change the color of your eyes.
  Brighten blue eyes by using warm shades of eyeshadow. Orange tones, such as coral and champagne, work very well with blue eyes. This makes your eyes appear brighter and bluer than they actually are. Blue eyeshadow makes blue eyes lighter, or more pale. Here are some color combinations you can try:
 - For everyday casual occasions, you can choose neutral tones such as brown, taupe, terracotta, or anything with an orange hue.
- For a special night out you can try metallic colors such as gold, copper or bronze.
- Avoid colors that are too dark, especially if you have pale skin. If you are using eyeliner, prefer brown or dark brown. That is less harsh than black.
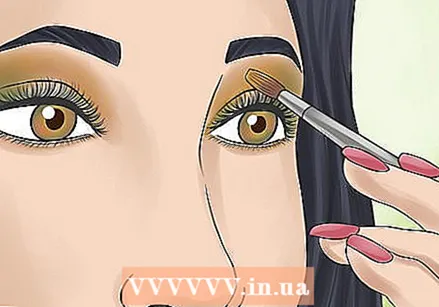
 Brighten brown eyes with cool colors. Brown-eyed people can use almost any color, but cool shades like purple and blue really brighten the eyes. Here are some options you can try:
 - Just stick to browns during the day. If you really want to make your eyes pop, go for a silvery shade of brown, or peach brown.
- If you're feeling adventurous, try blue, green, or purple.
- For a special night out you can take metallic colors such as bronze, copper or gold. A greenish gold tone also works well.
- If you have dark brown or black eyes, you can try jewel shades such as bright blue or purple. Silver tones or chocolate brown can also look beautiful.
 Bring out the blue or green in gray eyes by using blue or green eyeshadow. Gray eyes pick up the color that surrounds them. That means you can use eyeshadow to give your gray eyes a blue or green tone. If you want to bring out the shade of gray you have, stick to sooty black or smoky shades, such as silver, anthracite or black. Here are some tips to bring out the blue and green in your eyes:
 - To bring out blues, use these eyeshadow colors: copper, melon, neutral brown, orange, peach, or salmon. You can enhance the blue even more by putting a tiny bit of blue eyeshadow in the inner corner of your eye.
- To enhance the greens, try these colors: maroon, pink, purple, red-brown, or burgundy.
 Wear purple or brown shades to make green eyes look brighter. These are the best colors to choose if you have green eyes. They contrast with the green pigment in your eyes, making them appear brighter and more vibrant. For example, you can use purple eyeshadow during a night out, and shiny brown or taupe during the day. Here are more colors you can try:
 - You look beautiful in every shade of purple. If you don't like purple, try pink.
- If you don't like using purple, you can also put taupe eyeshadow on your eyelid, then apply a little bit of purple close to your lash line.
- Black eyeliner is too harsh for green eyes. Rather try anthracite, silver or dark purple.
 Take advantage of the green and gold flecks if you have golden brown eyes. Golden brown eyes contain green and gold colored flecks. That means you can use different colors to make these spots pop. Here are some more options you can try:
 - Don't use heavy, dark colors. As a result, you hide the green and gold tones in golden brown eyes, which can make them look gloomy.
- To let the green and gold speak in your eyes, try eyeshadow in the colors bronze, old pink or eggplant. Army green especially brings out the green spots.
- If you want your eyes to appear more brown, use gold or green eyeshadow.
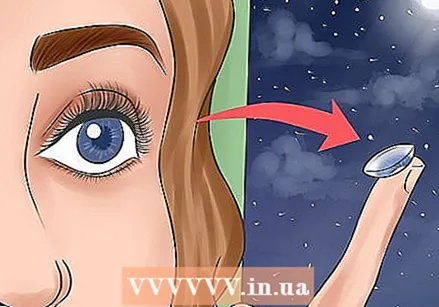
Method 2 of 4: Temporarily change your eye color with contact lenses
 Go to the optician to have your lenses fitted. Even if you have perfect vision, you will still need to get your eyes checked to get the right contact lenses. There are different shapes of eyeballs, and wearing the wrong shape contact lenses can hurt. Sometimes eyes are not suitable for contact lenses. And every now and then an optician has to prescribe special contact lenses, if you have very dry eyes, for example.
  Buy your contact lenses from a reputable store. You get what you pay for, especially when it comes to contact lenses. That's why it's better to spend a little more on a pair of contact lenses that are good than buying cheap junk that you'll regret later. Eyes are very sensitive, and poorly made lenses can permanently damage them.
 - It is best to buy your lenses from the optician.
- If you have bad eyes, you can also get polished lenses with a color.
 Think about how often you want to wear the lenses. Some lenses can only be worn once, while others can be used multiple times. Because colored lenses are more expensive than normal ones, you have to keep that in mind. Here are the different types of lenses you can buy:
 - Disposable lenses can be very expensive. Sometimes you can only use them once. If you only want to wear the lenses once or twice, you can take these.
- You have to take out daily contact lenses at night. How often you need new ones depends on the manufacturer. Some need to be replaced every week, while others can take up to a month or more.
- There are also lenses that you can just keep in when you go to sleep, although that is not recommended. The longer you keep your lenses in, the sooner you can get an infection. Reusable lenses, like the daily disposable lenses, should be replaced according to the manufacturer's schedule. Sometimes you can use it for a week, sometimes much longer.
 Get lenses that enhance your eye color if you have light eyes and want a subtle change. You can also use this to enhance the natural color of dark eyes. Since these lenses are translucent, they are not suitable for people with very dark eyes. Then you simply do not see the color.
  Get opaque lenses if you want a drastic change or if you have dark eyes. These lenses are less transparent and can completely change your eye color. They are available in natural colors such as brown, gray, green and golden brown. They also come in unnatural colors, such as white, red, cat's eyes and purple.
 - At some stores you can also determine the color yourself.
 Note the cosmetic drawbacks. You put a lens in your eye, and it can shift when you blink. That means if the lens is tilted, your natural iris will be visible. People will immediately see that you are wearing colored contact lenses.
 - This is especially noticeable with the opaque lenses, but less so with the color-enhancing lenses.
 Beware of visual impairments. Your iris and pupil change size as the light conditions change. Contact lenses don't change size. That means that if you enter a dark room and your pupils dilate, your vision will be partially blocked by the colored lenses. When exposed to bright sunlight, your pupils shrink, which may reveal your natural eye color through the translucent part of the contact lens.
  Keep the contact lenses clean. If you don't regularly clean your lenses properly, you could get an infection. An eye infection can be very serious and even lead to blindness. Always keep your contact lenses in a box when you are not wearing them. Clean them with a saline solution before putting them back in your eyes. Make sure you put clean lens solution in the box before putting the lenses back in.
 - Always wash your hands before touching your contact lenses.
- Never wet your lenses with saliva. The human mouth is full of germs.
- Never share your contact lenses with anyone else, even if you have cleaned them.
 Never wear your lenses longer than recommended, and remove them if you have to. That means you should always take your lenses off when you go to sleep. Even with reusable lenses. Although you can keep reusable lenses in at night, you can get an infection earlier if you wear them for too long. Always take your lenses out of your eyes when you shower or swim.
 - Some types of contact lenses can be used multiple times, while others should be thrown away after one use. Never use the lenses for longer than the recommended time
- A saline solution also has a limited shelf life. Do not use saline solution if the expiration date has passed.
- To keep bacteria from building up, change your lenses every three to six months.
Method 3 of 4: Change your eye color with Photoshop
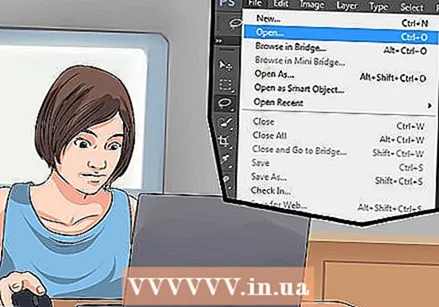 Fire up Photoshop and open the photo you want to edit. You can use any photo for this, but a clear, high-resolution photo works best. To open the photo, simply click on "File" in the top bar and select "Open" from the drop-down menu.
  Zoom in on the eyes. You can do this by clicking on the magnifying glass icon. You can find this in the small bar on the left side of your screen, at the bottom. If you can't find it, click the "Z" key on your keyboard. You can now zoom in on the eyes in two ways:
 - Click on the eyes with your left mouse button. The image gets bigger. Keep doing this until you can see the eyes clearly enough.
- Click on a spot at the top left of the eyes. Drag your arrow down to the bottom right corner of the eyes. Now there is a rectangle around it. When you let go, whatever was in that rectangle fills your window.
 Use the "Lasso Tool" to select the iris. If you can't find the lasso tool, you may have already selected another tool. Click and hold on the lasso (usually the third icon from the top) and select the icon that looks like a lasso from the drop-down menu. Once you've selected the tool, trace the iris. It doesn't have to be neat; you can fix that later.
 - To select the other eye, press and hold the Shift key. Now trace the other iris in the same way as you did the first.
 Create a new layer. You can do this by clicking the "Layers" tab in the top menu and choosing "New Adjustment Layer" from the drop-down menu.
 - Hovering your arrow over "New Adjustment Layer" opens a menu with a list of options. Select "Hue / Saturation" from this list.
 Go to the "Adjustments" window and make sure "Colorize" is selected. The "Adjustments" window is on the same side as your other windows, including one with the layers and color swatches. Click on this and make sure the box next to the word "Colorize" is checked. Now you can see the iris change color.
 - The pupil can also change color. Don't worry, you can fix that later.
 Move the "Hue", "Saturation" and "Exposure" sliders until you have the color you want. The "Hue" slider changes the color. The "Saturation" slider makes the color brighter or duller. The "Exposure" slider makes the color darker or lighter.
 - The color may seem a little unnatural. Don't worry, you can fix that later.
 Make sure you are back in the "Adjustments" layer. Click on the "Layers" window. You will now see two different layers: "Background" and "Hue / Saturation". Make sure you have the window with "Hue / Saturation" selected. You are going to make adjustments in this layer. The background layer is your original photo.
  Use the "Eraser Tool" to bring out the pupil and tidy the edges around the iris. Click on the "Eraser Tool" in the sidebar. Adjust the size if you want. You can do this by moving towards the top bar and clicking the dot and number that appears next to the word "Brush". When you are the size you want, gently erase the color from the area of the pupil. When you are done erase the edges around the iris as well. If you want, you can erase other spots.
 - When done, the eye should look exactly like the original, just a different color.
 Change the blending of the layers, if you want. Go to the "Layers" window and click the drop-down menu. You will now see options such as: "Normal", "Spread", "Darker" and "Multiply". Select "Hue" or "Color" at the bottom of the menu. The original texture of the eye now comes through better.
  Merge the layers when you are satisfied with the result. Right-click on the "Background" layer and select "Unite Visible" from the menu that you now see.
  Save your photo. You can save your photo as any file type you want. Photoshop automatically saves it as a Photoshop file. Unfortunately, it is difficult to share it on the internet. Try to save your file as JPEG; which is a standard file type for photos on the Internet.
Method 4 of 4: Get surgery to change your eye color
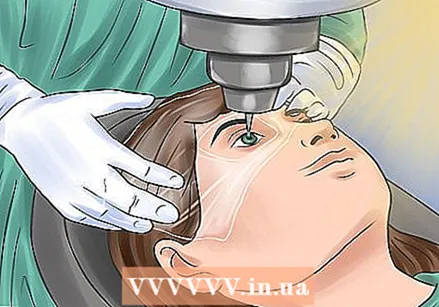 Undergo laser surgery to make brown eyes blue. This operation takes about 20 seconds. It removes the outer brown layer of the iris, revealing the blue color underneath. After two to four weeks, the body removes the rest of the layers. The eye then becomes increasingly blue.
  Know the disadvantages of changing your eyes from brown to blue. At the moment, this procedure is still in the testing phase, so the long-term effects are not yet known. You cannot have the operation performed in the Netherlands yet. It will probably be very expensive too, around € 5000. This procedure only works to make brown eyes blue, and it is permanent. As with other eye surgeries, it can blind you.
  Have a colored iris put in your eye. This operation takes 15 minutes per eye and is performed under local anesthesia.A flexible colored iris is placed in the eye over the natural iris.
 - This is not permanent. The implant can be surgically removed again.
- Recovery after this operation takes two weeks. During this time, your vision may be blurred and your eyes may be red.
- You are not allowed to drive after this operation. Make sure to bring someone who can take you home.
 Know the risks of having irises implanted. As with other surgeries, there are risks associated with having an iris implanted in your eye. Your vision may deteriorate. Some people have become completely blind. Here are some other complications to be aware of:
 - The fake iris increases the eye pressure. This can lead to glaucoma, which in turn can cause blindness.
- The surgery can cause cataracts. With cataracts, the lenses of the eyes become cloudy.
- The cornea can be damaged during surgery. You may need a cornea transplant to fix this.
- The natural iris and surrounding area can become inflamed. Not only is this very painful, but it can also blur your vision.
Tips
- Know that you cannot permanently change your eye color naturally unless you undergo surgery.
- You can also use an app to change the eye color. Depending on your device, you can download an app that allows you to adjust people's eyes in photos.
Warnings
- Never keep contact lenses in for more than a day. If you do, you can get infections and go blind.
- Eye surgery can cause many complications.
- If you notice that your eyes have become much lighter or darker, see your doctor. A drastic change, such as from brown to blue, can be a symptom of a serious condition.


