Author:
John Pratt
Date Of Creation:
10 April 2021
Update Date:
26 June 2024
Content
- To step
- Method 1 of 3: Preparation
- Method 2 of 3: Dyeing all of your hair
- Method 3 of 3: Color strips of hair
- Warnings
- Necessities
If you want to experiment with a different hair color but don't want to make it a long-term story or use harsh chemicals, there are a few "home remedies" that can help. This article will show you how to dye your hair with such a remedy, Kool-Aid drink mix powder. The color will last for a few weeks and your hair will not be damaged by the chemicals themselves used in temporary hair coloring.
To step
Method 1 of 3: Preparation
 Put on gloves to avoid stains. If you don't want to wear gloves, be aware that stains can remain on your skin, but they can be removed.
 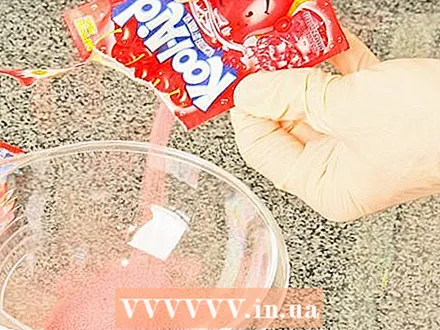 Place the Kool-Aid packets in a small bowl. To avoid sticky hair, use the unsweetened version. Plus, you shouldn't use the artificially sweetened kind either, as the chemicals can irritate your eyes. You may need more packs than recommended here, depending on the length of your hair and how deep you want the color. Suggestions for types of Kool-Aid to achieve a particular hair color are:
 - Tropical punch is good for a bright red
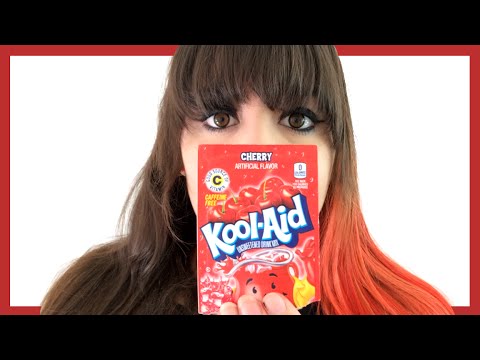
- Cherry works well for deeper reds
- Black cherry mixed with strawberry works for bright red
- Mixing raspberry and grape makes a purple-red color
- Experiment with the variations of your favorite Kool-Aid colors to create other colors.
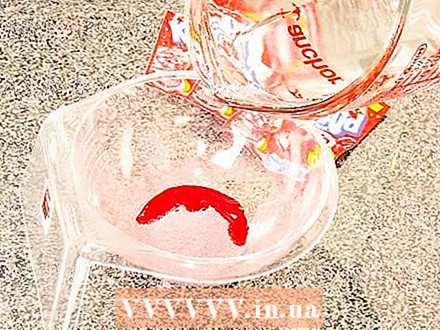 Add a little water to the Kool-Aid. Make sure that the powder dissolves. Make a smooth paste, not a liquid.
 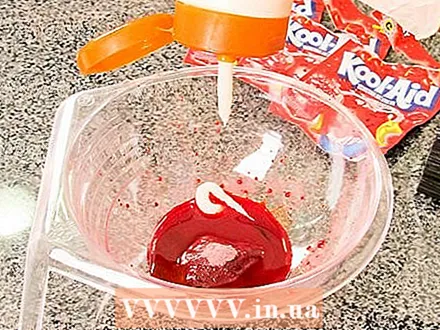 Add a few drops of conditioner to help the color of the hair penetrate the hair more evenly. Adding conditioner also helps make a paste that is easier to use.
  Mix the 3-6 packs of Kool-Aid, water and conditioner together until the ingredients form a smooth paste. Keep stirring until the lumps are gone. It really needs to be lump free before use.
  Wrap the person whose hair you want to dye in cloths (or a garbage bag with a clothespin to hold it in place) to avoid staining. Remember that Kool-Aid can stain fabric, so use an old cloth or rag.
Method 2 of 3: Dyeing all of your hair
 Apply the Kool-Aid paste in the hair at the roots. This is the fun part but you really need help with this if you want to dye your own hair.
  Continue adding the Kool-Aid paste from the center of your hair.
 Apply the Kool-Aid paste in the ends.
 Bring up sections of your hair to make sure the bottom layers of your hair are dyeing too.
 Wrap the hair in a few long strips or cling film. You have to sleep with it, so do your best! This step is important not only to protect your pillows and bedding, but also to retain the moisture that creates a deeper shade of red. It may be a good idea to wrap your pillow in an old cloth in case the cling film comes off while sleeping.
 - You can secure the cling film with adhesive tape.
 Remove the cling film after a good night's sleep. Don't be dismayed by the hideous colors on your skin - everything washes off easily!
  Rinse your hair thoroughly with lukewarm water. Use no shampoo! If you use shampoo, you wash the color immediately. You can apply conditioner if you wish and rinse again. Then comb your hair and wait for it to dry again. The latter shade will be less noticeable with wet hair.
  Get rid of your new Kool-Aid colored hair! Dark hair will only change the shade of wax, but lighter hair color can be changed dramatically! You may need to experiment with this a few times to get the balance for your hair color right - remember that the darker your natural hair color, the less noticeable the effects will be.
Method 3 of 3: Color strips of hair
- If you want points or highlights, use what is called a "highlighting wall" and wrap the painted sections in aluminum foil.
- Cover the entire head (or as many highlights as you like) with cling film and then pin them down. Make sure that the foil does not come off.
- Follow the instructions above if you want to wrap your hair in cling film for an entire night and rinse the next day.
Warnings
- The red paint mixture will remain in some bathtubs when you shower. (The best way to clean is to use a Mr. Clean Magic Eraser or similar product).
- This gives your hair a breath of fresh air; often the scent is striking and strong if you don't use the unsweetened version.
- The color will come off completely after a few washes.
- The Kool-Aid will adhere well to hair that has been chemically treated, meaning hair that has been permed, bleached or chemically styled. Be careful when dyeing and be aware that your paint can last as long as a semi-perm if your hair is exceptionally porous and damaged.
- If you have a sensitive scalp, this may not be the most suitable way; try a small section first to see if you get a response.
- You can of course use a commercial product, temporary or semi-permanent, to dye your hair. You may be more satisfied with the result if you use such a product. But some people dislike chemical makeup or such products and this may be a better alternative for them.
- Cherry Kool-Aid's dye is permanent, so don't spill it on the carpet or the stain will never come off. Any red dye can be quickly faded by ultraviolet light, but this will corrode and fade the fabric as well.
- Do not wet your hair before dyeing. It will leave your hair looking greasy and wet until the dye is washed out.
Necessities
- 3-6 unsweetened Kool-Aid pack, depending on the length of your hair and how strong you want it
- Conditioner (because you don't want your hair to stay tacky).
- A comb (a comb with large teeth is good).
- Color brush (or toothbrush) or something useful to do the strips or highlights. A paintbrush works best.
- Aluminum foil (for strips or highlights)
- Cling film (plastic)
- Adhesive tape
- Gloves (otherwise the Kool-Aid will stay on your hands just like a highlighter)


