Author:
Judy Howell
Date Of Creation:
5 July 2021
Update Date:
1 July 2024
Content
- To step
- Part 1 of 3: Choosing the right workplace and varnish
- Part 2 of 3: Preparing the wood for varnishing
- Part 3 of 3: Varnishing the wood
- Tips
- Warnings
- Necessities
By treating wood with varnish you not only preserve it, but you also help protect it against scratches and stains. Varnish enhances wooden objects and can help bring out the grain and color. You can also buy colored varnish to color the wood. Follow the steps below to varnish your wooden furniture.
To step
Part 1 of 3: Choosing the right workplace and varnish
 Select a well-lit and well-ventilated area. Strong, bright light will make it easier to spot imperfections such as air bubbles, brush strokes, dents and bald spots. Good ventilation is also important because some varnishes and thinners give off strong fumes, which can make you light-headed and nauseous.
 - If the fumes are too strong for you, consider opening a window or turning on a fan.
 Choose a place that is free of dust and dirt. Make sure that the place where you will be working is very clean and dust-free. You may need to mop or vacuum your work area beforehand to avoid getting dust on your workpiece, ruining it.
 - If you work outside, don't choose a windy day. The wind can cause tiny dust particles to get into the wet varnish, ruining the final result.
 Pay attention to the temperature and humidity. Make sure the temperature at your workplace is between 21 to 26 ° C. If it is too hot, the varnish will dry too quickly, creating tiny air bubbles. If it is too cold or too damp, the varnish will dry too slowly, so that tiny dust particles can soak longer in the wet varnish.
  Provide the correct protective equipment. When you varnish wood, you work with chemicals that can be harmful to you if they get on your skin. They can also ruin your clothes. Before varnishing the wooden object, put on clothes that you don't mind getting dirty or stained. Also put on protective gloves and goggles. You can also consider putting on a dust mask or a ventilated face mask.
  Find the right varnish. Many different types of varnish are available, and each type has its own advantages and disadvantages. Some varieties are easier to use than others, while others are more suitable for certain jobs. Choose varnish that suits the job and your preferences.
 - Oil-based varnishes, including some polyurethane varnishes, are very strong. Usually this type of varnish must be mixed with a paint thinner such as turpentine. This varnish also gives off strong fumes and should be used in a well-ventilated area. It is also necessary to thoroughly clean the brushes used to preserve them and make them last longer.
- Acrylic and water-based varnishes have a slight odor and can simply be mixed with water. These types of varnishes dry faster than oil-based varnishes, but are less strong. You can simply clean the brushes you use with soap and water.
- Spray varnish is easy to use. You do not need brushes and you do not need to dilute the varnish. However, it is necessary to use spray varnish in a well-ventilated area as it produces strong fumes that can make you light-headed or nauseous.
- Both transparent and colored varnishes are available. If you use clear varnish you will be able to see the natural color of the wood through the varnish. However, colored varnish can be used as a stain to give a wooden object a certain color.
Part 2 of 3: Preparing the wood for varnishing
 Remove the old finish if you wish. You can apply varnish to an already painted surface to preserve it, or you can apply varnish to a bare, unpainted surface. There are several ways to remove the old paint and varnish, such as using a paint remover and sanding.
 - If the wood furniture has never been painted or varnished or you want to keep the original coat of paint, continue with Step 5.
 Consider removing old paint and varnish with a paint stripper. Remove old paint and varnish by applying paint stripper to the wood with a paintbrush. Leave the compound on the wood according to the directions on the package, then scrape it off with a putty knife with rounded edges. Do not let the paint stripper dry.
 - Make sure to remove any residue of paint stripper. How you get rid of the residue depends on the type of paint stripper you used, but you can remove most with turpentine or water.
 Consider removing old paint and varnish by sanding. You can remove old paint and varnish with sandpaper, a sanding block or a sander. Sandpaper and sanding blocks work best on uneven and curved surfaces, such as buttons and chair legs. Sanders work best on flat surfaces such as table tops. Start with sandpaper with an average grit size like 150 and then move on to sandpaper with finer grits like 180.
 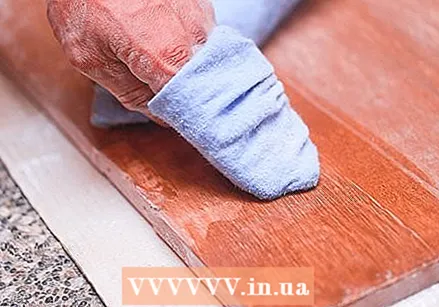 Consider removing old paint and varnish with paint thinner. Like paint stripper, you can use paint thinner to remove old varnish and paint. Soak an old cloth or rag with some paint thinner and rub it over the wooden surface. When the old layer of paint or varnish has come loose, scrape everything away with a putty knife.
  Sand the wood with fine sandpaper. Sanding the wood not only removes residual varnish and paint, but also roughens the surface so that the varnish can adhere to it. Use 180 to 220 grit sandpaper and sand in the direction of the wood grain.
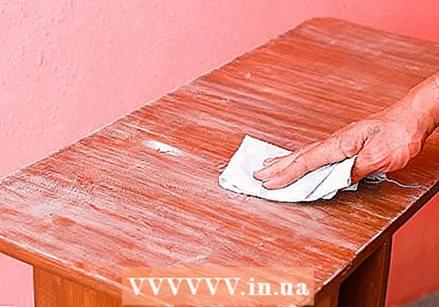
 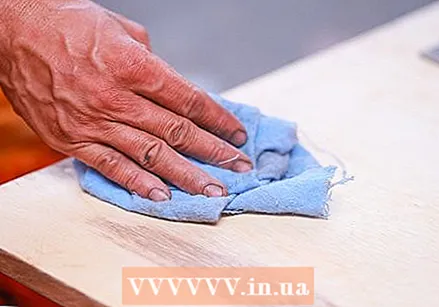 Clean the wood and your workplace with a damp cloth and let everything dry. It is important that your workplace is free of dust and dirt before you start applying the varnish. Clean the wooden object by wiping it with a damp cloth. Make sure you also sweep and vacuum the tables and floor where you will be working. You may need to use a damp cloth or mop.
 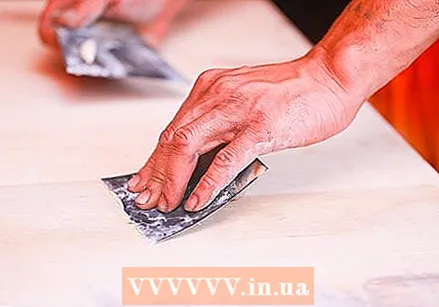 Think about filling in the wood grain. With some open-grain wood, such as oak, it is necessary to fill in the wood grain with a filler to get a smooth finish. You can use a colorant that matches the natural color of the wood, or you can choose one that is the same color as the varnish you will be using.
 - You can use a contrasting color to bring out the grain or choose a similar color to make the grain less noticeable.
Part 3 of 3: Varnishing the wood
 Prepare the varnish for the first coat, if necessary. Some types of varnish, such as spray varnish, do not require preparation. Other types need to be thinned before applying the first coat. This will help seal the wood and prepare it for subsequent coats. You do not need to dilute the varnish for the following layers.
 - Dilute oil-based varnish with a paint thinner such as turpentine. Use part varnish to part paint thinner.
- Dilute water-based varnish and acrylic varnish with water. Use part varnish to part water.
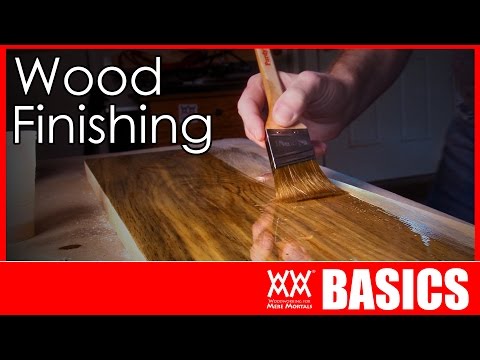
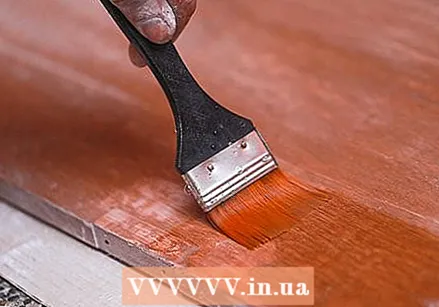
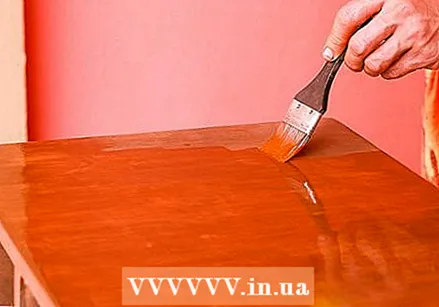
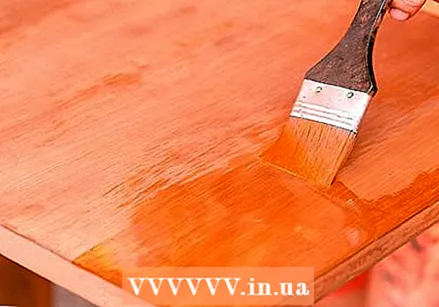 Apply the first coat of diluted varnish and let it dry. Use a flat paintbrush or foam brush to apply the varnish to the wood. Make long, even strokes working with the grain of the wood. Let the first coat dry for 24 hours.
 - If you are using spray varnish, hold the can 6 to 8 inches from the surface and apply a thin, even coat. Let the varnish dry according to the directions on the aerosol.
 Sand the first coat and wipe the surface with a damp cloth. When you have applied the first coat of thinned varnish, you will have to smooth everything out. You can do this by treating the varnished wood with 280 grit sandpaper and then wiping the surface with a dry cloth to remove all dust and dirt.
 - Make sure to wipe your work area with a damp cloth to remove all sanding dust.
- Clean your paintbrush with paint thinner (in the case of oil-based varnishes) or water (if you are using water-based varnishes).
 Apply the next coat of varnish and let everything dry. Use a clean brush or a new foam brush and apply the varnish to the wooden object. Again, make sure you work with the grain. You do not have to thin this layer. Wait 24 hours for the varnish to dry.
 - If you are using spray varnish, you can spray a second coat on the wood. Make sure to keep the aerosol at a distance of 6 to 8 inches from the surface and apply a single, thin coat of varnish. If you apply too thick a layer of varnish, puddles, drips and smudges can form.
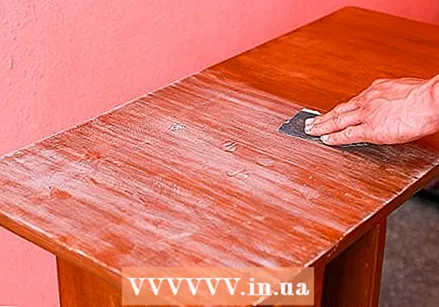
 Sand the second coat and wipe the wood with a damp cloth. When the second layer of varnish has dried, carefully sand the wood with fine sandpaper with a grain size of, for example, 320. Let the varnish dry for 24 hours before applying the next layer and do not forget to remove all sanding dust and dirt that has been released during sanding. sweeping your workplace.
 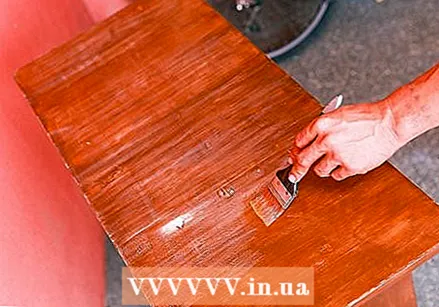 Apply more varnish and sand the wood between coats. Apply another 2 or 3 coats of varnish. Don't forget to let the varnish dry after each coat and sand and wipe the wood before applying more varnish. Always work with the grain when applying varnish and sanding the wood. You do not have to sand the last layer of varnish.
 - You can continue to work with 320 grit sandpaper or switch to 400 grit sandpaper.
- For best results, wait 48 hours before applying the final coat.
 Wait for the varnish to harden. Varnish usually needs some time to harden. To avoid ruining the varnish, leave the wooden object where no one can reach it. Some varnishes are cured after 24 to 48 hours, while others take 5 or 7 days. There are types of varnish that have to cure for 30 days. Read the directions on the tin to find out how long to let the varnish dry and cure.
Tips
- Do not shake the can with the varnish unless you are using an aerosol can. Shaking can cause air bubbles to form.
- By spraying water on the floor of your workspace or sprinkling wet sawdust on it, less dust will fly up when you apply the varnish.
- You can buy varnish that dries well in a humid environment, should the weather be humid.
- Do not use steel wool to sand the wood between coats. Steel fibers can get stuck in the varnish.
- Adding a small amount of sodium carbonate to the water when preparing the wood will help remove more dirt.
- If you are unsure whether you need stain, consider wetting the wood. This is the color that the wood gets when it is varnished. If you think the color is too light, consider adding stain to darken the wood.
- Do not use cold varnish. If the varnish is not at room temperature or warmer, but the medium warmer by placing the can in a bucket of hot water.
Warnings
- Never mix different types of varnish. This can cause a dangerous chemical reaction.
- Make sure you use the correct protective equipment, such as goggles, gloves and a mask.
- Provide good ventilation. Many paint thinners and varnishes give off strong fumes, which can make you light-headed and nauseous.
- Keep the varnish away from open fire. Varnish is highly flammable.
Necessities
- Paint stripper or paint thinner (optional)
- Sandpaper (with a grain size of 150 to 320; possibly sandpaper with a grain size of 400)
- Turpentine
- Varnish
- Paint brushes and / or foam brushes
- Soda ash (optional)
- Dust mask, ventilated face mask and gloves (optional)
- Damp cloth


