Author:
Robert Simon
Date Of Creation:
24 June 2021
Update Date:
1 July 2024
Content
- To step
- Part 1 of 3: Preparing the wood
- Part 2 of 3: Staining the wood
- Part 3 of 3: Finishing the wood
- Tips
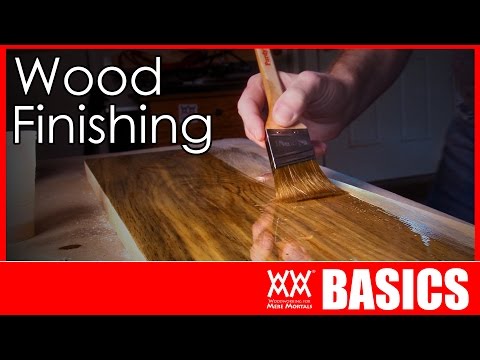
Finishing wood is the last step of a woodworking project. Finishing means that you apply one of the many types of protective agents to the wood. Usually it is a transparent agent generally referred to as lacquer. Whether you're restoring an old piece of furniture or creating a brand new piece of furniture, it's a good idea to bring it to life with stain and lacquer. Start by sanding the wood, then apply stain and finally protect the wood and color it with stain.
To step
Part 1 of 3: Preparing the wood
 Sand the wood. Wood has flaws such as scratches and dents. Whether these errors were caused by the machine when sawing, the wood was scratched or damaged during transport or the damage caused by use and wear, before you can apply stain, varnish or paint, you must sand the wood. That way you can apply new agents to the wood and prevent the flaws from being clearly visible.
 - If you don't sand away the flaws in the wood, the varnish you apply will only make the damage and scratches stand out.
- Start with a piece of sandpaper with a grit size of about 120. In most cases, this will remove any flaws without causing bigger problems.
- Always sand with the grain of the wood. Don't rub against it.
 Sand the wood again, but with finer sandpaper. Sand the wood until you reach sandpaper with a grain size of between 180 and 200. The finer the sandpaper, the higher the number.
 - By sanding the wood several times, you will remove the scratches caused by coarser sandpaper in the previous sanding sessions.
 Examine the wood to see if you are happy with how the surface looks. You can use a bright lamp or wet the wood with paint thinner to clearly see any remaining flaws and imperfections.
 - If you still see errors, you may need to sand the wood again. However, over-sanding a flawed area can only make the problem worse.
- Be careful to get a smooth and flat surface. Some areas may have blemishes that you simply cannot remove.
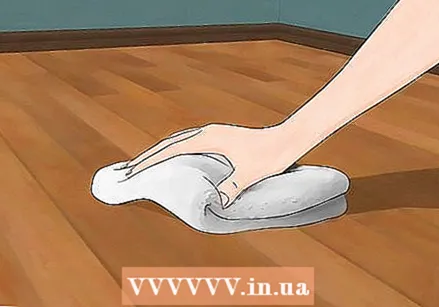 Wipe the wood and wipe off any sanding dust. After you've sanded the wood, wipe it with a cloth to remove all dust particles. In principle you can use any cloth, but with an adhesive cloth you will remove most of the dust.
 - If you do not wipe the wood before applying stain or paint, bumps and unevenness can form in the paint layer.
Part 2 of 3: Staining the wood
 Test the color before applying stain. Apply a small amount of stain to an inconspicuous area on the wood, such as the underside or a piece of scrap wood. When you are happy with the color of the stain on the wood, you can start staining the wood.
 - Leaving excess stain on the wood will not affect the color much, but it can cause stains and an uneven stain finish.
- Always stir the stain when you prepare it. Never shake the can.
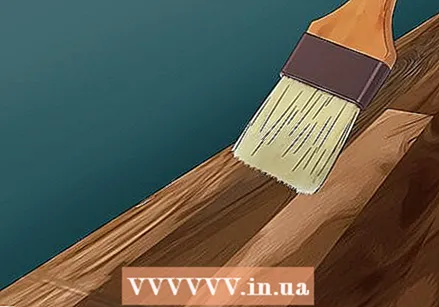
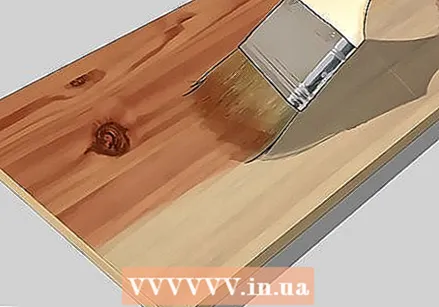
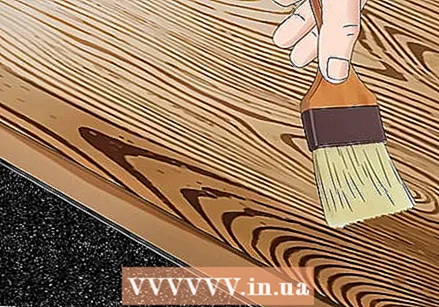
 Apply the stain with a cloth or brush. Apply an even layer of stain and make sure that no puddles of stain and lumps remain on the wood. A brush works better than a cloth and will help you apply the stain more evenly.
 - Make sure the cloth or brush does not drip onto another surface when you dip it in the stain. This way you don't spill stain in other places.
- Thoroughly wipe the stain into the wood, making sure to apply it evenly. Go over the brush strokes several times to spread the stain and get a smooth surface.
 Start by applying the stain to a small area like a leg or the front of a drawer. This way you can see how quickly the stain dries. If your stain dries too quickly, you can make it liquid again by applying new stain. However, the stain layer will then become darker. Immediately wipe off the excess stain.
 - When you know how long it takes for the stain to dry, you can stain the rest of the furniture.
- If the stain layer is not dark enough, you can apply several layers of stain.
 Continue to apply the stain. Apply a wet coat of stain and wipe off the excess stain before it dries. Wait until the first coat is completely dry before applying a new coat. Always treat a single surface at a time.
 - Do not apply more stain to areas you have already finished, as this will cause the stain layer to change color.
Part 3 of 3: Finishing the wood
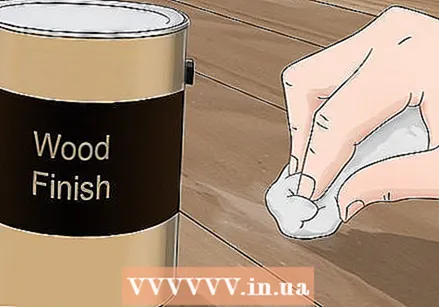 Choose lacquer for the wood. Water-based paint is less harmful, non-flammable and better for the environment than other types of paint. Transparent polyurethane lacquer gives your wood a nice protective layer.
 - Choose transparent lacquer with a gloss that you like for the wood. If you choose high-gloss lacquer, the wood will have a stronger gloss than with satin lacquer or matt lacquer.
- Varnish that contains a lot of water sometimes causes the fibers of the wood to swell unevenly. Apply several thin layers of this type of lacquer.
- You can also carefully sand away any imperfections that you see on the wood after applying the first coat. Apply at least two additional coats after the first coat for a thorough, even finish. You probably sanded the first layer more than usual for a coat of paint.
 Apply lacquer to protect the wood from water damage, dirt and stains. Just like you did with the stain, use a brush with natural bristles to apply the lacquer. Apply the lacquer with the grain of the wood and not against it.
 - Stir the paint in the can before applying. Do not shake the can. Shaking can cause air bubbles to form, which can then end up in the lacquer layer on the wood.
- Water-based polyurethane lacquer is the best finish for bare wood, as the lacquer makes the characteristics of the wood itself stand out, such as the grain and natural color.
- Oil-based polyurethane lacquer, in combination with stain, provides a more durable finish.
- Wipe lacquer (oil-based polyurethane lacquer half thinned with paint thinner) is the best lacquer for stained decorative pieces. You can easily apply this lacquer flawlessly, but it does not protect the wood against wear.
 Spread the lacquer on the wood with a brush with natural bristles. You can also use a foam brush about two inches wide. Let the first coat cure overnight.
 - Apply several coats of lacquer to the wood. However, let the first coat dry completely so that you can sand and smooth it lightly before applying more coats.
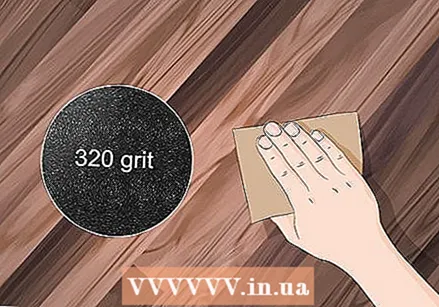 Sand the paintwork when it is dry. Sand the first coat with 280 grit sandpaper or finer sandpaper if there are not many imperfections.
 - Remove all sanding dust with an adhesive cloth or a vacuum cleaner, then apply a second coat of lacquer.
 Apply the second coat in the same way as paint. If you see air bubbles, remove them by running the brush over the area again to smooth them out. If possible, work with the grain of the wood.
 - In the case of a smooth surface, iron the paint from one side to the other and from front to back.
- Apply as thin a layer of lacquer as possible and make the strokes side by side so that the lacquer evenly covers the wood.
 Sand every subsequent coat of paint. Just like you did with the first coat, sand each subsequent coat after curing to remove all dust particles in the paint.
 - Now also remove all sanding dust with an adhesive cloth or vacuum cleaner.
- Apply another two or three coats of lacquer. When you have applied a few layers of lacquer, iron the last layer of lacquer on the wood. Do not sand the last coat of paint.
- You do not have to sand the last layer, because this will remove the beautiful shine and beautiful appearance.
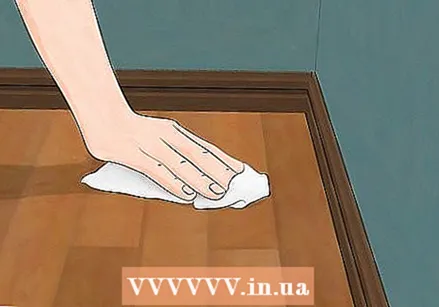
- When the paint is dry, wipe the wood with a soft cloth to remove all particles.
Tips
- It is recommended to use separate stain and lacquer instead of stain and lacquer in one. The wood will look better and will have a more durable finish.
- Apply the stain and lacquer with long, smooth brush strokes.
- Make sure to wipe off all sanding dust and particles with an adhesive cloth before applying stain.
- If you're not working on a workbench, put down a tarpaulin and wear old clothes. Put on protective gloves. If stain ends up on a surface other than the wood, you may not be able to remove the spilled stain.


