Author:
Roger Morrison
Date Of Creation:
21 September 2021
Update Date:
1 July 2024
Content
- To step
- Method 1 of 3: Make a basic face cream
- Method 2 of 3: Make aloe vera face cream
- Method 3 of 3: Make green tea face cream
- Tips
- Warnings
- Necessities
- Making a basic face cream
- Make aloe vera face cream
- Make green tea face cream
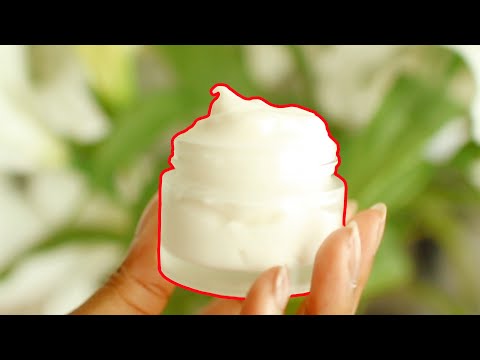
Whether you want to be more economical or simply want to lead a more natural lifestyle, there are many ways to make your own face cream. Homemade face cream is not only cheaper than store-bought creams, but you can also check what goes in for yourself. Making your own face cream is surprisingly easy and once you know how to make the base, you can use all kinds of other recipes.
To step
Method 1 of 3: Make a basic face cream
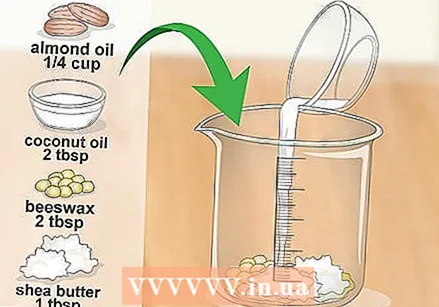 Place the first four ingredients in a heat-resistant container or measuring cup. You will need: 60 ml almond oil, 30 g coconut oil, 30 g beeswax granules, and 15 g shea butter. Wait a little longer with the vitamin E oil and the essential oil.
  In a saucepan, bring a little water to the boil. Fill a pan with water to a height of 7.5-10 cm. Put the pan on the stove and bring the water to a boil.
  Place the pot or measuring cup in the water and let the contents melt. Take the jar that you put the oils, beeswax, and shea butter in and put it in the pan. Leave the pot in the pan until everything has melted, stirring occasionally. Do not cover the pan or pot.
 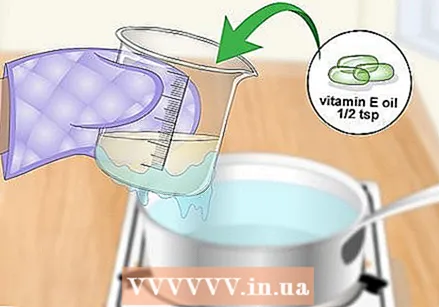 Remove the jar from the water and add the vitamin E oil to it. Use a pot holder or an oven mitt to remove the pot from the water. Place it on a heat resistant surface. Let it cool for a few moments, then add ½ teaspoon of vitamin E oil to it.
 - Measuring the vitamin E oil will be easier if it is in a bottle, but you can just as well use capsules - just pierce them first.
 Consider adding two to three drops of the essential oil. You can use any kind of essential oil you like for this. Start with two to three drops first and then add a little more if necessary. The essential oil will give the face cream a nice scent. Some types of essential oils also have a beneficial effect on the skin, such as:
 - Acne or oily skin: lavender, lemongrass, palmarosa, pepermut, rosemary
- Dry or aged skin: lavender, palmarosa, rose, rose geranium
- Normal skin: rose, rose geranium
- All skin types: camomile, palmarosa
 Move the mixture to a clean jar, let it cool and harden. Put the cream in a 120 ml glass jar, preferably one with a wide opening. Let the cream cool and harden at room temperature.
 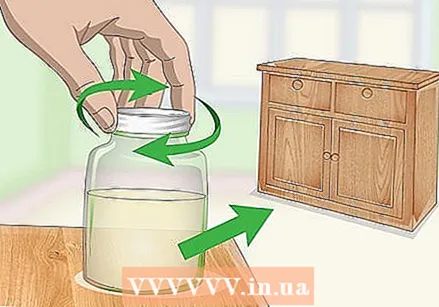 Close the jar and keep it in a cool, dry place. You can use this cream in the morning and in the evening without any problem. It will last for about three months.
Method 2 of 3: Make aloe vera face cream
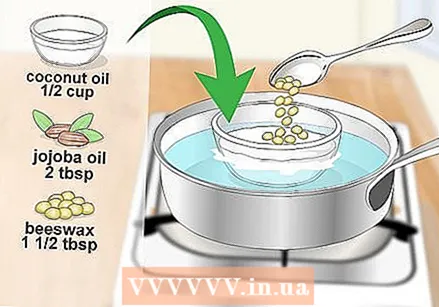 Place the oils and beeswax in a double boiler. Fill a saucepan with about 2 inches (5 cm) of water, then place a heat-resistant glass bowl on top. Add 105 g coconut oil, 30 ml jojoba oil, and 20 g beeswax granules.
 - Wait a little longer with the aloe vera and essential oil.
 Melt the oils and beeswax. Bring the water to a boil with the heat on medium-high. Let the oils and beeswax melt, stirring occasionally. You are done with this once it is liquid and translucent.
  Transfer the mixture to a blender and let it cool for one to an hour and a half. Make sure the blender is heat resistant (glass, that is). If you have a plastic blender, you will need to let the mixture cool down first and then put it in the blender with a spatula.
 - If you don't have a blender, you can safely use a food processor instead.
 Mix the mix while gently adding the aloe vera gel. Set the blender on a low setting. While it is running, add 235g of aloe vera gel. Every now and then you have to turn off the blender and scrape the sides down with a rubber spatula.
 - Use natural aloe vera gel, not aloe vera juice or homemade gel.
 Add five to eight drops of the essential oil. This is not necessary, but it will provide the cream with a pleasant scent. If you use the right kind of essential oil, this can also have a beneficial effect on your skin. For instance:
 - Acne or oily skin: lavender, lemongrass, palmarosa, pepermut, rosemary
- Dry or aged skin: lavender, palmarosa, rose, rose geranium
- Normal skin: rose, rose geranium
- All skin types: camomile, palmarosa
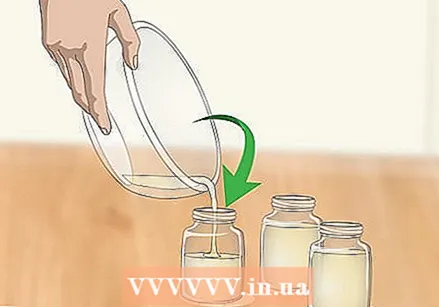
 Mix everything together and transfer it to clean glass jars. Blend the mixture or whisk it by hand until light and fluffy. Use a rubber spatula to transfer the cream to the glass jars. Pots with a capacity of 60 or 120 ml will do fine for this.
  Keep the jars in the refrigerator. You can safely put a jar in the bathroom, but the rest should be kept in the fridge to make the cream last longer. Use the cream in the morning and evening, and within three to four months.
Method 3 of 3: Make green tea face cream
 Place the beeswax and oils in a double boiler pan. Fill a pan with about 2 inches (5 cm) of water. Then place a heat-resistant glass bowl on top and add the following: 7 g beeswax granules, 30 ml almond oil, 30 g coconut oil, and ¼ teaspoon rose hip seed oil.
 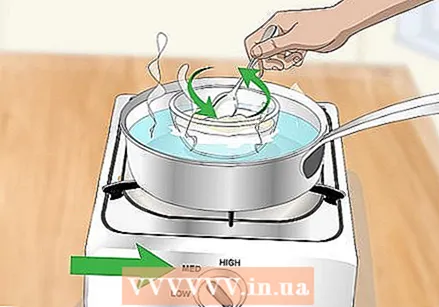 Let everything melt over medium heat, stirring every now and then. As the ingredients melt, they will clear. Once the color is translucent and there are no more lumps, it means you're done with it.
  Add the tea to the mixture and let it pull off the heat. Remove the bowl from the pan and place it on heat-resistant surface. Add a green tea bag to the melted oil and beeswax mixture. Let the tea steep for 15 minutes.
 - You can keep the tea in the bag or cut open the bag and add the loose leaves to the mixture.
 Blend the mix until it is creamy. Do this with a hand mixer or with a food processor fitted with a whisk. Keep mixing until the mixture is creamy and brought to room temperature.
 - If you have put the tea into the mixture in loose leaves, you must first strain it, using a fine mesh strainer.
 Transfer the mixture to a mason jar and let it cool. For this, choose a 240 ml jar with a wide opening. Use a rubber spatula to transfer the mixture to the jar. Let the mixture cool further and close the jar.
 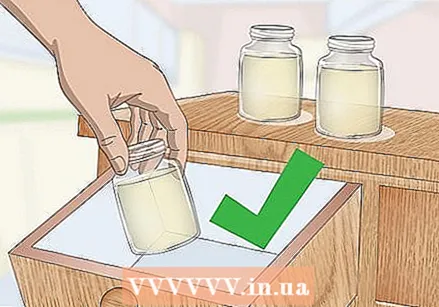 Keep the jar in a cool and dry place. You can use this cream fine both in the morning and in the evening. Do use it within three months.
Tips
- You can buy the essential oils online and in health food stores. Do not replace fragrance oil with candle oil - it is not the same.
- The beeswax stabilizes the cream. If you don't have beeswax, use half the amount in carnauba wax, emulsion or soy wax.
- Only use 100% beeswax. If you can't get it in granular form, grate it off a block.
- Consider keeping the cream in smaller jars - these are easier to use than a large jar.
- Do not use wax intended for making candles. This is often mixed with other ingredients that are not exactly skin-friendly.
- Most homemade creams will last for a few months. If they start to smell or look strange, throw them away immediately.
- Do not add the essential oil to the mixture while it is still warm - you risk ruining the beneficial properties of the oil.
Warnings
- Make sure all items and pots used are clean and sterile. If these are dirty, bacteria can get in.
- Never use face cream on dirty skin. If you do this, you're actually trapping the dirt and it will give you a rash. Always wash your face first and put a toner on it.
Necessities
Making a basic face cream
- 60 ml almond oil
- 30 g coconut oil
- 30 g beeswax granules
- 15 g shea butter
- ½ teaspoon of vitamin E oil
- Essential oils (optional)
- 120 ml glass jar
- Heat resistant glass jar or measuring cup
- Pan
Make aloe vera face cream
- 235 g of aloe vera gel
- 105 g coconut oil
- 30 ml jojoba oil
- 20 g beeswax granules
- 5 to 8 drops of essential oil (optional)
- Au-bain-marie-pan
- Blender or food processor
- Rubber spatula
- Glass jars
Make green tea face cream
- 7 g beeswax granules
- 30 ml almond oil
- 30 g coconut oil
- ¼ teaspoon of rose hip seed oil
- 1 bag of green tea
- Au-bain-marie-pan
- Blender or food processor
- Rubber spatula
- 240 ml glass jar


