Content
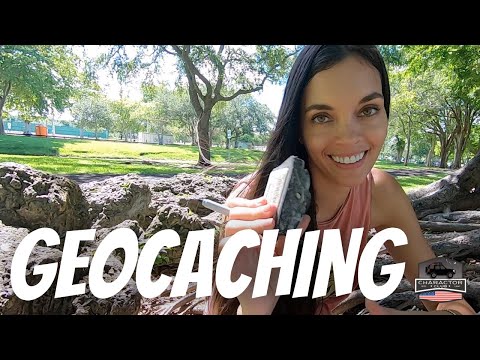
Geocaching is an outdoor sport / game where you have to find a certain "treasure" with the help of GPS equipment. These "treasures" can consist of a simple notepad hidden under a tree stump, but it can also consist of a chest containing things. With geocaching, a walk in the woods gets a totally new dimension. Walking aimlessly on forest paths becomes a trip between trees and "impassable areas". Geocaching is a sport for young and old, the children are happy to go on a trip through the forest. The caches are not only "hidden" in forests, but may also be located in urban areas.
To step
 Find the treasure. The treasure (cache) usually consists of a waterproof box containing a notebook in which you can enter data when the cache has been found. In addition to this notebook, there are also caches where there are other things (goodies) in the cache. In general, these are swap items specially designed for children. When you have found the cache, you can take something out of it and then add a new surprise for the next detective. As mentioned, these are often items specially designed for children: a set of colored pencils, stickers, a smurf or other small toys. However, there are also caches that have been set out especially for adults. The cache is not always a simple waterproof box, but can also consist of an ammunition box or a film tube, in fact anything is suitable if it can withstand the test of time and weather influences. When you have found the cache, write the name of the finder and the date in the notepad, and also report on a special website whether the cache in question has been found. The intention is to hide the cache after finding it in the same way and in the same place as where it was found. Obviously, the pleasure of others can be "ruined" if a cache suddenly disappears.
 - To find the cache and possibly extra "tools" in the sense of a compass, maps and possibly a flashlight. Everyone understands that a GPS receiver is part of the basic equipment of a geocacher. If you are very good at reading maps and have very detailed maps, you can theoretically search and find many caches without a GPS receiver. But you could say that a GPS receiver is usually necessary to search for a cache. If you want to try geocaching, you can of course always borrow or rent a GPS receiver. But the purchase of a receiver does not have to be really expensive. If you search within the second-hand market, you can already find good basic receivers for a reasonable price. You can of course also decide to purchase a new receiver, the price of this receiver starts around 100 Euro and goes up to 500 Euro or even more.
- Then, of course, the irrevocable question follows: "Which receiver should I buy?" Unfortunately, it is difficult to advise anyone on this. For example, it depends on what you want to do with the recipient. Do you only want to use the receiver for geocaching or do you also want to use it for car navigation? Do you also want to use the receiver while climbing a mountain or do you prefer to stay with both feet in the polder clay? Do you only want to search for "normal" caches or do you also want to get started with Wherigo? Does the receiver have to be user-friendly so that the children can also work with it? Does the receiver have to be waterproof because it also goes on the boat? So first determine what you want to do with the receiver and then compare the specifications of different receivers. Get advice from one of the many geocaching websites. Keep in mind that you will then have to deal with the personal preferences of other geocachers. For example, there is a group of old-school cachers that don't see anything in modern equipment that have all kinds of extra gadgets. There are people with a preference for brand A and people with a preference for brand B or C. It is therefore virtually impossible to give someone good advice about purchasing via this website.
- Determine the goal. You are in possession of the necessary items that you can use when you go out to search for a cache. Before you go out, you must of course determine your goal. Visit one of the websites where a database of available caches can be found. Most of these websites require you to register yourself before you can access the necessary information.
- Next, find a cache that is near the residential area or in another area where you are well known. Especially during the first quests it is useful if you are walking through an area that you are already quite familiar with. You are then aware of certain situations and circumstances.Print out the data associated with the cache and then choose a few more "spare" caches to search if the search for the target cache crashes.
- It is wise to find out the simpler caches in the beginning. do not immediately get started with a complicated "Mystery cache" but rather look for a traditional cache. Often the website where you found the information about the cache also states how difficult the cache is.
- Also look at things such as the length of the tour, but also the terrain conditions. An initial search can end in disaster if you immediately venture into an inhospitable area without being properly prepared. You can always read the logs that people have posted after they have found the cache in question, often you can tell from this whether the cache is "doable" for a beginner. See if there are any spoilers (clues) available that can make it easier for you on the first search. Finding some cachers requires solving complicated riddles and calculations, skip these caches at first as you will have your hands full with the basics of the search.
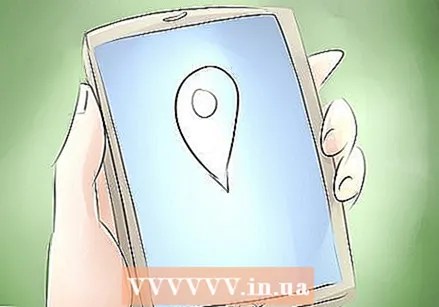
- Get out there. Make sure the GPS receiver is set up correctly, pay particular attention to the correct map date (WGS84) and enter the required coordinates manually or automatically using a computer. All preparations have been made and you can go to the starting point where the search can begin. In general, this will be a parking area near a nature reserve or forest. It is a good idea to enter a waypoint into the GPS receiver at this location. It can always happen that you get lost. If that is the case, you can always navigate back to where the car is parked.
- The necessary coordinates have been entered into the GPS receiver and can be switched on. Generally, an arrow on the receiver screen will now point in the direction and distance from the location that corresponds to the coordinate that was entered. This does not take into account roads and hiking trails, the arrow indicates the shortest distance to the cache as the crow flies. Determine the route to the location in question yourself, using the hiking trails and roads that are available. Do not walk straight through a vulnerable nature reserve to get to a cache as quickly as possible.
- The reception, and therefore the accuracy, of the GPS equipment depends on a number of factors. For example, the weather can influence the reception, but also a canopy that blocks the signals from a satellite. You need at least the signal from two satellites to navigate. The more satellites that are received, the more accurately the equipment will work. Make sure that the GPS receiver is in the correct "mode", it is different for car navigation, for example, than for navigation while walking. This has to do, among other things, with the speed at which one moves.
- Take in the environment. According to the data from the GPS receiver, at one point you are at a distance of ten meters from the cache. Do not try to get to the cache within one centimeter. You always have to deal with a deviation and tolerance, assume an accuracy of about five to ten meters. Continue the last meters of the search and get as close to the cache as possible.
- What do you see? Are there any strange things that seem to be wrong? Is there a strange mountain of leaves in a place that doesn't seem natural? Do you see traces left by other geocachers? You look and look but you don't see anything at first. We now assume that you will not be able to find anything even after a very good search. The next step is often not necessary. Now mark the place where according to your GPS receiver the cache should be. Use a marking ribbon for this, for example a piece of fabric that is clearly visible from a distance.
- Walk away from the affected location and approach the affected area again from a different direction. Follow the directions on the GPS receiver. It will often turn out that you now end up at a different location, mark this location as well. Repeat this until you've marked an area for yourself that the cache should almost certainly be within. Again, the use of these types of markers is by no means always necessary, but it can be useful if the ultimate finding really does not work.
- Don't get noticed! Try not to stand out too much. There can always be people who are curious about your search. Prevent the cache from being looted by people who are not geocaching. There are even people who deliberately rob caches and extract goodies, travel bugs and geocoins. Too inconspicuous can be striking again, so don't sneak through the forest like a true commando who seems to be on a secret mission. Act as normally as possible.
- Search well. The people who post caches are often very creative and smart at hiding a cache. For example, look under an old tree stump or under a piece of wood that "happens to be" on the spot. But it goes further, there are people who use fake stones, bird houses, etc. Caches can be underground but also at eye level or even higher. When searching, work structurally and do not kick a number of tree trunks at random. Take into account the vulnerability of the environment and make sure that you do not destroy anything. The search is not always easy, try to put in the mind of the person who hid the cache, where would you place a cache? If necessary, sit back and take in the surroundings again. It is striking to notice that children, for example, look differently from adults. You should have read the approximate size of the cache in the description of the cache. A cache can be very small and the size of a film canister. The cache can be "stuck" to something with the help of a magnet. There are also larger caches that are the size of a shoebox or even larger. Search and you will find!
- Found it! With a proud smile on your face you conjure up a cache. Make sure that you do not stand out too much, preferably walk a bit away from the location and then open the cache. This should contain at least a log, but often also goodies and possibly travel bugs and / or geocoins. It can always be the case that the cache is in bad condition and, for example, has become wet or even damaged. Always contact the cache owner if you find this. Once you have found the cache, you are always somewhat responsible for the cache. This in the sense that it is good, for example, to temporarily repair certain damage or to dry the cache and content for a while. If necessary, put a log and other items in a sealable plastic bag to prevent further damage.
- Of course always write a log in the logbook first, if there is room for that you can write a short story but at least mention your name, date and possibly the time when you found the cache. And then it is time to trade a goodie if necessary, take a goodie from the cache and put a new goodie back in the cache. Make sure that the goodies fit together a bit, children are not happy with a set of batteries. Don't just take a travel bug or geocoin with you because you like it. Remember that taking these items is an obligation to the owner. Take a photo to prove that you have found the cache. This is not mandatory, but it is nice if you can add a photo to your log in the evening. Make sure this photo does not contain spoilers (clues) because that can give too much away for people who want to search for the cache in the future. For example, take a picture of yourself with the cache or log in hand.
- Restore the cache. The best part of the search is now over, you have found your first cache. However, you still have to fulfill the most important task. The cache must be placed back carefully. Make sure that other geocachers can still enjoy the cache. Pack the items in the cache again and replace any plastic bags if they are broken. Make sure the cache looks good on the inside and take a moment to do this properly. It is very frustrating when a log is harmlessly crammed back into a cache, the cache installer has put time, effort and enthusiasm into the cache.
- Make sure that the cache is hidden from view again and possibly cover it with some camouflage material (leaves and the like). Then remove any traces you have left behind and make sure you don't leave a mess. Empty drinking cans and plastic disfigure the environment, possibly take the rubbish left behind by other people on the site: Geocachers are generally nature lovers!
- Post a log. You are back home after a wonderful day outdoors. Now take a moment to take the final steps to complete the search. Post a log on the page where you got the data about the cache in question. The way in which you can do this is described on the relevant website. Report the cache owner of any corruption or other issues. It may always be the case that you have not been able to find the cache in question, please also report this as this may be important information for the owner of the cache.
Necessities
You are not really there with just a GPS receiver. Of course you can already go and you will generally come a long way, but it is wise to also consider the following:
- Hiking boots
- Compass
- Map (Map Date WGS84)
- First aid equipment (e.g. to remove a tick)
- Pen and paper
- Goodies (swap items)
- A print of the cache you want to search (possibly stored in a PDA)
- Mobile phone
- Food and drink
- Marking ribbon (piece of fabric or similar)
- Sealable plastic bag (size sandwich bag, freezer bag)
- Possibly binoculars, calculator, flashlight and / or prod
- Camera
- Spare batteries for GPS


