Author:
Frank Hunt
Date Of Creation:
17 March 2021
Update Date:
1 July 2024

Content
- To step
- Part 1 of 3: Bringing back warm undertones
- Part 2 of 3: Dyeing your hair
- Part 3 of 3: Processed hair care
- Necessities
- Tips
- Warnings
Maybe you've bleached your hair to dye it a lighter brown, or maybe you're just done with the bleached look - whatever your reason, you're ready for a change! It can be a difficult process to dye your bleached hair back to brown, especially when your hair has lost its natural warm undertones. To achieve your desired hair color, apply a tinted protein filler to bring warm tones back to your hair, then apply a brown hair dye that is a few shades lighter than the color you want to achieve in the end.
To step
Part 1 of 3: Bringing back warm undertones
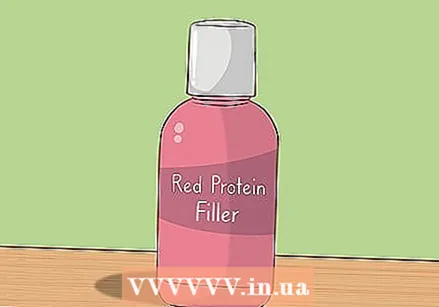 Choose a red protein filler to tone and strengthen bleached hair. Find a filler with a strong red shade to bring back warm undertones to your bleached hair. This will help keep your hair from turning green or ashy when you dye it brown. It also helps the paint stick to your hair for smooth, even coverage.
 - Layering color can be quite difficult, so if this is your first time using a tinted protein filler, you may want to check with a professional hair color expert before getting started.
 Wear old clothes and wrap a towel around your shoulders. While most tinted protein fillers are washable, try to protect your clothes as much as you can. Put on a hair dye cape or some old clothes that you don't mind getting dirty, then wrap an old towel around your shoulders to protect them from the spray.
 - It is also best to put on a pair of latex gloves before starting to avoid discoloration of your skin.
 Dampen your hair before you start applying the filler. Fill up a spray bottle with water and spray your hair with it until slightly damp. Don't soak your hair - just spray enough water on your hair until it feels like you towel-dried it after you shower.
  Pour the filler into a clean spray bottle and screw the top on. Since your hair is already damp, you don't need to dilute the filler solution. Simply pour the filler into your spray bottle and seal it tightly.
 - Make sure to use a clean spray bottle to avoid contamination of the tinted protein filler.
 Spray the filler through all your damp hair. While wearing your latex gloves, start spraying the filler on all areas where your hair is bleached. Work in sections by lifting and spraying your hair until all of your bleached hair is thoroughly covered.
 - You only need to apply the filler to hair that has been bleached or dyed! Don't worry about your natural outgrowth, because your natural hair is not brittle or porous due to chemical processing.
 Comb through your hair with a wide comb. This will help distribute the filler evenly by pulling it through your hair. Start at your roots, or where the bleached hair begins, and gently pull the comb through your hair to the tips of it. When you've combed through all of your hair, rinse the comb and let it dry.
 - Make sure to use a wide plastic comb that you don't mind getting filler on.
 Let the tinted filler sit for 20 minutes before you start painting. Set a timer and let the filler work in your hair for a full 20 minutes. Do not rinse the filler when the time is up! It should stay in your hair until you have finished dyeing and processing the brown hair dye.
Part 2 of 3: Dyeing your hair
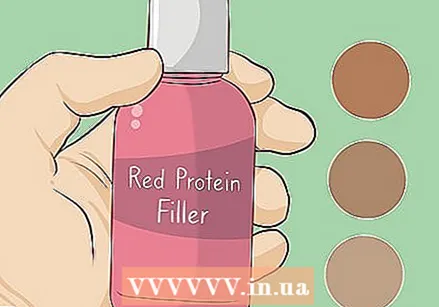 Choose a color that is 2-3 shades lighter than the color you want to end with. Because bleached hair is more porous than hair that has not been bleached, even with the protein filler it will absorb more color than healthy hair, and look much darker than the intended color. You will want to choose a slightly lighter color to balance out this effect.
 - If you're buying a hair dye based on the photo on the box, pick one that's slightly lighter than what you'd like.
 Protect your skin and clothing with gloves and an old towel. Before mixing the paint, put on a pair of latex gloves and wrap an old towel around your shoulders to protect your clothes. The paint will discolor anything it comes into contact with, so make sure to wear old clothes that you don't mind getting dirty.
 - Use a dark towel to hide stains from the hair dye.
 Mix and apply the brown hair dye according to the instructions on the box. Measure and mix the hair dye and developer from the hair dye kit with a hair dye brush in a plastic bowl. In general, paint and developer should be mixed in a 1: 1 ratio, but this may vary between manufacturers. Make sure to follow the instructions on the box and combine the products so that they have a creamy texture.
 - Some kits will also provide a conditioning or moisturizing treatment.
 Divide your hair into 4 parts and pin them up. Use the pointed end of your hair dye brush to distribute your hair along the center of your head, then from side to side. Pin each section up with a plastic bobby pin to keep your hair out of the way while you work. Take down 1 part at a time, working part by part on applying the dye to your hair.
  Apply the paint to your hair part by part. Take the first section of hair out of its hairpin, fill your hair dye brush with hair dye, then apply the dye to a thin layer of hair about an inch thick. Start at your roots and apply the paint to both sides of the film to cover your hair thoroughly. Work through each section of your hair until all of your hair is covered.
 - Get as close as you can to the base of your hair roots without touching your scalp.
- If the color matches the color of your natural outgrowth, try to blend it into your roots so you don't have to worry about outgrowth as much. However, getting the colors to match exactly can be very difficult, so unless you have a lot of experience coloring your hair you may just want to paint your entire head.
 Let the hair dye process for as long as it is indicated on the box. Most brown hair dyes take 30 minutes to process, but always follow the instructions. Check how your hair is doing every 5-10 minutes until the 30 minutes are up.
  Rinse the hair dye with lukewarm water until the water runs clear. Run water through your hair under a sink or shower. Work your fingers through it and rinse out any excess paint. Look at the water running down the drain to see if it is still tinted by the paint - when the water has run out of color, you're done rinsing!
 - After rinsing, apply a color-treated hair conditioner according to the manufacturer's instructions. This will help contain your color.
 Let your hair air dry instead of blow drying it. Avoid using a hair dryer as the heat can be too intense for your freshly processed hair. Instead, dab your hair with a dark towel to remove excess water, then let it air dry naturally.
Part 3 of 3: Processed hair care
 Avoid washing your hair for the first 24 hours after dyeing. During this time, the hair dye will still oxidize and settle in your hair. Washing too quickly can sometimes remove the color from your hair, something you definitely want to avoid.
 - This could mean skipping a few fitness sessions to avoid washing your hair.
- You can also wear a shower cap to keep your hair dry in the shower.
 Wash your hair every other day at most. Since washing your hair can fade your hair color, try washing your hair every other day, and if you can, even less. You may even want to give your hair 3-4 days between washes as it will likely be drier than usual after dyeing.
 - If your hair gets greasy in between washes, try using a dry shampoo.
 Use color protecting shampoo and conditioner to wash your hair. These products are mild and specially formulated to help your color last longer and keep your hair healthy. Look for ingredients that will moisturize your hair and help remove build-up of dirt without stripping your color, such as keratin, natural plant oils, and minerals.
  Avoid using heat styling tools while your hair is still fragile. Since your hair will be more prone to damage after the chemical treatment, you will want to use as little heat as possible on it. This means avoiding the use of styling tools such as curlers, straighteners, and blow dryers.
 - If you have hot tools must use, make sure you apply a heat-protecting product first and / or use the lowest heat setting or the cool setting of your styling tool.
- It is also best to avoid using heat styling tools in combination with heavy styling products, such as gels, volumizers, hair sprays, and mousses.
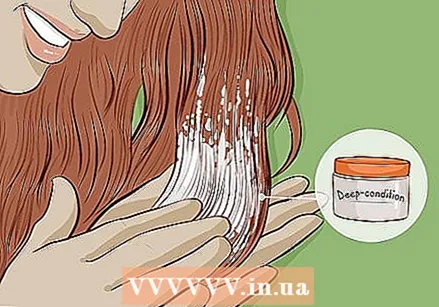 Use a deep conditioner on your hair once a week to keep it hydrated. If your hair still feels brittle or dry, use a deep conditioning treatment or hair mask once a week. Work the product through your hair, especially focusing on the ends, then run through your hair with a wide comb to make sure the product is evenly distributed. Leave the mask on your hair for 20 minutes (or as long as the product recommends), then rinse thoroughly.
 - Find a moisturizing mask made especially for colored hair.
- This is especially important if styling your hair requires heat styling tools.
Necessities
- Red-tinted protein filler
- Wide plastic comb
- 2 spray bottles
- Brown hair dye
- Hair dye brush
- Mixing bowl
- Plastic hairpins
- Dark towels
- Latex gloves
- Color protecting shampoo and conditioner
- Deep conditioning hair treatments
Tips
- Apply a layer of petroleum jelly along your hairline and ears to avoid staining your skin when applying the brown hair dye.
- Try a hair test before dyeing your entire head to make sure you will be happy with the color. Choose a 1-1.5 cm section of hair that you can easily hide, and apply the dye to this section according to the instructions on the box.
Warnings
- Since hair dyes and fillers contain chemicals, make sure you dye your hair in a room with good ventilation, such as an open window and air supply.


