Author:
Roger Morrison
Date Of Creation:
4 September 2021
Update Date:
1 July 2024
Content
- To step
- Method 1 of 3: Cutting a bowl of watermelon
- Method 2 of 3: Cutting a cucumber flower
- Method 3 of 3: Cutting out more complicated designs
- Tips
- Warnings
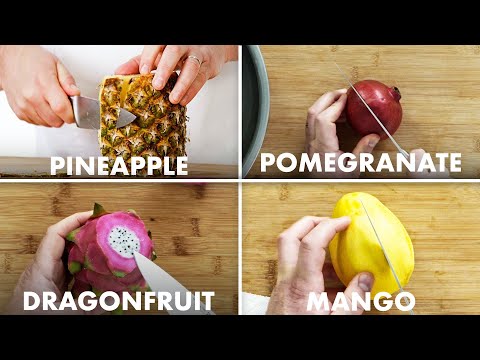
Artistic chefs in Thailand, China and Japan have been cutting fruits and vegetables into amazing shapes for centuries. Most designs require nothing more than a sharp paring knife and a fruit or vegetable of your choice. With enough practice, you can turn these ingredients into anything from attractive garnishes to impressive visuals.
To step
Method 1 of 3: Cutting a bowl of watermelon
 Select a melon. Choose a melon with a firm, hard bark, and no obvious bruises or soft spots. Watermelons are often used for this because they are so large, but any firm melon is suitable.
  Cut a small piece off the bottom of the melon so that it stands. To do this, use the sharpest knife you have for the most control over the cutting. You can set up the melon vertically, or use the long side for a larger bowl.
 - A stainless steel knife is best suited for this, to prevent the fruit from discolouring.
 Draw a pattern on the melon. Use a permanent marker to draw a pattern on the melon (e.g. the silhouette of a bird). You can do this freehand, but most people use tracing paper for this. You can find patterns online or in specialty hobby stores.
 - It can get very difficult to find patterns specifically for slicing cantaloupe, but many sites are dedicated to pumpkin stencils, which are easy to apply to a cantaloupe.
- Position the pattern so that it is not mostly over the top of the cantaloupe. You are going to remove that part of the melon.
 Cut along the pattern. Start cutting at any point on the marked line and work out the entire pattern. Depending on the hardness of the skin and the sharpness of your knife, you can just cut, or you will have to saw. Make sure to cut through the skin, into the underlying pulp.
  Remove the remaining peel. Once the entire pattern has been cut out, you can remove the rest of the shell that is no longer needed. If necessary, you can go along the cut line again with the knife to remove the top. Carefully remove these parts of the melon and cut or pry the top off the bottom and the pulp.
  Hollow out the melon. Use a knife or special tool to remove the pulp from the melon. Scrape the inside to leave only the skin, or a thin layer of flesh, if you like the variation in color.
  Fill the bowl. A fruit salad is probably the most obvious filling for a melon. Serve this themed dessert immediately, or keep it in the fridge. Alternatively, use the melon bowl for snacks, appetizers, or any other filling. Melon bowls are almost never used to actually hold anything, because the skin will eventually decay.
 - You can also remove the moisture from the salad by poking a few holes in the bottom of the bowl and keeping it in a pan.
- If the contents fall through the larger holes in the bowl, wrap it in appropriate paper or other material.
 Cut out a lid for your bowl (if necessary). If the top of the bowl has remained intact, you can score a pattern on it. You can then use this as a lid for the melon bowl. This is optional and is usually used for more abstract designs. If the pattern you used is more realistic, such as the commonly used swan head silhouette, the lid may inadvertently divert attention from the design or make it more difficult to distinguish.
Method 2 of 3: Cutting a cucumber flower
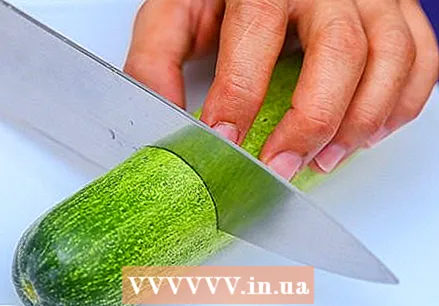 Cut a piece off the cucumber. Cut a third of the bottom off of a medium or large cucumber, or cut a small cucumber in half. The exact size is not important, but the piece you are going to cut will need both an end and a cutting surface.
 - Keep some of the material on hand, because a lot will go wrong the first time, and you will need several tries to get it right.
 Make a strip by cutting just below the skin. Using a sharp paring knife, cut about 1/8 of the circumference of the cucumber, just below the green skin, from the end of the cucumber. Slowly move the knife under the peel to about 1/2 inch from the tip. Remove the blade and leave the strip attached to the cucumber.
 - If the strip breaks, you can still use the piece of cucumber as a practice material.
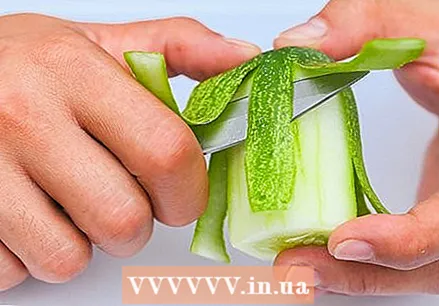 Make more strips around the perimeter of the cucumber. Repeat the foregoing until all the skin has been transformed into strips, also called the "outer petals".
  Then also make strips of the pulp. Use your paring knife again for this and start from the cutting edge of the cucumber. This will form the "inner petals".
 - This is probably more difficult than peeling the skin, as you will need to make strips that are thin enough to bend, but not break. Take it slowly and stop for a moment if you notice your eyes or hands getting tired.
 Remove the seeds. Carefully remove the seeds and pulp from the center of the cucumber with your knife. If there is still white flesh left, remove this too.
  Trim the leaves into a triangle. To do this, use a knife or scissors. Try to get a nice symmetrical effect by making each triangle look alike.
  Add a colorful focal point. Try to imitate flower pollen by cutting a disk from a carrot and placing it on top, between the strips. Other colorful options include a small berry, a slice of tomato or even an actual flower (eg marigold). Small edible flowers are dandelion buds, clover or daisies.
Method 3 of 3: Cutting out more complicated designs
 Look for a variety of sharp, stainless steel knives. You can also use bronze knives, but other types of metal can cause the fruit to discolour. Sharp paring knives or Thai paring knives are ideal. The blade of a knife, used for cutting fruit, is usually about 5–10 cm long, and the handle is long and comfortable to hold.
 - Use additional special-purpose utensils. A zester or garnish with a V-shaped stripe is the most common, and is used to strip the fruit.
 Select a melon to practice on. A melon offers plenty of room to practice, and the firm skin can be formed easily. If you are a bit more ambitious, you can cut with any type of fruit. Firm fruits such as apple or pineapple are easier to handle than softer fruits such as kiwis or grapefruit.
 - The following method assumes you are using a melon, but it can be applied to other fruits as well.
 Hold the knife correctly. Place the thumb of your dominant hand on the handle of the knife, right next to the blade. Place your index finger on the blunt top of the blade. Place your middle finger on the side of the blade, opposite the thumb. Grab with your ring finger and pink the handle firmly.
  Cut out a simple shallow pattern. For example, try scraping or cutting out a heart or circle, but not all the way through the shell. Try to get the depth the same everywhere, without cutting down to the pulp.
  Cut a grid in this pattern. Cut a grid through the scraped-out pattern, without removing skin or pulp. You may be able to see the attractive colors of the underlying pulp through the lines in the grid.
  Practice cutting out smaller shapes. Cut out smaller or more complex shapes around the grid or elsewhere on the melon. Designs with short, straight lines, such as diamond patterns, are probably a bit simpler than designs with curves.
 - It can take a lot of practice to remove the skin around a fragile design without breaking it. Make sure the peel is completely cut all over before attempting to remove it. If removal is difficult, pierce the center with a knife and pull gently.
 Try to cut at an angle. Slightly tilt the blade while cutting to create variety and a more professional result. This creates height differences, and can make it look like the different designs overlap each other. A pattern of "Vs" cut out like this can give an idea of petals.
Tips
- Select fruit with a firm, non-bruised skin, without bumps or strange shapes.
- Sharpen your knives often to use them effectively and safely.
Warnings
- Make sure that children do this only under the supervision of an adult, and stick to simple patterns that suit their motor skills.


