Author:
Eugene Taylor
Date Of Creation:
7 August 2021
Update Date:
22 June 2024

Content
- To step
- Part 1 of 6: Assembling the parts
- Part 2 of 6: Connecting the cells
- Part 3 of 6: Building your panel chest
- Part 4 of 6: Wiring your panel
- Part 5 of 6: Closing the chest
- Part 6 of 6: Installing your panels
- Warnings
- Necessities
Solar energy is a renewable energy source that benefits not only you, but also the environment. By making your own solar panel, you help prevent environmental pollution by limiting the use of fossil fuel. Even better is that you save money on your energy bill. To build your own solar panel, you have to assemble the parts, connect the cells, make a panel box, wire the panels, seal the box and finally install the solar panel.
To step
Part 1 of 6: Assembling the parts
 Purchase the cells. You can buy different types of solar cells; the best are made in the United States, China or Japan. In any case, from a cost-effectiveness standpoint, it is best to buy polycrystalline cells. The number of cells you buy depends on the amount of energy you want to generate. Pay attention to the specifications if you are going to purchase the cells.
 - Buy a few extra cells. Solar cells are very fragile.
- You can easily order cells online, but you can also buy them at the hardware store near you.
- You may have to collect the laundry from the cells first, if the manufacturer sent them in. Do this by putting them in hot, but not boiling water.
- A cell should cost no more than about $ 1 per watt.
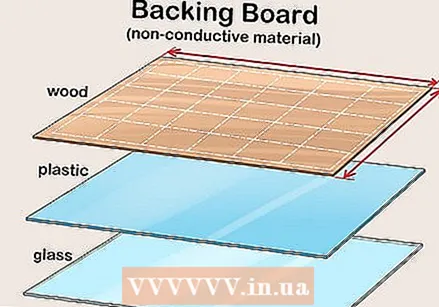 Measure out a surface and cut or saw it to size. You need a thin base of a non-conductive material, such as glass, plastic, or wood, to attach the cells to. Place the cells in the way you want to use them, then measure the size of the substrate and cut it out.
 - Leave a few centimeters of space at the edges of the substrate. This space is needed for the wiring that connects the rows.
- Usually wood is used as a substrate, because it is easy to drill. You have to drill holes to run the wires through.
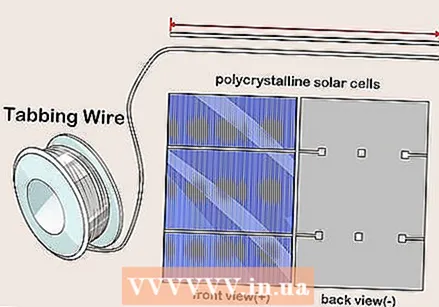 Measure and cut all your tab wire. If you look at your polycrystalline cells, you will see a large amount of small lines going one direction (the longitudinal direction) and two larger lines the other way (the width direction). You must use tab wire to connect the two larger lines to the back of the next cell in the matrix. Measure the length of that longer line, double it, then cut two pieces for each cell.
  Flux the stage. Using a flux pen, draw two or three lines lengthwise along each cell strip. Do this at the back of the cells. This prevents the heat of the solder from causing oxidation.
 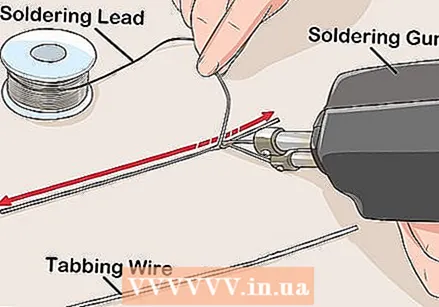 Solder the tab wire. Use a soldering iron to melt a thin layer of solder on the back of the strips.
 - You can skip this step if you are using pre-soldered tab wire, which is often a good idea as it saves a lot of time, heats up the cells once and uses less solder. It is, on the other hand, a bit more expensive.
 Connect the wire to the cell. Heat the first half of a piece of tab wire with a soldering iron. Then connect the end of the wire to a cell. Repeat this for each cell.
Part 2 of 6: Connecting the cells
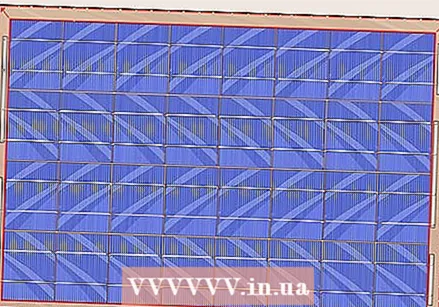
 Glue the cells to the substrate. Put a little glue in the center of the back of the cells and press them into place on the substrate. The tab thread should run in a straight line through each row. Make sure that the ends of the tab wire rise up between the cells and can move freely, with only the two pieces sticking out between each cell.
 - Remember that one row runs in the opposite direction of the row next to it, so that the tab thread extends at the end of one row and the opposite end of the next.
- You have to place the cells in rows as long as possible and keep the number of rows as small as possible. For example, three rows of 12 cells each lengthwise next to each other.
- Make sure to leave about an inch of space at the end of the substrate.
 Solder the cells together. Apply flux along the length of the two thick lines (the contact points) on each cell. Then take the free parts of tab wire and solder them on the entire length of the contact points.
 - The tab wire that is connected to the back of one cell must be connected to the front of the next cell each time.
 Connect the first row with bus wire. Solder tab wire at the beginning of the first row to the front of the first cell. The tab wire should be about an inch longer than it takes to cover the lines and extend to the extra space on the substrate. Solder these two wires together with a piece of bus wire that is the same length as the distance between the thick lines on the cell.
  Connect the second row. Connect the end of the first row to the beginning of the second with a long piece of bus wire running between the wire on the edge of the panel and the wire furthest away on the next row. You need to prepare the first cell of the next row with extra tabbing, just like you did the first.
 - Connect all four wires to this bus wire.
 Continue connecting the rest of the rows. Continue connecting the rows with the long bus wires until you get to the end, where you connect again with a short bus wire.
Part 3 of 6: Building your panel chest
 Measure the cell panel. Measure the size of the panel on which you placed the cells. At least the chest has to be that big. Add about an inch on each side to leave room for the sides of the box. Leave a free space of about an inch by an inch at the corners.
 - Make sure there is enough space for the bus wires at the end.
 Cut the back to size. Cut a piece of chipboard to the size you calculated in the previous step, plus the extra space for the sides of the box. You can do this with a handsaw or jigsaw depending on what you have on hand.
  Make the sides. Measure two pieces of non-conductive board 1 "by 2" to the length of the long sides of the box. Then measure two more pieces of 2.5x5 plank, which will fit between the long pieces to complete the box. Assemble the parts with self-tapping screws.
 - It is important that the sides are not too high, because then when the sun is at a sharp angle they will cast shadow on the cells.
 Attach the sides. Use self-tapping screws to attach the sides to the bottom of the box. The amount of screws you need depends on the length of the sides, but at least use three screws per side.
  Paint the chest. You can paint the box in any color you want. Consider white or other reflective colors as this will keep the chest cooler and cells fare better when they are cool. Your panel will last longer if you use exterior paint. This type of paint protects the wood from the elements.
 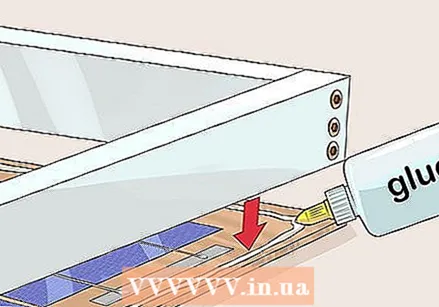 Fix the solar unit on the box. Glue the solar unit to the box. Make sure it is secure and that the cells are facing up and can catch sunlight. There should also be two holes in the panel for the ends of the bus wire.
Part 4 of 6: Wiring your panel
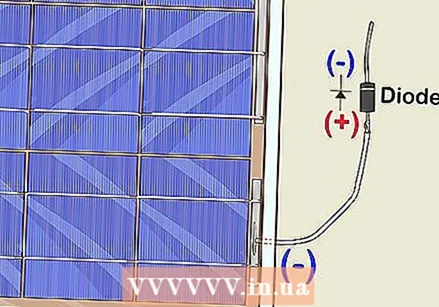 Connect the last bus wire to a diode. Take a diode with an amperage slightly higher than that of your panel and connect it to the bus wire and protect it with a little silicone sealant. The light colored end of the diode should point in the direction of where the negative part of the battery is going. The other end should be connected to the negative end of your panel.
 - This prevents energy from running back from the battery through the solar panel when it is not being charged.
 Connect the other wires. Connect a black wire to the diode and run it to a terminal block that you put on the side of the box. Then pull a white wire from the short bus wire with the other side of the terminal block.
  Connect your panel to a converter. Buy a converter and connect the panel to the converter; make sure you connect the positive and negative sides well. Pull the colored wire wires (to keep track of the charge) from the terminal block to the converter.
 - If you are using more than one panel, it might be a good idea to put all the positive and all negative wires together so that you end with two wires.
 Connect the converter to your batteries. Buy batteries that fit the size of the panels you have built. Connect the converter to the batteries according to the manufacturer's instructions.
 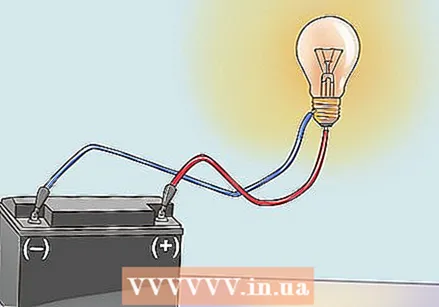 Use the batteries. Once you've connected and charged the batteries from the panel or panels, you can run the electrical devices from the batteries depending on the amount of power you need to do so.
Part 5 of 6: Closing the chest
 Buy a piece of plexiglass. Buy a piece of plexiglass the size of your panel. You can find this in specialized stores or perhaps in the hardware store.
 - Make sure you use plexiglass and not ordinary glass, because ordinary glass breaks or crumbles quickly.
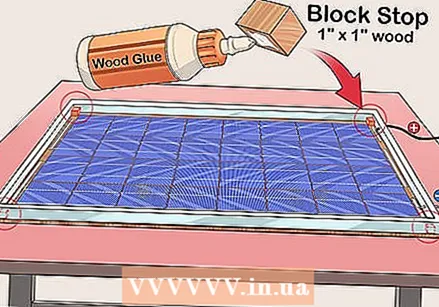 Put sealing stoppers on the glass. Saw 2.5x2.5 cm pieces of wood for the corners. They should be high enough to stick out above the terminal block and low enough to fit under the edge of the box. Glue the stoppers in place with wood glue.
  Place the plexiglass. Place the plexiglass on top of the box, so that the glass rests on the stoppers. Using the correct screws and a drill, carefully connect the plexiglass to the stoppers.
  Seal the chest. Seal the edges of the box with silicone sealant. Seal any holes you find to make the box as watertight as possible. Follow the directions for use to apply the kit.
Part 6 of 6: Installing your panels
 Mount your panels on a cart. You could mount your panels on a cart. You can angle the panel like this, but the direction in which the panel can change to increase the amount of sun that hits it every day. You have to adjust the panel a few times a day.
  Mount the panels on your roof. This is often done because the panels collect the most sunlight and do not get in the way. The angle at which you mount them must match the path that the sun takes and with your own charging peak. As a result, you only get the full layer on your panels a few times a day.
 - If you have a lot of panels and little space, this is the best way.
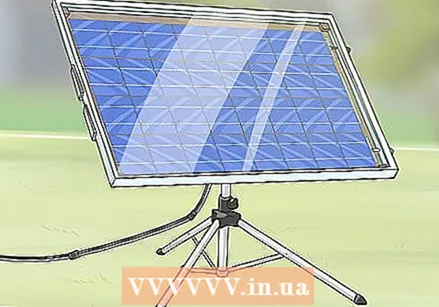 Mount your panels on the tripod of a dish receiver. A tripod that is actually used for mounting a satellite dish can also be used to mount solar panels. You can often even program them to move with the sun.This option only works with a small number of panels.
Warnings
- If you are unsure about working with electricity, ask a professional. Don't electrocute yourself!
- Be careful with tools.
Necessities
- Solar cells
- Tab wire (preferably pre-soldered)
- Bus wire
- Flux pen
- Silver solder
- Soldering iron


