Author:
John Pratt
Date Of Creation:
13 April 2021
Update Date:
1 July 2024

Content
- To step
- Method 1 of 2: Quick and easy method
- Method 2 of 2: Alternative method
- Tips
- Warnings
- Necessities
- Fast and easy method
- Alternative method
There are all kinds of flashlights on the market today - models that you can shake, bend, rotate, click and more. If none of these flashlights turn on you or you don't want to pay a lot of money for unnecessary bells and whistles, you can make your own from a toilet paper roll and other basic supplies you can find at home.
To step
Method 1 of 2: Quick and easy method
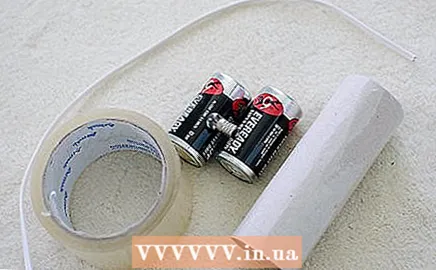 Gather your supplies. Clear a space to work and invite the children and family to come and see how you manipulate electricity with your bare hands. You need:
 - An empty toilet paper roll (or thin cardboard, rolled up into a small tube)
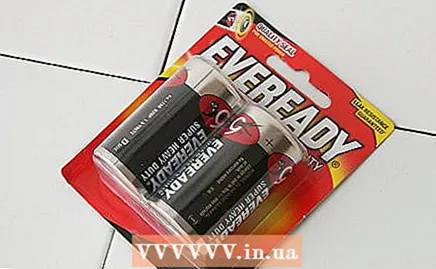
- 2 D batteries
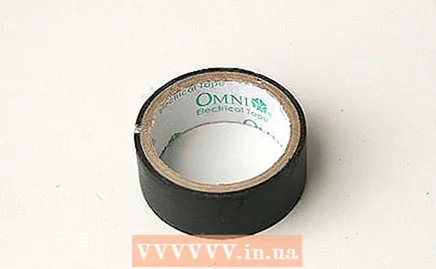
- Adhesive tape (electrical tape works well)
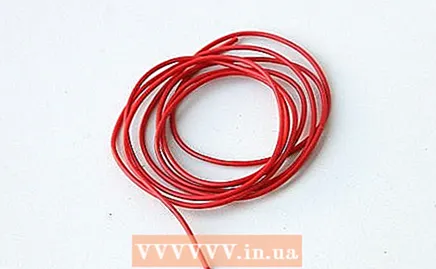
- 12.5cm piece of electrical wire (if using speaker wire, get one with copper)
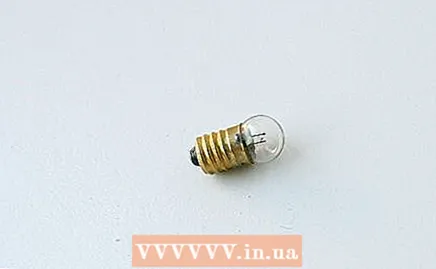
- 2.2 volt light bulb (other lights are possible, but it might not work as well. A bulb from a string of fairy lights works very well.)
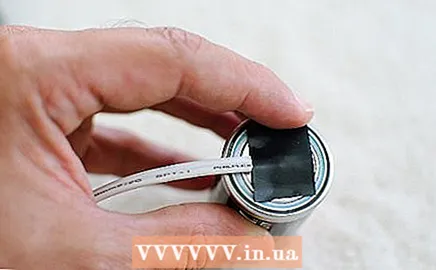 Stick the wire to the negative (-) side of one of the batteries. Make sure it is secure and cannot come loose, otherwise your lamp will turn into a flashing light.
 - You can use aluminum foil instead of wire, but it is less reliable and more difficult to work with.
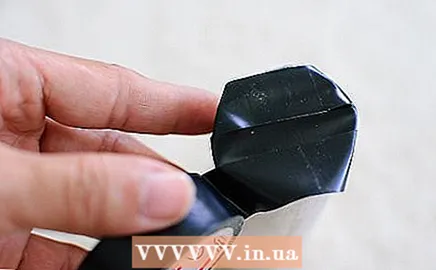 Tape the bottom of the toilet paper roll tightly so that it is completely covered. You don't want light coming through the cracks and dissipating the power - that would be a malfunctioning flashlight.
 - If you didn't have a reason to use black electrical tape, now you have.
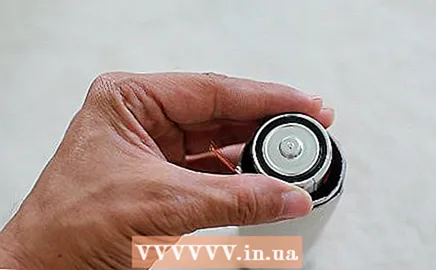
 Put the battery, wire side first, in the toilet roll. Although the side with the thread faces the taped bottom of the roll, the other side of the thread should protrude from the open part of the roll.
 - If the wire doesn't stick out enough to get past the edge of the battery, then you'll need to trim your tube.
 Insert the next battery, negative side first. Its negative side will be against the positive side of the battery already in it. This connection allows the flow of electricity to flow from back to front, and will eventually make your device shine.
 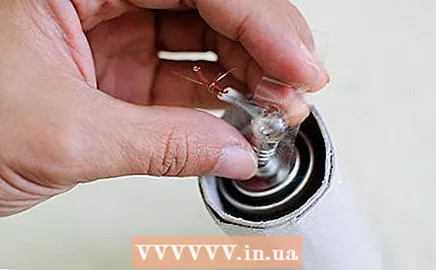 Stick the lamp on the top of the battery. Make sure there is a good direct connection between the two surfaces (in short, make sure it is secure). Make sure you can still see the bottom half of the lamp.
 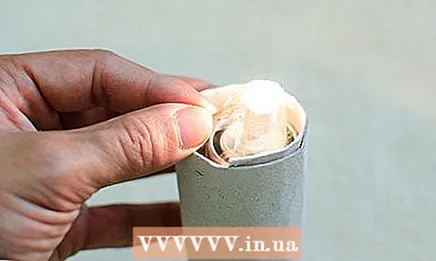 Turn on your flashlight. Touch the silver part of the lamp with the wire. If it doesn't turn on after a few tries, check out the troubleshooting tips below. If it does work, you now have a working flashlight with an on / off switch.
Method 2 of 2: Alternative method
- Gather your materials. It's time to awaken and start the MacGyver in you. You need:
- 2 D-cell batteries (separate)
- 2 pieces of insulated copper wire number 22 measuring 12.5 cm each (2.5 cm on both sides stripped of the insulation)
- Cardboard tube, cut to a length of 10 cm

- 3-volt flashlight lamp, PR6 or number 222
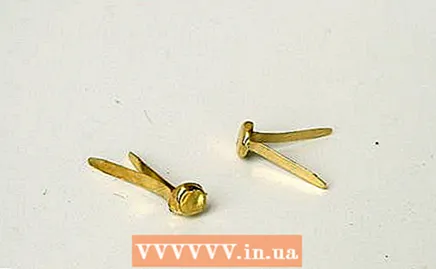
- 2 split pins
- Cardboard strip of 2.5 x 7.5 cm

- Paperclip

- Tape
- Paper drinking cup

- 2 D-cell batteries (separate)
 Attach a copper cotter pin to each wire. Wrap it around to secure it. Poke the cotter pins through the same side of the cardboard tube, but with the wires coming out on different sides. The pointed ends should stick out of the tube. This will be used as part of the on / off switch.
 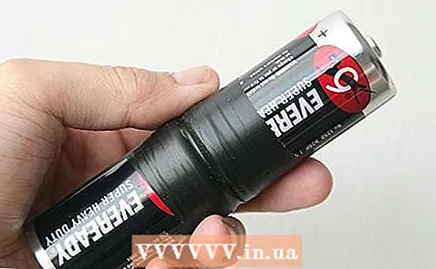 Stick your two D batteries together. Make sure the positive side of one meets the negative side of the other. Your battery should now be twice as long, not twice as wide. Make sure they are stuck together firmly and let the batteries slide into the tube.
 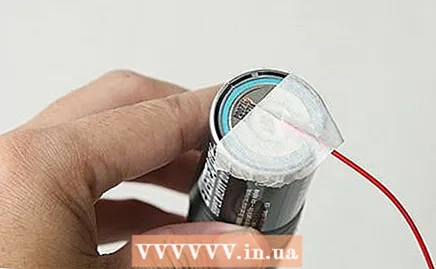 Stick the wire to the negative (-) side of the battery. The negative side is the flat side. Masking tape is sufficient for this.
  Cut a hole in your narrow cardboard strip. Thread the wire on the positive side through that hole and wrap that wire around the bulb. Insert the end of the lamp into the hole so that it can be supported by the cardboard.
 - Wrap tape around the base of the lamp and the cardboard to secure it to the wire. At this point it should start to flicker.

- Wrap tape around the base of the lamp and the cardboard to secure it to the wire. At this point it should start to flicker.
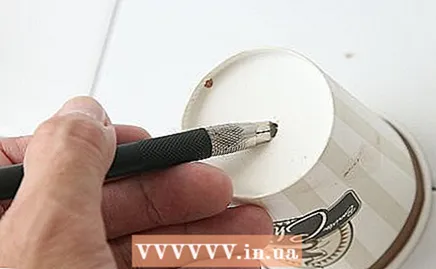 Cut a hole in the bottom of a paper cup just big enough for the light. Insert the lamp into the hole and tape the cup to the cardboard base with more tape.
 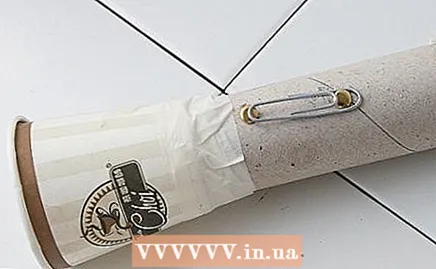 Place the tab of a can between the two ends of the cotter pins. When the tab hits both, it conducts the current and your lantern will turn on. When the tab is removed, your lantern will turn off. Voila!
 - You can use a paper clip instead of the tab.
 Ready.
Tips
- Do you want the flashlight to look cool? Draw something on a piece of paper and tape it around the toilet paper roll or cardboard tube. A ghostly face, for example. Or you can cover the end with masking tape and then draw on it.
- If the light does not come on, look at the following:
- Has the lamp burnt out?
- Is the lamp a 2.2 volt lamp?
- Is everything connected?
- Do the batteries have enough power?
- Are the batteries in good condition?
Warnings
- Always do this under the supervision of an adult.
- Be careful; the wire will become quite hot.
Necessities
Fast and easy method
- An empty roll of toilet paper, or thin cardboard, rolled up into a small tube
- 2 D batteries
- Adhesive tape (works better with firmer tape)
- 12.5cm piece of electrical wire (if using speaker wire, get one with copper)
- Desk or worktop
- 2.2 volt light bulb (other lights are possible, but it might not work as well. A bulb from a string of fairy lights works very well.)
Alternative method
- 2 D-cell batteries (separate)
- 2 pieces of insulated copper wire number 22 measuring 12.5 cm each (2.5 cm on both sides stripped of the insulation)
- Cardboard tube cut to 10 cm length
- 3-volt flashlight lamp, PR6 or number 222
- 2 split pins
- Cardboard strip measuring 2.5 by 7.5 cm
- Paperclip
- Adhesive tape
- Small cardboard cup


