Author:
John Pratt
Date Of Creation:
12 April 2021
Update Date:
1 July 2024

Content
- Ingredients
- To step
- Method 1 of 3: Collect your ingredients
- Method 2 of 3: Using a toaster
- Method 3 of 3: Use a crisp dish
- Warnings
If your kitchen doesn't have a stove (or if you just prefer not to use it), but you would like to enjoy the nice, crunchy heat of a cheese sandwich, don't despair! Unfortunately, you can't just throw bread and cheese in the microwave without creating a soggy mess, but if you have a toaster or crisper pan you can make a tasty cheese sandwich in minutes.
Ingredients
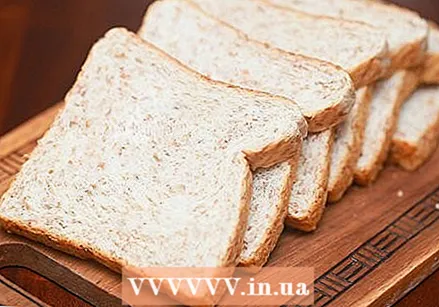
- 2 slices of bread
- Cheese
- Butter, margarine, or mayonnaise
To step
Method 1 of 3: Collect your ingredients
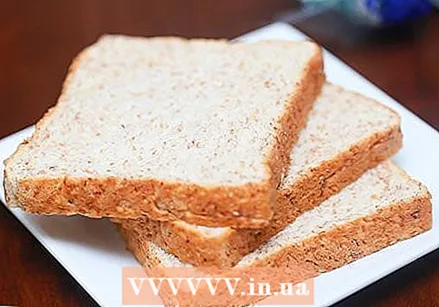
 Choose the right bread for the sandwich. The classic choice for a sandwich with cheese is a light white bread, but if you want something healthy, go for a whole grain or flaxseed bread. Just follow your taste buds - from rye bread to sourdough, it's all good.
 - Avoid bread with large air bubbles or holes, as your cheese will melt and leak through.
 Use dry bread that is a day old if you have it. Since the moisture in fresh bread makes it soft (unlike a hot oven, a microwave does not evaporate the moisture, so it does not become crispy), a dry piece of bread is much more suitable for the microwave.
 - Always check stale bread for mold, just to be on the safe side.
 If possible, use sandwiches. Each slice of bread will be the same thickness, which means it will be toasted evenly. If you buy an uncut loaf from a bakery, ask if they can cut it for you. Most bakeries and bread departments at the supermarket have a bread slicer.
 - If you cut the bread by hand, use a serrated bread knife and try to cut the slices about an inch and a half thick. Bread of this thickness fits in a standard toaster and is thin enough for the microwave to heat.
 Choose a cheese that melts easily. Gouda and cheddar are good cheeses for a toasted sandwich, but you can branch out with cheeses like Monterey Jack, Gruyère, Munster, American, or brie, as they all melt smoothly.
 - Avoid fresh, crumbly, or very hard aged cheeses, including fresh goat cheese, feta, and aged Parmesan. These cheeses just don't melt well when they make up the bulk of the cheese in a sandwich.
- A very hard cheese such as Parmesan will melt smooth when you grate it and pair it with a processed cheese, such as cheddar. The moisture in the cheddar helps the Parmesan to melt better.
- If you can't resist those hard-to-melt cheeses, you can still add them to your sandwich for flavor (just as you would add pickles or tomato). Make sure to include plenty of cheese that melts easily, such as Havarti or American.
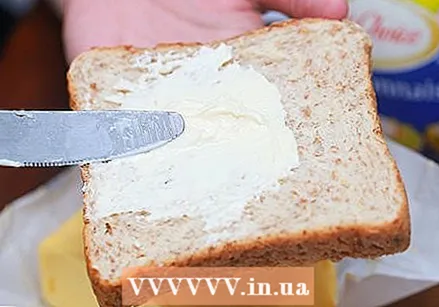 Choose your fat. Butter is the classic choice, but margarine or mayonnaise will also flavor your bread and help make it crispy.
  Consider adding additional ingredients to your sandwich. Pickles, tomatoes, jalapeno peppers, avocado, even chips, are creative extra fillings if you want something different from the classic cheese-and-bread sandwich.
 - Increase your protein intake with a few slices of ham, turkey or other meat. Just dab on extra moisture before putting such toppings on your sandwich.
- Keep in mind that ingredients with extra moisture, such as tomatoes, can make your sandwich a bit soft.
- Enjoy your sandwich with a little mustard, ketchup, sriracha or tomato soup.
Method 2 of 3: Using a toaster
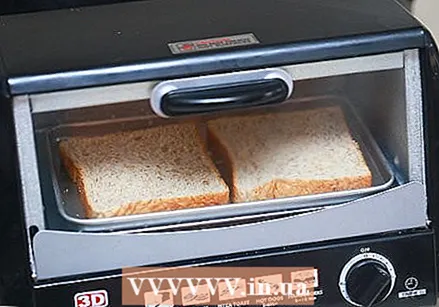 Toast both slices of bread in a toaster until golden brown. If you are unsure which toaster setting to use, try turning the dial to the middle position. That way, if your bread isn't toasted enough, you can put it back in the toaster on the lowest setting to make it crispier.
 - The drier the toast, the better. You add moisture back to the bread when you put it in the microwave with the cheese and butter. Too much moisture can make your sandwich soggy.
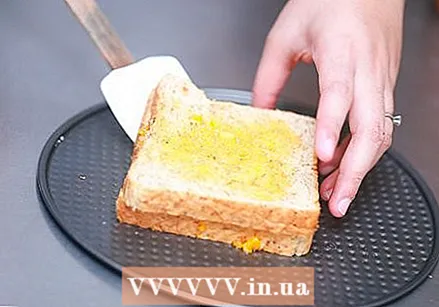
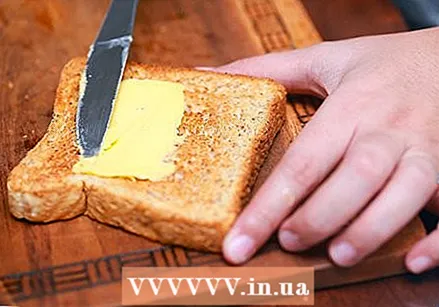 Butter one side of each slice of bread. You can butter both sides, but you run the risk of adding too much moisture and ending up with a steamed, soft sandwich.
 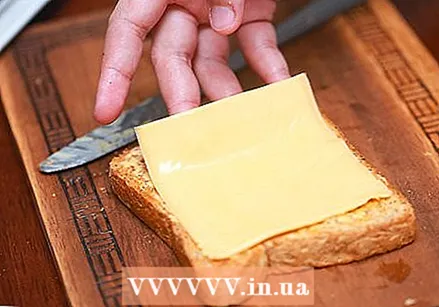 Cover the two sandwiches with the cheese and any additional ingredients. Place the cheese on the dry side of the bread with the buttered side facing out. Two slices of cheese at about 25 grams (or about 45 grams in total) is usually enough cheese.
 - Make sure the cheese is spread evenly over the bread so that it melts evenly. You can rip slices into smaller pieces to make them fit.
- Don't stack your sandwich too high with extras. Microwave heat cannot penetrate very deeply - only about 2-4cm - so a very thick sandwich will not heat all the way up and thus won't melt your cheese.
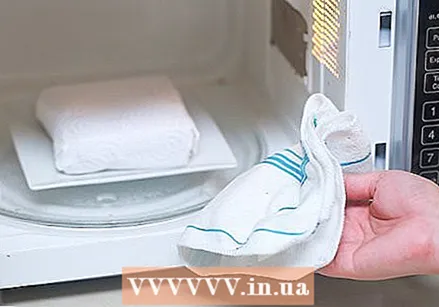
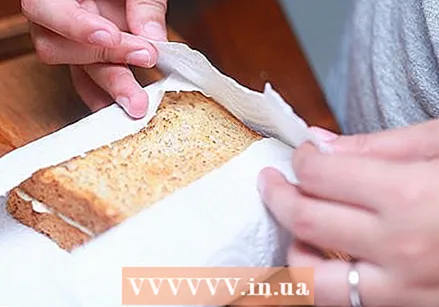 Wrap the sandwich in a paper towel and place on a microwave-safe plate or rack. The paper towel will absorb the excess moisture so your bread doesn't get too soggy.
 - Don't wrap the sandwich in plastic wrap, as this will trap moisture instead of absorbing it.
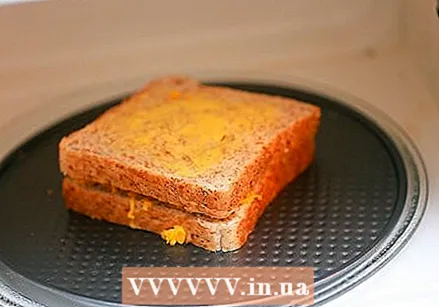
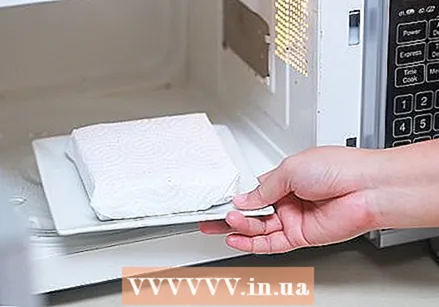 Heat the sandwich for 15-20 seconds, or until the cheese has melted. The time it takes for the cheese to melt varies depending on the microwave. When you see the cheese start to drip from the sides, the sandwich is ready.
 - You can also tell if the cheese has melted by trying to lift the top slice of bread. When the cheese is completely melted, the bread will stick together and be difficult to separate.
 Use a towel or oven mitts to remove the bun and let it rest for 2-3 minutes before serving. This will give the bread time to cool and get crispy, making it safer for you to eat.
Method 3 of 3: Use a crisp dish
 Spread butter on one side of each slice of bread. Make sure the butter is soft so that it spreads easily on the bread or else the bread can tear. Place the bread on a clean surface, butter side down.
 - You can soften or melt the butter by placing about a tablespoon in a microwave safe bowl, 5-10 seconds.
 Place your cheese on the dry, uncovered side of a slice of bread. Most recipes call for two slices of cheese, or about 45 grams. Go ahead and add more if you want a super cheesy sandwich.
 - Spread your cheese evenly over the bread so that everything melts at the same rate.
 Cover the cheese with any extra ingredients and then put the second slice of bread on top, butter side up. Do not stack sandwiches more than 1.5 cm high, otherwise the microwaves will not heat the bread completely.
 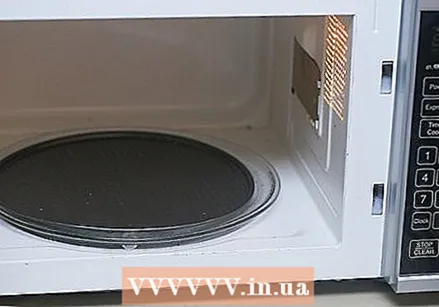 Place your crisp pan in the microwave and follow the manufacturer's instructions to preheat. A crisp dish is made of microwave-safe metal that gets extremely hot and works the same as a baking tray or pan that you would heat on the stove. It will make your bread brown and crispy, just like if you were making your sandwich in a skillet.
 - To get the grill effect, a crisper dish must become "extremely hot" during preheating. Only use it under adult supervision and never touch it with your bare hands. Use heat resistant oven gloves to handle the crisper dish.
- Follow the manufacturers' directions on where to place the pan. It may need to be placed on the floor of the microwave, or the pan may have built-in legs to lift it closer to the grill on the ceiling of the machine.
- Do not put anything on the crisper pan until it is preheated.
 Place the sandwich on the crisper pan and heat for 20-30 seconds. If the crisp pan comes with a lid, do not use it or cover the sandwich.
 - If your bread doesn't seem to be browning, add more time in five second increments. Remember, the bread touching the pan is the side that turns crusty, so you may not be able to see it until you flip the bun.
 Use a spatula to flip your sandwich and heat with the microwave for an additional 20-30 seconds. This will ensure that both sides of your bread are browned and toasted and that the cheese is heated evenly. Press the sandwich on either side with the spatula to make it crisper.
 - Be very careful that no part of your skin comes into contact with the pan. If this is easier for you, remove the pan with oven mitts from the microwave first, turn the sandwich over and return the pan to the microwave.
 Use heat resistant oven gloves to take out the crisper dish and sandwich. Let the sandwich cool for two to three minutes before cutting it in half and serving it warm. The bread can get a little crispier while it cools.
Warnings
- The Crisp Bowl should only be used under adult supervision as it becomes "extremely hot" when used in the microwave.
- Let your sandwich cool for a while to avoid burns from the melted cheese.
- Do not put a sandwich with cheese in the toaster, as this will most likely lead to a short circuit.


