Content
- To step
- Method 1 of 3: Lay wires to your battery
- Method 2 of 3: Attaching your car radio (head unit)
- Method 3 of 3: Install the subwoofer and amplifier
- Necessities
If you install a subwoofer in your car, you must connect your audio system to the amplifier before connecting your subwoofer. This means that you have to disassemble your dashboard and run several wires from the front of your car to the subwoofer in the trunk or under your front seat. This doesn't necessarily have to be difficult, but it can be time consuming, so make sure you have a few hours to set up your system. Overall, the system will function by using the car battery to power your amplifier, after which the line converter converts the signal from your car radio (head unit) to the amplifier. You may need to purchase additional speaker cables or RCA cables in addition to the supplied wiring kit.
To step
Method 1 of 3: Lay wires to your battery
 Turn off your car and open the hood. Do not leave the keys in the ignition - your car's engine should not be running when you install the power cable and connect the car radio, amplifier and subwoofer together. Push the button or pull the lever in your car to unlock the hood. Lift and secure the hood.
 - If you can, do this indoors. Wiring a sub, amplifier and car radio can take quite some time and you will have to be able to easily access a lot of tools. Doing this indoors makes it easier to keep a cool head and keep everything organized.
 Disconnect the negative terminal from your vehicle's battery. Remove the cover from your vehicle's negative terminal by prying it up and pushing it off. Use a wrench to loosen the bolt from the negative pole by turning your wrench counterclockwise. Remove the nut and pull the cable connecting the battery connector to the rest of the car, folding it away from the battery.
 - Look for a positive (+) and negative (-) sign on the battery to distinguish between the positive and negative terminals. The positive pole usually also has a red cap.
- You may need an Allen wrench extension to access the bolt on the clamp.
Warning: Loosening the positive terminal first can cause a short if you use a metal key. First, disconnect the negative terminal to make sure you don't damage anything.
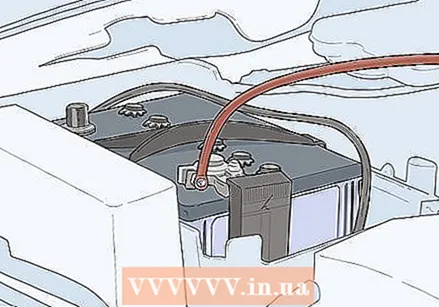 Connect a power cable to the positive pole of your vehicle's battery. Open the cover and loosen the bolt of the positive terminal. Once the bolt is removed, slide the open loop of the power cable over the screw of the positive terminal. Slide the bolt on top of the screw so that the loop of the power cable is between the bolt and the base of the pole. Reattach the bolt with an Allen wrench to secure the loop to the battery.
 - The power wire or cable is used to power your amplifier. It uses electricity from the battery to turn the amplifier on and off.
- The power cables for vehicle audio systems are usually red.
 Poke a hole in the rubber next to the bulkhead to route the power wire. Using a small knife, poke a hole right next to the opening where all the other wires run in the car. In most vehicles, the wires run to the glove compartment on the other side of the engine. Once the opening is sealed, poke a hole in the bulkhead with a small knife.
 - The bulkhead refers to the part of the frame that separates the engine compartments from the interior of the vehicle. A bulkhead is also called a "firewall" because it is designed to stop a fire if it starts in the engine.
- Make sure not to cut any other wires.
- In some vehicles, there will be a lid or plastic ring around the opening where your wires run. If so, remove the cover or push the wires down a little to make room for the power cable.
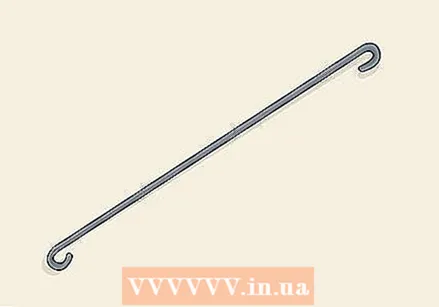 Unwind a metal coat hanger to create a guide for the cable. You can do this by hand or with wire cutters, cut the hook and loosen the hanger. Bend the hanger so that it is a single straight thread. Shape the end into a small circle and thread the free end of your power cable through it. As soon as the power cable is on the hook, squeeze the hook so that the power cable is clamped.
 - You can use a "line pulling grip" or "drop mesh grip" if you have one, but most do-it-yourselfers don't have wire guiding tools. They are not worth buying, for 30-60 cm of cable.
- If you have a really stiff power cable, you can skip this step and try running it through the bulkhead by hand.
 Slide the power cable through the bulkhead with the coat hanger. Use your coat hanger to slide the power cable through the hole you made. Slide the cable until you reach the glove compartment or the opening under your glove compartment where the wires enter your car's interior. Open the passenger side door and locate the wire from the inside. Pull it through and detach the coat hanger.
 - If your car is newer, the wires may be hidden behind the frame of your vehicle. If this is the case, find a spot near the glove compartment - underneath or inside - where you can drill a hole to run the wire into the vehicle.
 Install your fuse holder by cutting the wire and mounting it near the engine. If your audio system came with a fuse holder, trim the power cable about 5 cm from the pole of your battery. Use a wire stripper to cut the cable where you plan to install the fuse holder and remove the plastic coating from each end with the smaller hole on the end of the wire stripper. Slide each exposed part into the opening of your fuse holder and tighten the connections with an Allen key or socket wrench.
 - A fuse holder provides your audio system with a separate fuse. This keeps the system safe if you ever experience electrical issues with your vehicle.
- Most fuse holders have a clip that attaches them to the trim (the trim) under the windshield.
 Secure the wire under your windshield with zip ties. Once you've pulled the power cable all the way through, you need to get the power cable out of the way of your motorcycle parts. Lift the cable up to the trim near the battery and locate the other wires leading to your glove compartment. Use ties to tie the power cable to the other wires.
 - Place a cable tie every 5-10 cm to ensure that the cable does not have any slack.
- If the wires are well hidden or your car is very compact, you may have some difficulty in reaching these wires.
- If a cable cover or concealer is included with your audio wiring kit, it is best to follow those directions.
 Hide your power cable along the floor to route it to the back of your vehicle. Slide the power cable under the plastic covers between the passenger side doors and the seats, or hide it under the floor mats. Run the cable all the way to the back of the vehicle or into the trunk so you can connect the cable to the amplifier.
 - You may have to drill a hole to get to your trunk. It really depends on the make and model of your particular vehicle.
- If you drive a truck or don't have a trunk, you can place the subwoofer under the front seat (provided there is enough space).
- Some vehicles have a plastic slot where you can run a wire all the way to the trunk.
Method 2 of 3: Attaching your car radio (head unit)
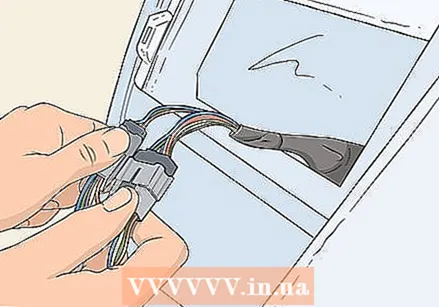
 Disassemble the center console to remove the built-in car radio. Every car stereo, center console and removal process is different depending on the make and model of your vehicle. To learn how to disassemble your dashboard to access your factory car stereo, see the manual provided. Normally you use a plugging tool to remove the covers after loosening the knobs and screws from the center console. Once the factory car stereo is loose, slide it out or unscrew it before pressing the clip to remove the wire harness.
 - The car radio or head unit refers to the box where your radio buttons and volume controls are located. The wiring harness is the small set of slots that place all of your individual wires in the correct slots on your car stereo.
- Put aside any knobs or screws in a safe place so you don't lose them when it comes time to reassemble your dashboard.
- You usually start at the bottom of the dashboard where your cup holders or the gear lever are.
 Match the colors for each wire on the new car stereo. Depending on your audio system, you can connect a new car radio to the old cable harness or attach a new cable harness to your existing cable harness.Slide your new car stereo directly into the wiring harness while matching the corresponding colors, or use wire strippers to expose the wires on each corresponding pair and twist the exposed part to tighten it. Slide each set of exposed wires into a butt connector and use crimping pliers to secure the wire in place.
 - This process is completely dependent on the make and model of your vehicle and the instructions of your audio wiring kit.
- Use a cable tie to string bundles of cords together and make things easier.
- Protect all exposed wires with small pig tails by cutting them with wire strippers. Twist the pigtail on top of the exposed wire, until it clicks into place.
Tip: Run new speaker cables to the wiring harness when installing new speakers. If you are installing new speakers, you will now need to run the new speaker cable from your car radio to the line-out converter.
 Connect your line-out converter to the car radio. A subwoofer and an amplifier work on a different voltage than your speakers and car radio. To compensate, connect a line-out converter to your car radio by using RCA cables to connect the right and left channels in the line converter to the right and left channels in the car radio. Connect the other cables as indicated in the manual for the audio system.
 - Some single-din main units come with a line converter slot directly underneath.
- You will probably need to use RCA cables to connect the car stereo to the line-out converter.
- You may need to connect a cable to the output of the car radio and run it into the input of the line-out converter.
 Run the blue cable to the amplifier on the other side of the vehicle. Your line-out converter comes with a blue connection cable. This cable transmits information from your line-out converter to your amplifier. Run the cable to your amplifier, either by hiding it under your floor mats or by running it under the plastic panels between the doors and the driver's side seats.
 - Hide the cable under the cabinets between the doors and the seats or just slide it under the floor mats.
- Leave the blue cord next to the red cord.
Method 3 of 3: Install the subwoofer and amplifier
 Attach the ground wire from your amplifier to the vehicle chassis. Since it is a closed electrical system, you must ground the amplifier to the chassis of your vehicle. Find an unpainted metal surface in your vehicle and mount the ground loop to the metal, or rip a piece of fabric in an inconspicuous area to expose the metal underneath.
 - If you ever smell something like fire near your subwoofer when using your new audio system, check the ground wire.
- You cannot attach the wire to a painted surface. Use sandpaper to remove the paint from a small piece of metal if you need to.
Tip: Some vehicles have a specific place where you must attach the ground wires. Consult your manual before you start tearing upholstery.
 Connect your line-out converter to the amplifier. Place your amplifier near where it is grounded to the chassis. Connect the blue cable from your line-out converter to the input of the amplifier. If there are RCA channels you need to connect, run these cables the same way you tucked the power cable.
 - With some audio systems you just need to connect the blue cable. You must also use RCA cables on other systems. Sometimes all three of these cables are bundled.
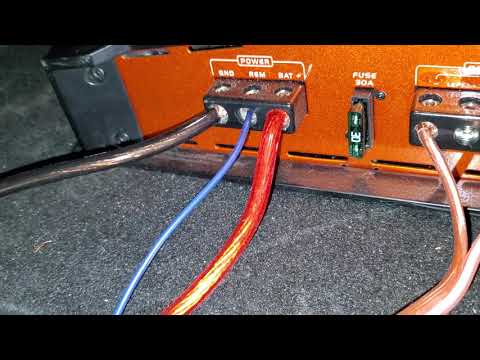
 Connect the power cable to the other side of the amplifier. Connect the red power cable from the battery to the amplifier. If the open end of your power cable is a loop and the opening for your power cable is a slot, use a wire stripper to strip the end of the cable and expose 1 - 2.5 cm of copper wire. Slide it into the opening and push the latch to close the connection.
 - If the opening of the power cable on the amplifier is a small round knob, unscrew the cap and loop the cable over the screw. Then tighten the cap on the loop to keep it in place.
 Connect the RCA cables from the subwoofer to the amplifier. Connect the left channel of the subwoofer to the left channel of the amplifier and the right channel of the subwoofer to the right channel of the amplifier. If there is a separate power cable for the subwoofer, you may also need to connect it to the amplifier.
 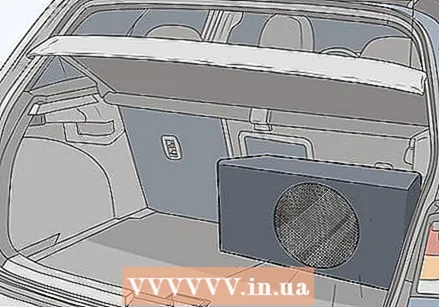 Reconnect your battery and test the system. Before reassembling the dashboard, reconnect the negative battery terminal. Turn your volume knob all the way down and start the car. Try playing some music. Increase the volume slowly. When you hear music, you're done and turn off the vehicle again before reinstalling the dashboard using the same clamps and parts.
 - If the car radio does not turn on, check the cable connections in the wiring harness.
- If the sound is distorted, check your line-out converter to make sure your connections are clean.
- If you don't hear anything, check the amplifier to see if it is getting power from the battery.
Necessities
- Key
- Metal clothes hanger
- Wire cutter
- Drill
- Allen key
- Pry tool
- Pig tails
- Screwdriver
- Wire stripper
- Butt connectors
- Crimping tool


