Author:
Judy Howell
Date Of Creation:
4 July 2021
Update Date:
1 July 2024
Content
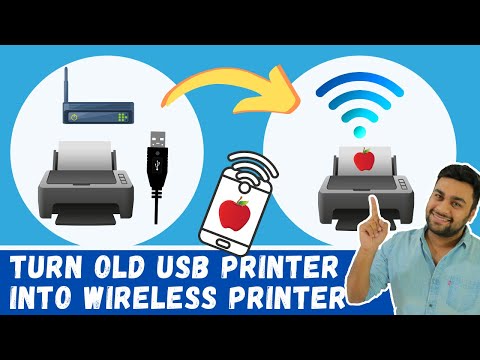
This wikiHow teaches you how to turn a regular printer into a wireless printer by connecting it to a router. If this is not possible on your printer, you can always connect your printer to a computer that is online and share that printer with the other computers on your network.
To step
Method 1 of 3: Connecting the printer to a router with USB
 Check if there is a USB port on the back of the router. If your router has a USB port (on the back), you can connect the printer to the router using the USB cable that came with your printer.
  Buy an ethernet adapter with USB connection if necessary. If the router does not have a USB port, you will need to purchase a USB adapter to connect to one of your router's Ethernet ports.
 - You can buy such adapters online at Expert.nl or Allekabels.nl, or take a look at a local electronics store first.
 Place the printer near your router. Your printer should be close enough to the router that you can connect the USB cable without bending any of the plugs.
 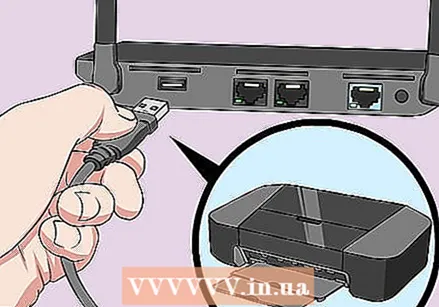 Connect the printer to the router. Plug one plug of the USB cable into the back of the printer and then the other plug into the back of your router.
 - If you are using a "USB to Ethernet" adapter, first plug one of the adapter's plugs into one of the Ethernet ports on the back of the router.
 Connect your printer to a power source. You may need an extension cable or power strip to complete this step.
  Turn on your printer. Press the on / off button
  Wait 10 minutes. This gives your router enough time to recognize and deploy the printer.
 - Your internet may slow down for a few minutes while the router installs the drivers for the printer.
 Try to connect to the printer. Make sure your computer connects to the same wireless network as that of your router that the printer is connected to, then do one of the following, depending on your computer's operating system:
 - Windows - Open Start
 Connect your printer to the computer you want to use as a host. This method allows you to use an Internet-connected computer as the wireless source for the printer. You start by connecting your printer to your computer using a USB cable.
  Connect your printer to the mains. Choose an outlet as close to your computer as possible to avoid stretching and bending the cord.
  Turn on your printer. Press the on / off button
  Follow the instructions on the screen. If prompted to download new drivers or install specific software, follow the on-screen instructions before continuing.
  Open Start
  Open the Control Panel. Type control panel then click Control panel when this is at the top of it Startmenu appears.
  click on Network and internet. This is the heading at the top of the page.
 - If you see small or large icons on the right side of the "View with:" heading in the top right corner of the window, you can skip this step.
 click on Network Center. You will find this option in the middle of the page.
  click on Change advanced sharing settings. This is a link in the top left corner of the page.
  Check the "Enable file and printer sharing" box. You will see this option under the heading "File and Printer Sharing".
  click on Saving Changes. This option is at the bottom of the page.
  click on Control panel. This tab is located in the top left corner of the Control Panel. This will bring you back to the main Control Panel window.
  click on View devices and printers. This is the heading at the bottom of the page.
 - If you see small or large icons, click on them Devices and printers.
 Right click on the connected printer. A drop-down menu will appear.
 - If your mouse does not have a right button, click on the right side of the mouse, or click the mouse with two fingers.
- If you are using a trackpad instead of a mouse, tap the trackpad with two fingers, or press the bottom right of the trackpad.
 click on Printer properties. This setting can be found roughly in the middle of the drop-down menu. A new window will appear.
  Click on the tab Share. You will see this tab at the top of the new window.
  Share the printer with the other computers on your network. Check the "Share this printer" box and click To apply and then on OK at the bottom of the window.
  Try connecting the printer. Using another computer connected to the same Wi-Fi network as the host computer, do one of the following, depending on your computer's operating system:
 - Windows - Open Start
 Connect your printer to the computer you want to use as a host. This method allows you to use an Internet-connected computer as the wireless source for the printer. You start by connecting your printer to your computer, with a USB cable.
 - If your Mac doesn't have a traditional USB 3.0 port (the rectangular version), you'll need a USB 3.0 to USB-C adapter.
 Connect your printer to the mains. Choose an outlet as close to your computer as possible to avoid stretching and bending the cord.
  Turn on your printer. Press the on / off button
  Follow the instructions on the screen. If prompted to download new drivers or install specific software, follow the on-screen instructions before continuing.
  Open the Apple menu
  click on System Preferences .... You can find this option in the drop-down menu. The System Preferences window opens.
  click on Share. You'll see this option in the System Preferences window. A new window will open.
  Check the box "Printer Parts". You can find this on the left side of the window.
  Select your printer. Click the name of your connected printer in the "Printers" pane.
  Try connecting the printer. Using another computer connected to the same Wi-Fi network as the host computer, do one of the following, depending on your computer's operating system:
 - Windows - Open Start
, click on Settings
, click on Appliances, click on Printers and scanners, click on Add a printer or scanner, select the wireless printer and click Add device
- Mac - Open it Apple menu
, click on System Preferences ..., click on Printers and scanners, select the wireless printer on the left side of the page, and then click Add.
- Windows - Open Start
- Windows - Open Start
- Windows - Open Start
Tips
- You can also use a "print server" to make your printer wireless. You connect a print server to the back of your printer, so that it can receive wireless print jobs.
Warnings
- Printers can be very different depending on the built-in software. If you have questions about your specific brand of printer, it is best to consult your printer's manual or online documentation.

 quickly")

