Author:
Christy White
Date Of Creation:
3 May 2021
Update Date:
1 July 2024
Content
- To step
- Method 1 of 3: Connecting a wrist with kinesio tape
- Method 2 of 3: Using non-stretch sports tape
- Method 3 of 3: Try alternative treatments
- Tips
Carpal tunnel syndrome is a wrist injury that can develop from a number of causes, including: trauma or injury to the wrist, an overactive pituitary gland, hypothyroidism, rheumatoid arthritis, and repetitive use of vibrating hand tools. The pain, tingling, and numbness caused by carpal tunnel syndrome occurs because the median nerve, located in your hand and arm, is pinched at your wrist. The median nerve is located in the carpal tunnel of your wrist, which is why its name comes from.
To step
Method 1 of 3: Connecting a wrist with kinesio tape
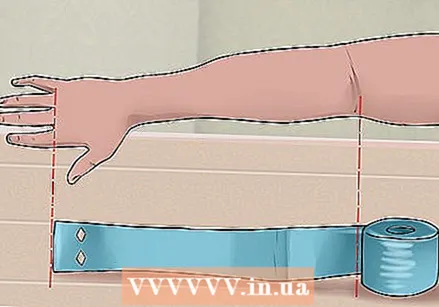
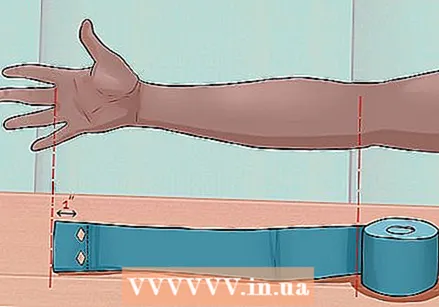 Measure the first piece of tape. Measure the first piece of tape to the length from the center of your fingers (palm up) to the bend of your elbow. Fold over a piece of about 2-3 cm on one side of the piece. Cut two small triangles from the end of the tape measure, on the fold. This means that when you unfold the 2-3 cm piece at the end, two diamond-shaped holes have formed in the tape.
 - These two diamond-shaped holes should be right next to each other and about 1 cm wide in the center.
- The end with the two holes is considered the "anchor".
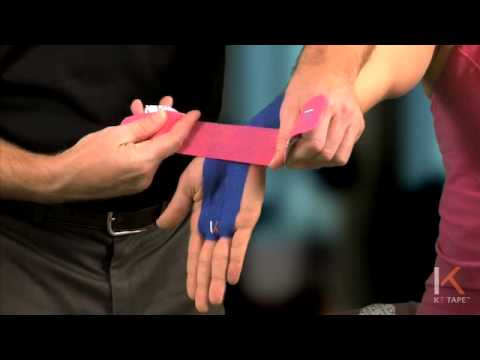
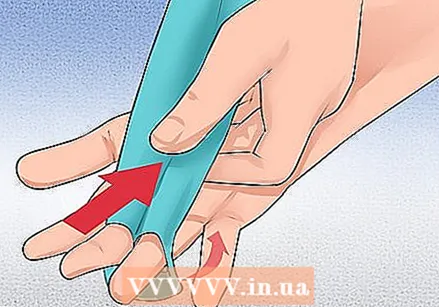 Attach the tape to your fingers. Remove the backing from the tape only at the "anchor" end, where the two holes are. Hold your arm in front of you with your palm up and slide your two middle fingers through the two holes in the tape. Make sure to keep the sticky side of the tape facing your palm.
 - Press the anchor end of the tape onto your skin, around your fingers.
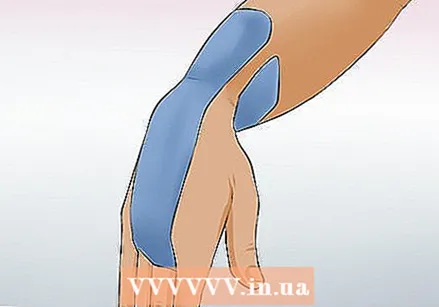
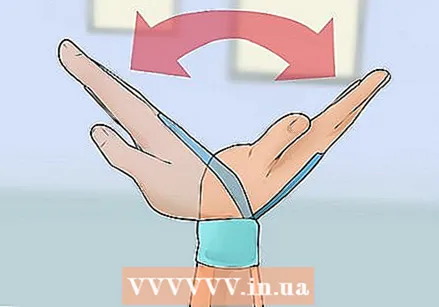
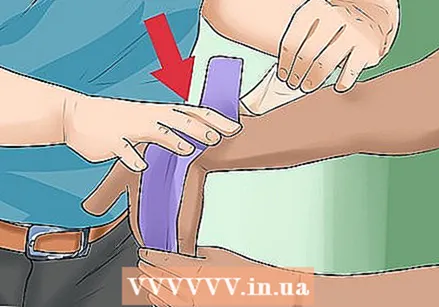 Thread the tape up over your wrist and arm. You will likely need a second person to help you put the tape around your arm, as you will need to keep your hand and wrist fully extended while applying the tape. Once your wrist is fully extended, remove the backing from the rest of the tape while sticking it to your skin.
 - To fully extend your wrist, keep your arm straight in front of you, palm up. Then use your other hand to pull your hand down so that your wrist bends. Your hand should be at a 90 degree angle to your arm.
- Pull up not to the tape and do not apply pressure when applying it to your skin - just peel off the backing and press the tape onto the skin.
- When you stretch your wrist and hand, you will notice that the tape has some natural folds or ripples at your wrist joint. This is to make sure you still have full hand and wrist movement while the tape is applied.
 Cut a second piece of tape. The second piece of tape should be exactly the same length as the first piece of tape, including the two holes in the end for your fingers. The same two middle fingers go through the small holes again, but this time the sticky side goes over the back of your hand and arm - so your arm should be palm down.
 - As with the first piece of tape, remove only the back of the anchor piece and slide it over your fingers.
- Press the anchor end of the tape onto your skin, around your fingers.
 Attach the second piece of tape to your arm. Extend your wrist fully again, but this time your palm should be facing down and your hand should be folded towards the inside of your arm. Slowly remove the cover from the tape while sticking it to the skin in this position.
 - Pull up not to the tape and do not apply tension when attaching it to your skin.
 Take a third piece of tape. The third piece of tape should be the same length as the first and second pieces, but no holes need to be cut for your fingers. Instead, once it's cut to the correct length, break the tape cover right in the middle so you can access the adhesive side.
 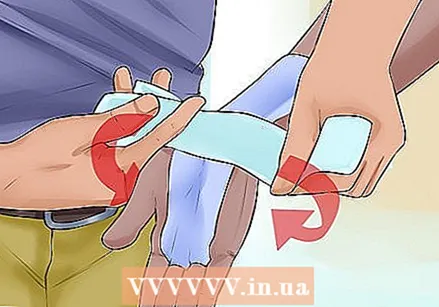 Apply the third piece of tape. Hold your arm out in front of you again, palm up and extend your wrist fully. Place the middle part of the tape over the inside of your wrist, right on the underside of your palm. Due to the width of the tape, it will likely cover part of your palm as well. Slowly remove the cover on one side and attach that piece to your arm. Do the same for the second side.
 - Pull up not the tape and do not apply pressure while removing the cover and attaching the tape to the skin of your arm.
- The angle of your hand allows the ends of the tape to overlap on the back of your arm.
 Make sure you still have the full range of motion of your hand and wrist. The purpose of the tape is to open the carpal tunnel and release pressure on your middle nerve. No additional pressure should be applied (which is why you have not applied any pressure when attaching the tape to your skin). So you should still be able to fully move your hand and wrist once the tape has been applied. If you can't, then you'll have to reapply the tape.
Method 2 of 3: Using non-stretch sports tape
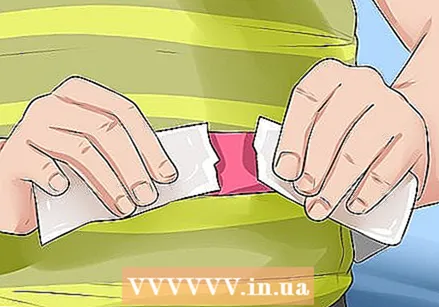
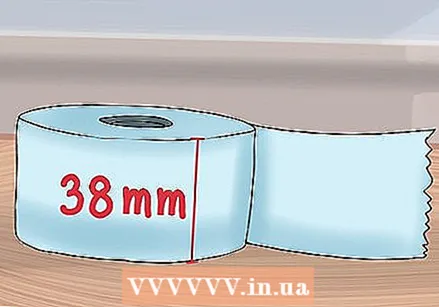 Find the correct type of tape. For this type of tape you need a self-adhesive, non-stretchable (rigid) sports tape about 38 mm wide. When using this type of tape, it is suggested to also apply a hypoallergenic underlayment. This under bandage helps prevent skin irritation from the sports tape.
 - To avoid pain later on, consider removing the hair from your wrist area and the back of your hand. Do this at least 12 hours before applying the tape.
- The reason that non-stretch tape is used is to prevent the wrist from moving while the tape is in place.
- Wash and dry your hand and wrist before applying the tape.
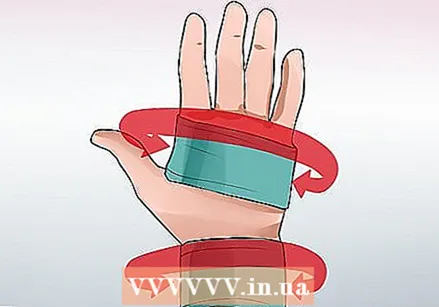 Apply the anchor pieces of the tape. The first piece of tape should go all the way around your wrist, like a bracelet. The second piece of tape should go around the palm and back of your hand, just above your thumb. Apply well, but not too tight. You don't want to cut your circulation with these pieces of tape.
 - Just estimate the length of tape needed for each anchor section as it's okay if the ends overlap.
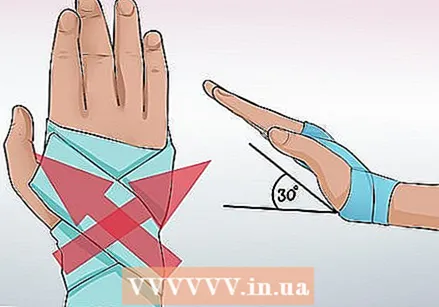 Cross the back tape over your wrist. First, place your wrist in a neutral position. Then place two pieces of tape over your hand and wrist so that the end result looks like an X on the back of your hand. One piece should run from about your thumb to the outer part of your wrist. The second piece should go just below your little finger to the inner part of your wrist.
 - To put your wrist in a neutral position, keep your hand straight in relation to your arm and then tilt it up about 30 degrees (with your palm facing down).
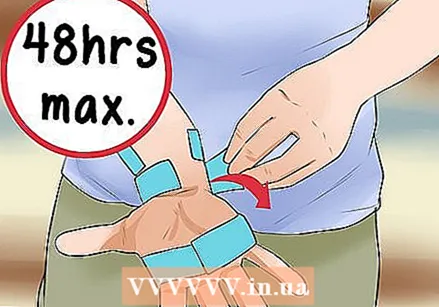 Remove the tape after a maximum of 48 hours. Don't leave the stiff tape on your hand and wrist for more than 48 hours, and be sure to remove it sooner if it cuts off circulation or if it hurts you. You can use blunt-nosed scissors to cut the pieces of tape, or you can peel it off from the ends.
 - Peel the tape off in the opposite direction of how it was applied.
- It may also help to pull your skin slightly in the opposite direction of where the tape is being pulled.
Method 3 of 3: Try alternative treatments
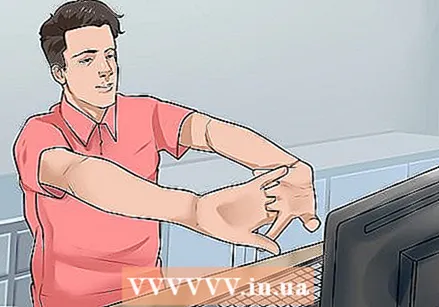 Schedule regular breaks. While there is no direct evidence that carpal tunnel syndrome is caused by using your keyboard and mouse, these objects will certainly make your wrist more painful if you already have carpal tunnel syndrome. If you work with a keyboard and / or mouse, or with other equipment that puts stress on your wrist, take regular breaks.
 - Regular breaks can be used in conjunction with many other treatment options.
- While taking a break, consider rotating your wrists and stretching your palms and finger to keep the area flexible and loose.
- When typing on a keyboard, try to keep your wrists straight and avoid bending your hands up from your wrist to type.
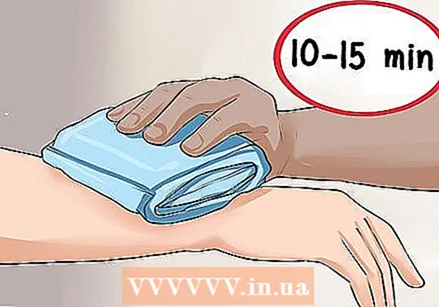 Use cold compresses. Cold generally helps reduce inflammation. Placing a cold compress or ice pack on your wrist can help temporarily relieve the pain of your carpal tunnel syndrome. Put on a cold compress for 10-15 minutes, avoiding putting these items directly on your skin. First, wrap the packages in a towel.
 - Also try to keep your hands warm as often as possible. Working in a cold room can often lead to increased pain and stiffness. Consider wearing fingerless gloves while working on a keyboard.
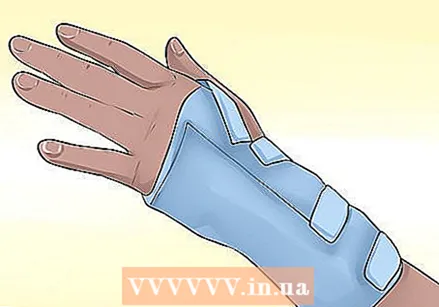 Wear a splint on your wrist. Carpal tunnel syndrome can actually be made worse by the way you sleep. Most people sleep with their wrists bent, which exacerbates their wrist problems. Wearing a splint while you sleep is an option to help relieve pressure on the median nerve.
 - Splints are designed to keep your wrists in their correct and straight position.
- Also try to avoid sleeping on your hands at night, as this extra pressure can increase pain in your wrists and hands.
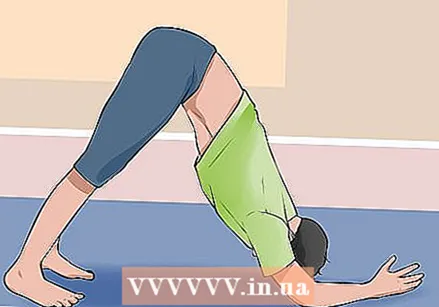 Practice yoga. Yoga has been proven to reduce wrist pain and improve grip strength in people suffering from carpal tunnel syndrome. Yoga poses that focus on strengthening, stretching, and balancing the joints in your upper body are the most helpful.
 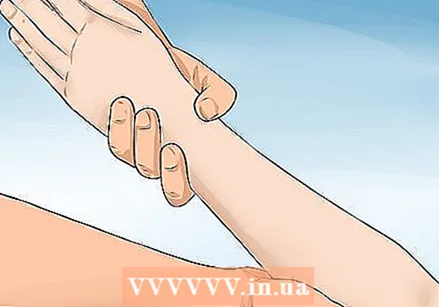 Try massage therapy. Massage therapy by a registered therapist can help relieve the pain associated with muscle dysfunction. Massage is effective in increasing blood flow and removing fluid from the wrist and surrounding muscles. Start with a 30 minute massage. Keep in mind that you may need three to five treatments to see any benefits.
 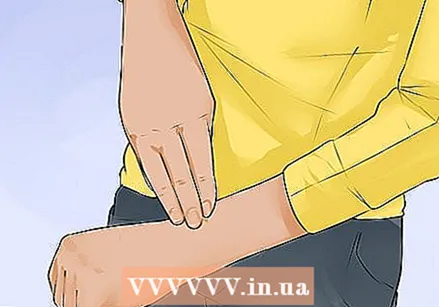 Treat trigger points. In some cases, symptoms related to the carpal tunnel can be caused by trigger points, or more commonly known as muscle knots. These knots can develop in the wrist area, forearm and even on the neck and shoulders. You can apply pressure yourself, looking for sensitive areas that resemble carpal tunnel symptoms. Applying pressure for 30 seconds will gradually reduce the pain and discomfort. It is important to find and deal with as many sensitive areas as possible. Do this once a day until the pain subsides.
 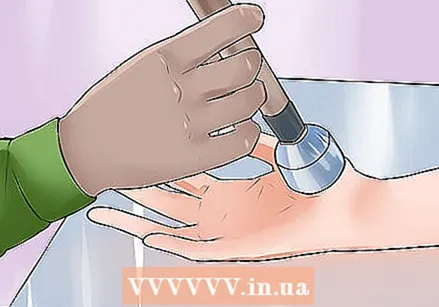 Consider ultrasound or hand therapy. Physical and occupational therapy, performed with the help of a physical therapist or occupational therapist, can potentially help relieve pressure on the median nerve and decrease the amount of pain you are experiencing. Ultrasound therapy can also be used to increase the temperature in the carpal tunnel area, which in turn helps reduce the pain.
 - Both forms of therapy should be carried out for at least several weeks before improvements can be noticed.
 Take non-steroidal anti-inflammatory drugs (NSAIDs). NSAIDs contain drugs such as ibuprofen (eg Advil, Motrin IB, etc.) and can temporarily reduce pain caused by carpal tunnel syndrome. NSAIDs are freely available in all drug stores and the generic versions are cheap.
 - Consult with your doctor before taking any new medications.
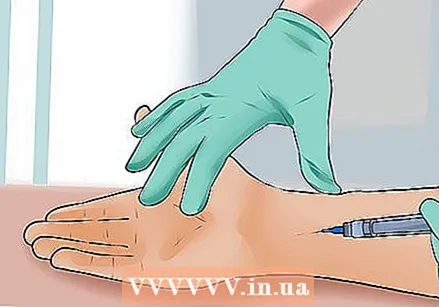 Ask your doctor about corticosteroids. Corticosteroids are drugs that can be injected directly into your wrist by your doctor. Corticosteroids can reduce inflammation and swelling, which in turn can reduce pressure on the median nerve and make your wrist less painful.
 - While there are corticosteroids in oral (pill) form, they are not as effective against carpal tunnel syndrome as the injected versions.
 Talk to your doctor about surgery. For people with severe and chronic carpal tunnel syndrome, one possible option may be to consider surgery. This relieves the pressure on your median nerve by cutting the ligament that runs down the side. Doctors can perform two types of surgery: endoscopic surgery and open surgery.
 - Endoscopy is a surgical procedure where the doctor will use a small camera that can be inserted into your wrist, and then small surgical instruments to cut the ligament. Endoscopic surgery is not as invasive as open surgery and is easier to recover. In addition, it does not leave any noticeable scars.
- At a Open surgery, the doctor makes an incision in your wrist and palm so that the carpal tunnel and median nerve can be viewed. If your wrist and palm are cut open, the doctor can cut the ligament to relieve pressure on the nerve. The larger incision may take longer to heal and will result in a scar.
- Other surgical side effects include incomplete release of the nerve from the ligament (not completely relieving pain), infections in the wound, scarring and nerve damage. Before making a decision about surgery, be sure to discuss any possible side effects with your doctor.
Tips
- You can ask a physical therapist or occupational therapist to tape your wrist the first time so you can see how it is done and what the end result should look like.
- You can buy kinesio tape at drugstores and some sports stores, as well as many online stores, including Amazon.


