
Content
- To step
- Method 1 of 9: Remove the old paint and varnish
- Method 2 of 9: Prepare the chest of drawers for painting and lacquering
- Method 3 of 9: Fix the chest of drawers
- Method 4 of 9: Refinishing the chest of drawers
- Method 5 of 9: Using paint
- Method 6 of 9: Paint the chest of drawers with acrylic paint
- Method 7 of 9: Paint the chest of drawers with enamel paint
- Method 8 of 9: Finish the chest of drawers with wax
- Method 9 of 9: Finish the chest of drawers with oil
- Tips
- Warnings
- Necessities
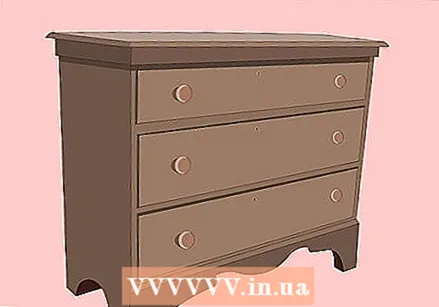
Refinishing an old chest of drawers is an excellent way to give the piece of furniture a whole new look for the next decade and keep it looking neat. Strictly speaking, it is not difficult to refinish a chest of drawers, but it does take some effort. You should also schedule a significant amount of time for it, such as a weekend or the occasional time off.
To step
Method 1 of 9: Remove the old paint and varnish
 Look at how the cabinet is now finished. Usually the wood is painted and varnished, but it can also be one of the two. The wood can also be finished with wax, stain, shellac or another means. If you can't figure out what it is, ask someone who knows it for help. It is important to be sure of this as it depends on the type of paint or varnish which technique you should use to remove it.
  Choose the correct way to remove the old paint or varnish. Once you know what kind of paint or varnish is currently on the cabinet, you can use one of the following tools to take it off:
 - Paint scraper
- Steel wool
- Paint burner
- Paint stripper
Method 2 of 9: Prepare the chest of drawers for painting and lacquering
 Place the chest of drawers in a suitable workplace. Pick a place where you can make junk. This could be the backyard when the weather is good, the garage floor, or a hobby area with good ventilation and tarpaulins on the floor.
 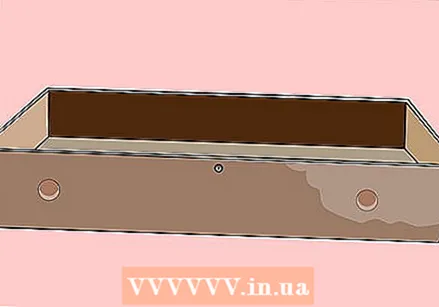 Remove all drawers from the chest of drawers. Place them separately on the floor (not on top of each other) so that you can get started one at a time.
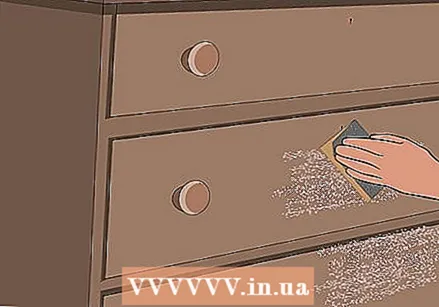
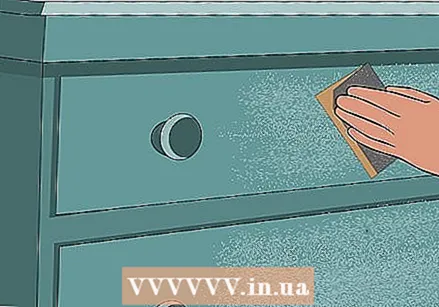
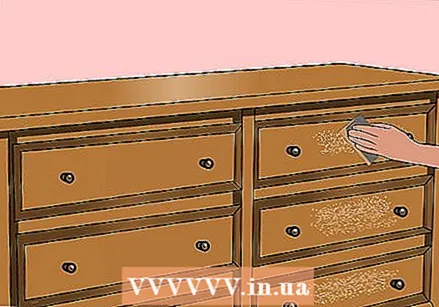
 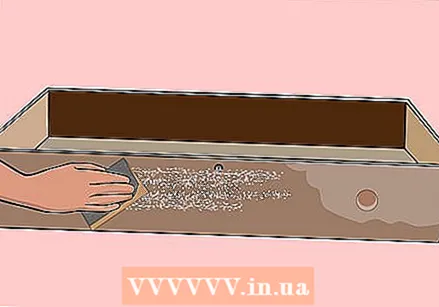 Start sanding. After using one of the aforementioned techniques to remove the old paint or varnish from the wood, start sanding the surface. Even if you used a paint remover or paint remover to remove most of the paint or varnish, you still need to sand the wood to remove any stubborn paint residue and clean awkward spots. Sanding also smooths the surface so that it is ready for refinishing. In general, the following things should be considered when sanding:
 - If you completely remove the old paint or varnish by sanding the wood, remember that sanding a chest of drawers takes quite a bit of time. You may need to schedule multiple days or hours off to complete this job. Start with coarse sandpaper, for example with a grit size of 150, and then use progressively finer sandpaper with a grit size of 200 to 300, depending on the surface. Since each grain size removes paint from other parts of the surface, gradually use finer sandpaper and don't skip anything.
- An electric sander is usually fine for tackling the large areas of the drawer cabinet, but you should still use a sanding block with sandpaper around it for smaller areas and areas that are difficult to reach, such as nooks or scorches. You also need this for delicate areas, such as the areas around decorations.
- Spots with stubborn old paint or varnish may need to be tackled with a special tool such as a razor blade, chisel, or steel wool to pull off stuck or awkward patches of paint. Be careful though. If you have treated the surface with a paint stripper or paint remover, remove any loose and lumpy paint and varnish first.
Method 3 of 9: Fix the chest of drawers
 If necessary, repair the chest of drawers before refinishing the furniture. Check if the following things are okay at the chest of drawers (if not, fix it):
 - The drawers slide in and out of the cabinet easily without getting stuck.
- The drawers are in good condition, no nails or other sharp objects sticking out, and no pieces have broken off.
- Make sure the legs are sturdy and the chest of drawers does not wobble. Test this on a flat surface, otherwise you may think that the chest of drawers wobbles when it is actually on the floor.
- There are no unsightly dents or scratches in the wood. If so, treat these areas with a suitable wood filler and sand the wood before you apply the new paint or varnish.
- If the cabinet has a mirror, check it for cracks, dents, and stains. You can fix certain things yourself if you have a broken mirror, but it might be better to seek advice from a professional.
- If the cabinet has bars, make sure they are in good condition, with no dents or cracks.
- If the cabinet has doors, check that the hinges are in good condition. If not, replace them.
Method 4 of 9: Refinishing the chest of drawers
 Decide how you want to refinish the cabinet. When you have finished the closet and the hard work is over, the fun part of the job begins. Which finish do you choose? Each agent has its own special appearance, and some agents are more difficult to apply than others. Here are some examples:
 - New paint (acrylic paint, enamel paint, two or more colors of paint, a pattern, a decoration, etc.)
- Spray paint
- Painting technique that makes the cabinet look old
- A paint wash
- Wood stain and wax
- Was alone
- Varnish
- Oil
- Politoer
- Paint (difficult if you are not a professional, but black Japanese paint is an option)
- Decoupage technique
- Dust
 Below you can read how to finish the chest of drawers with paint, wax and oil.
Method 5 of 9: Using paint
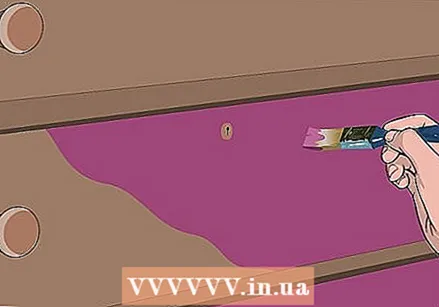
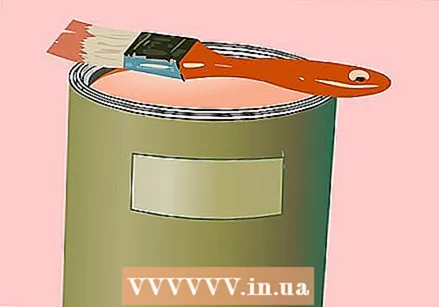
Paint is probably the most versatile you can use to finish the cabinet. You can use a single color, two colors or multiple colors. You can use gloss or matte paint, or paint the chest of drawers to make it look old. You can even make decorations, templates or patterns.
 Choose a paint type. The most popular type of paint for wooden surfaces is water-based acrylic paint. You can apply it easily and the surface gets a smooth and durable finish. You can easily rinse out used paint brushes with water. With enamel paint you give a surface a nice shine, but you can work with it less quickly and you have to clean the brushes with white spirit. That means it takes more effort, it doesn't smell as good and has a longer drying time.
 - In general, it is best to use enamel paint if the chest of drawers will be used a lot and will have a lot to endure (such as in a children's playroom). Acrylic paint is fine for a chest of drawers that is not widely used.
Method 6 of 9: Paint the chest of drawers with acrylic paint
 Prepare the chest of drawers as described above.
 Apply the first coat of acrylic paint. This will be the bottom layer. First paint the cupboard itself and then any loose drawers you took out. You only have to paint the drawers on the outside, in the part that you can see. Let the paint dry.
  Use a soft, clean cloth to wipe the dried painted parts of the chest of drawers. This removes any dust or dirt that has landed on the surface during drying.
  Apply the next coat of paint. This is the second bottom layer. Let the paint dry.
 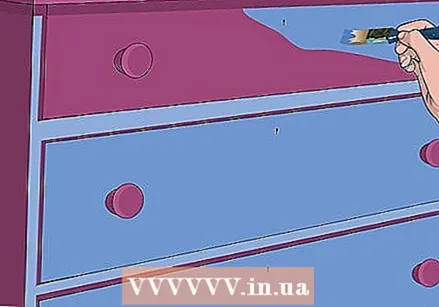 Sand the painted parts. Use 240 grit sandpaper and lightly sand all paintwork with it. Wipe the cabinet with a clean cloth to remove the sanding dust.
  Apply the third coat of paint. This is the first top coat and it has to be perfect. Wipe away any drops that form during painting.
 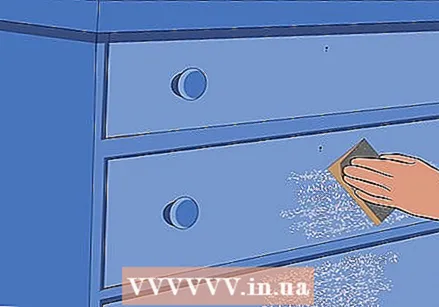 Use a smaller brush for the decorated areas of the chest of drawers. Let the paint dry.
 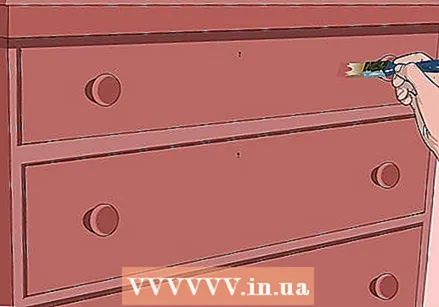 Sand the paintwork again. Wipe the cabinet with a clean cloth to remove the sanding dust.
 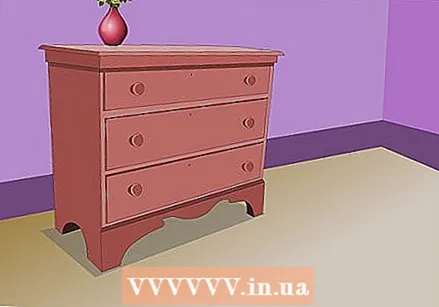 Apply the final top coat. Let the paint dry.
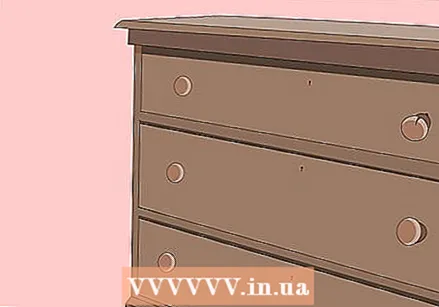
  Assemble the chest of drawers. The piece of furniture should look brand new and be ready to use.
Method 7 of 9: Paint the chest of drawers with enamel paint
 Prepare the chest of drawers as described above.
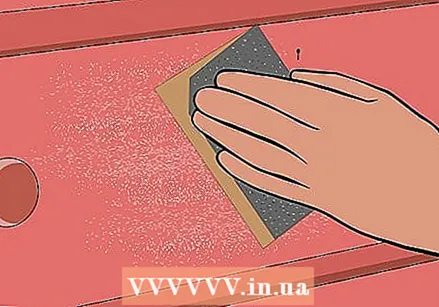 Paint the cabinet itself and the drawers you took out. You only have to paint the drawers on the outside, in the part that you can see. Let the paint dry. This is the bottom layer.
 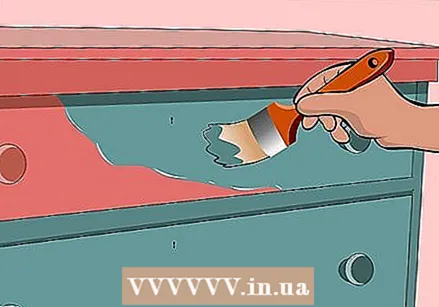 Lightly sand the substrate with 220 grit sandpaper. Don't apply too much pressure or you will remove enough paint that you can see the wood. Wipe off the sanding dust with a soft, clean cloth.
 - If you sanded away too much paint, apply another coat of paint to that area before working on the second coat.
 Apply the second coat of paint. This is the top coat. Let the paint dry.
 - Paint with long brush strokes and apply light pressure. Only use the end of the paintbrush for painting.
 Lightly sand the paintwork with 320 grit sandpaper. Again, don't apply too much pressure or you will have to reapply if you sand down enough that you can see the layer of paint underneath or the wood.
 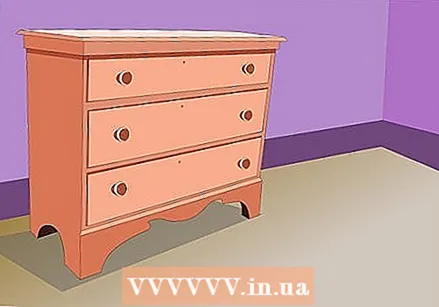 Apply the last coat of paint. Again, paint with long, careful strokes using only the end of the paintbrush to get a perfect finish. Let the paint dry.
 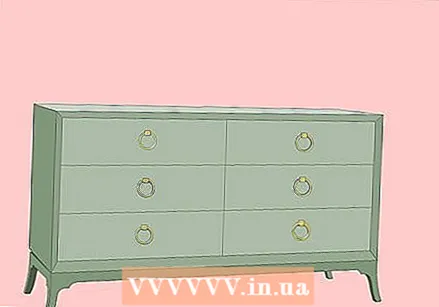 Reassemble the chest of drawers. The cabinet will have a glossy, durable finish.
Method 8 of 9: Finish the chest of drawers with wax
You can easily finish the chest of drawers with wax. This is very suitable for wood with an interesting structure, color or grain.
 Prepare the chest of drawers as described above.
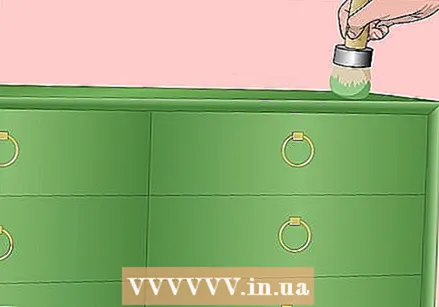 Single wax. Furniture wax is a good choice or you may want to try beeswax. You will also need a nylon scourer or a piece of steel wool to apply the wax (the "applicator").
  Apply a generous amount of wax to the applicator. Rub this on the wood of the chest of drawers, in the grain of the wood.
 - Make even strokes and make sure that no wax piles form on the surface.
 Let the wax sit for a few minutes.
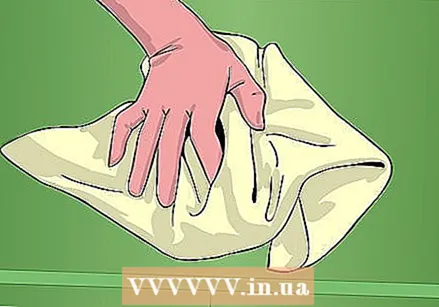
 Rub the waxed wood with a clean cloth. Continue rubbing until the wood is no longer sticky to the touch and has become smooth. This will take quite a while, so get into the rhythm and keep rubbing.
 - Always keep your hands on the cloth, so that your natural skin oil does not get on the wooden surface. Wear a cotton glove on the hand you are holding the furniture with, or place a clean cloth under the hand that is holding the wood.
- Turn the cloth over periodically to be able to work with a clean area. The wax will eventually build up on the cloth. You will likely need several cloths to cover the entire chest of drawers.
 Repeat the process on the drawers.
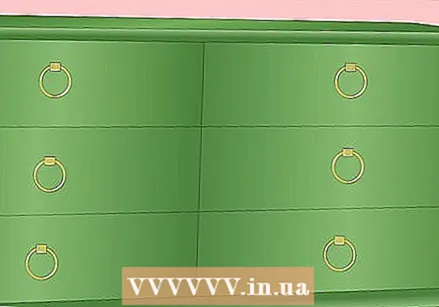 Repeat the process again. Apply another coat of wax and then rub it constantly to smooth it out. You should apply at least two coats of wax to the wood surface, but more is better. The more layers you apply, the better the chest of drawers will look.
  Stop applying wax when you are satisfied with the appearance of the cabinet. Think about whether you want to leave the cabinet as it is now, or whether you want to protect the wax layers with varnish. Either way is fine, but know that an unpainted wax coat is less strong and can scratch easily.
  Reassemble the chest of drawers. Carefully return it to its old location so that it is ready to use.
Method 9 of 9: Finish the chest of drawers with oil
You can finish a piece of furniture with oil if you want to bring out the grain and structure of the wood. Oil-finished wood cannot be cleaned with furniture polish and stains cannot usually be removed. So keep that in mind if you choose this option.
 Choose an oil to finish the cabinet. Linseed oil is usually used to finish furniture, but there are other types of oil that you can also use. Ask the store or hardware store for advice.
  Prepare the chest of drawers as described above. Sand the wood with fine sandpaper and fill in dents and other irregularities with a wood filler that matches the wood well.
 - If there are stains or color variations in the wood, apply stain to it before proceeding so that the wood looks the same all over.
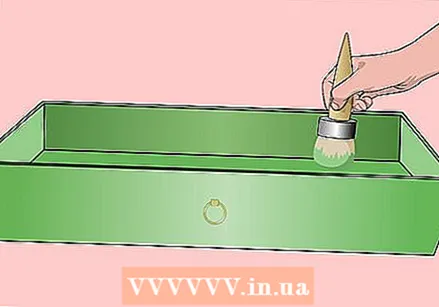
 Using a brush, apply the oil to the chest of drawers and drawers. Use a regular width paintbrush that you would also use to paint the chest of drawers. Use a generous amount of oil. The wood will absorb the oil.
  Apply oil to dry areas. These spots need more oil.
 - Let the oil soak into the wood. This takes about 15 to 45 minutes, depending on the type of wood, the condition and age of the wood, and the oil. Humidity and temperature also affect how long it takes for the oil to soak into the wood. The oil will soak into the wood more quickly when it is warm and more slowly when it is cold.
 Repeat the process. Apply a new coat of oil with your brush. You need to apply about five or six coats of oil to the chest of drawers to give it a finish that is durable enough. The cabinet will also look better with more layers of oil.
 - Reassemble the chest of drawers. Carefully return it to its old location so that it is ready to use. Keep an eye on the condition of the cabinet. Oiled surfaces need to be maintained regularly to keep them shiny. Every few months or every six months, rub more oil into the wood to keep the cabinet looking its best and to keep the wood well protected.
- Rub with the grain of the wood when you clean the cabinet. When cleaning, use a few drops of oil to make the cabinet shine again and then polish the wood.
Tips
- Don't forget the knobs on the drawers and doors. Replace these with beautiful new ones and the chest of drawers will look like new again.
- While sanding, you can remove the old paint or varnish that is coming off the sandpaper with a razor, tweezers, or steel wool.
- Some chests of drawers also have doors in addition to drawers. Unless you want to unscrew them, treat the doors with the rest of the cabinet. Then treat them along with the drawers.
- You can add pieces of fabric to the front of the drawers if you want. With this you can give a boring chest of drawers a fresh look. You can also ensure that the cupboard matches your interior, for example with the colors and wallpaper in a children's room.
Warnings
- Treat old furniture against woodworms and other insects before refinishing. If you ignore the signs of an insect infestation, you can take home pests that will not only eat your chest of drawers even further, but will also affect other pieces of furniture. Use professional tools to control the bugs that destroy your furniture.
- Do not treat the bottom of the chest of drawers with oil or wax. The furniture will become slippery that way and the oil or wax will stain the floor.
- When sanding the wood, it is best to wear a mask and goggles to protect your airways and eyes from the sanding dust and other hazards.
- When working with a chemical paint stripper, always read and follow the instructions carefully before use. Always work in a well-ventilated area.
Necessities
- Aid to remove the old paint or varnish
- Sander
- Sandpaper with different grit sizes
- Paint or varnish
- Paintbrushes
- Soft clean cloths
- Tools for applying the paint, varnish, wax or oil


