Author:
Roger Morrison
Date Of Creation:
28 September 2021
Update Date:
1 July 2024

Content
- To step
- Part 1 of 2: Planting a hydrangea
- Part 2 of 2: Adjusting the colors of your hydrangea
- Tips
- Warnings
Hydrangeas are known for their large, colorful flowers and are found in many parts of the world. There are many different types and varieties of hydrangeas, which produce flowers in many different colors and shapes. Hydrangeas are relatively easy to grow, as long as you plant them in the right conditions as described below.
To step
Part 1 of 2: Planting a hydrangea
 Check the hardiness zone of your hydrangea variety. One of the most popular hydrangeas, Hydrangea macrophylla or the common hydrangea, thrives best in hardiness zones 6-9 with a minimum winter temperature of (-23 to -7 ºC). Some varieties can withstand the conditions in hardness zone 4 (-34 ºC), including H. arborescens (snowball) and H. paniculata (panicle hydrangea).
  Know the safest time to plant. Hydrangeas can suffer when planted in high temperatures or frost. Hydrangeas grown in flower pots are best planted in the garden in spring or autumn. If your hydrangeas have bare branches with no soil on them, it is best to plant them early to mid-spring so they have time to adjust to their new location.
  Choose a spot in your garden that gets both sun and shade. Ideally, the hydrangea will receive several hours of sun per day, but will be protected from the hot midday sun by a wall or other barrier. If this is not possible in your garden, choose a spot with light partial shade.
  Give the plant enough space to grow significantly. A hydrangea can grow larger to a shrub of about 120 by 120 centimeters. Research your species and variety online if you want a more accurate estimate of how big your hydrangea will grow.
 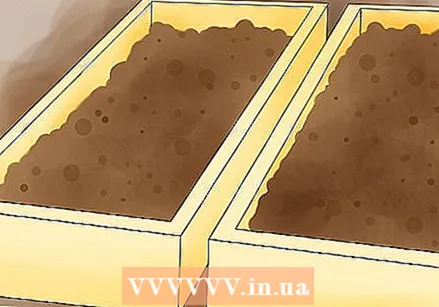 Prepare fertile, porous soil. Add compost to your soil if it is low in nutrients. If the soil is very dense, stiff or mostly clay, add pine bark or other mulch to prevent pools of water from gathering around the plant.
  Loosen the roots. The roots can become tangled or grow together in groups, making them less likely to grow into the soil when the hydrangea is planted. As a result, the plant may absorb less nutrients. To loosen the roots, cut off some of the outer roots and gently shake the roots apart. When the inner roots are loose they will be able to grow in the soil.
 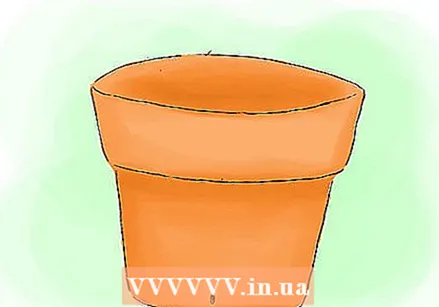 Carefully plant the hydrangea in a spacious hole. Dig a hole about the depth of the root ball or flower pot and two or three times as wide. Carefully lift the hydrangea and put it in the hole. Make sure the roots don't break off or scrape anywhere as you move the plant.
  Fill the hole halfway with soil and add a little bit of soil at a time. Gently push the soil in as you fill the hole to remove air bubbles and support the plant so that it stays upright. Stop when the hole is about half full.
  Pour water into the hole, drain the water, then fill the rest of the hole with soil. Pour a large amount of water into the half-filled hole and let the water drain for at least 15 minutes or until there is no more water in the hole. Fill the rest of the hole in the same way as you just did, pushing in small amounts of soil at a time. Stop when the roots are covered. Make sure the trunk or stem is no more than 2-3 inches below the soil.
  Water the plant regularly for the first few days. With newly planted hydrangeas, the roots will not function optimally yet, so it is important to water them well. Water the plant again when the hole is completely closed, then water it daily for the first few days after planting.
 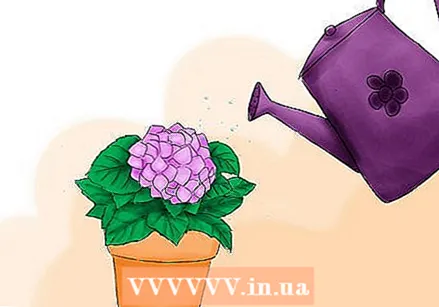 Water the plant less, but keep the soil moist. When the hydrangea is used to its new location, water it when the soil is about to dry out. Make sure to give it a large amount of water each time and not just sprinkle some water on it. The soil should remain slightly moist, but should not be soaked. Hydrangeas do not require any further care and are often easy to grow and bloom.
 - If your hydrangea withers or dries out, set it up so it is shaded and block the sun at midday. You can also try using mulch.
- If very low temperatures and long periods of frost are expected in winter, or if you have planted the hydrangea in a hardiness zone lower than the recommended zone (see above), you may need to protect your hydrangeas from the winter cold.
Part 2 of 2: Adjusting the colors of your hydrangea
 See if the type and variety of hydrangea you have produces different colored flowers. Some types of hydrangeas can have purple or blue flowers, depending on the amount of aluminum in the soil and the acidity of the soil. Most hydrangeas of this type grown belong to the variety Hydrangea macrophylla, but some hydrangeas of this variety grow only white flowers or become too pink or blue to easily match the colors. If you don't know what its name is, ask the previous owner of the hydrangeas what kind it is.
 - The Enziandom, Kasteln, Merritt's Supreme, Red Star and Rose Supreme varieties can all have pink or blue flowers, although the color is not always intense.
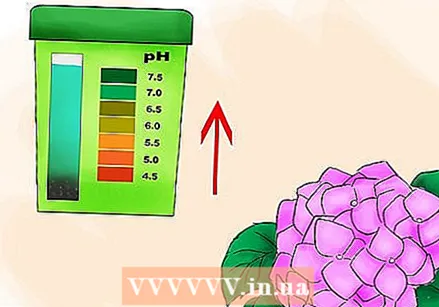
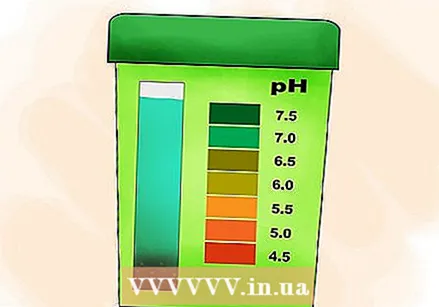 Test the soil's pH. Most garden centers sell kits for measuring the pH or acidity of the soil. Because the acidity affects how well the hydrangea absorbs aluminum (which in turn affects the color of the flowers), measuring the pH of the soil can make a rough estimate of the color of the flowers. As a rule of thumb, a pH of less than 5.5 is likely to produce blue flowers, and a pH of 7 or higher is likely to produce pink or red flowers. It is difficult to estimate what will happen when the soil has a pH of between 5.5 and 7. The flowers can then turn blue, pink or purple, or have a spotty pattern of blue and pink.
 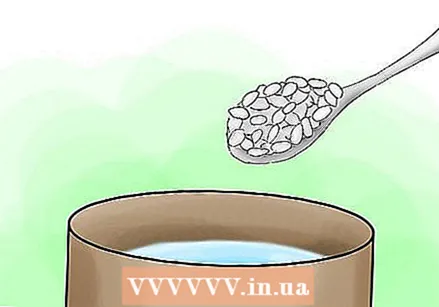 Make the flowers blue. To ensure that your hydrangea produces blue flowers during the growing season, mix 1 tablespoon (15 grams) of aluminum sulfate with 4 liters of water. This way you add more aluminum to the soil and the soil becomes more acidic (and the pH lower). This makes it easier for the plant to absorb the aluminum. Once every 10 to 14 days, give the plant just as much of this mixture as you normally water it. Continue to measure the soil pH and stop giving the mixture when the pH drops below 5.5.
 - You can also get blue flowers by using fertilizer that is low in phosphorus and high in potassium. Look for a mixture with a 25-5-30 ratio. Do not use superphosphates and bone meal.
 Get your hydrangea pink flowers. If the hydrangea is already blue, it is difficult to make it pink because the flowers already turn blue due to the presence of aluminum. However, you can take precautions to make your hydrangea more likely to develop pink flowers. You can also put the hydrangea in a pot. Don't plant your hydrangea near a driveway or wall, as some concrete mixes and mortars can leak aluminum into the soil.
 - Use fertilizer without aluminum, but with a lot of phosphorus. Phosphorus ensures that the plant absorbs less aluminum. Look for a mixture with a 25-10-10 ratio. Consider raising the pH by adding wood ash or pulverized limestone to the soil. This makes it difficult for the hydrangea to absorb aluminum. Do not let the pH exceed 6.4, as this can affect the health of the plant.
Tips
- Buy flowering hydrangeas when you can get them and it's the right time of year. By buying a bare plant you can be surprised by a kind of flower that you don't like. In the worst case, the plant could even be mislabeled.
Warnings
- Be careful when planting hydrangeas under or near trees, as the large roots of the trees probably don't leave enough water and nutrients for the hydrangeas. Keep an eye on your hydrangea if it is in such a spot and move it if it is not growing and blooming.


