Author:
Charles Brown
Date Of Creation:
6 February 2021
Update Date:
1 July 2024

Content
- To step
- Method 1 of 3: Using a compass
- Method 2 of 3: Using an object with a circular base
- Method 3 of 3: Using a protractor
- Tips
- Warnings
- Necessities
An equilateral triangle has three sides of equal length, connected by three corners of equal width. It can be tricky to draw a perfectly equilateral triangle by hand. However, you can use a circular object to mark the corners. Make sure to work with a ruler to get the lines straight! Read on to learn how to draw an equilateral triangle.
To step
Method 1 of 3: Using a compass
 Draw a straight line. Place your ruler on the paper and then draw a line along the straight edge with a pencil. This line segment will form one side of your equilateral triangle, which means that you have to draw two more lines of exactly the same length, each towards a point at an angle of 60 ° to the first line. Make sure you have enough space to draw all three sides!
  Place your compass along the line. Slip a pencil into your compass (if necessary) and make sure the tip is sharp! Put the point of your compass on one end of the segment and the pencil point on the other.
 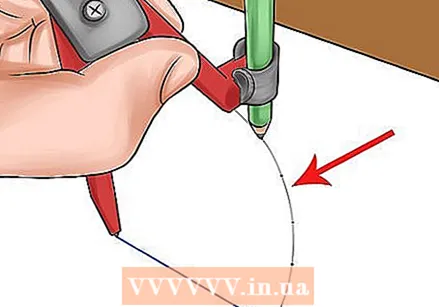 Draw a quarter of a circle. Do not adjust the point of the compass or change the set "width" of the tool from the compass point to the pencil point. Rotate the pencil tip of the compass in a quarter circle up and away from the line segment.
  Rotate the compass. Without changing the width of the compass, move the point of the compass to the opposite end.
 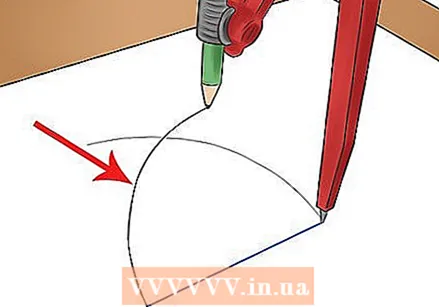 Draw a second arc. Gently swing the pencil tip of the compass so that the new arc intersects with the first arc you drew.
  Mark the point where the two arcs intersect. This is the top of your triangle. It should be right in the middle of the line segment you drew. You can now draw two straight lines leading to this point, one from each end of the "bottom" segment.
 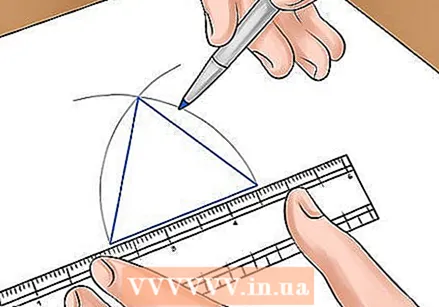 Finish the triangle. Use a ruler to draw two more straight line segments: the remaining sides of the triangle. Connect each end of the original segment to the point where the arcs intersect. Make sure the lines are straight. To finish the work, erase the arcs you drew so that only the triangle remains!
 - Consider tracing this triangle on another page. This way you can start fresh with a clean shape.
- If you need a larger or smaller triangle, repeat the process, but adjust the length of the original line segment. The longer the sides, the bigger the triangle!
Method 2 of 3: Using an object with a circular base
If you don't have a compass or protractor, you can use an object with a circular base to locate an arc instead. This method is basically the same as using a compass, but you will have to be smart about it!
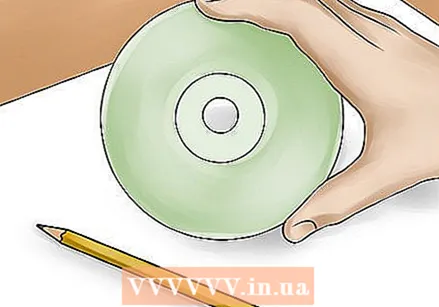 Choose your circular object. You can use almost any cylindrical object with a circular base (such as a bottle or soup can). For example, use something like a round roll of tape or a CD. If you are going to replace the arc of this object with the arc of a compass, you will have to choose an object of the correct size. In this method, each side of the equilateral triangle becomes the same length as the radius (half the diameter) of the circular object.
 - If you are using a CD as an object, imagine an equilateral triangle that fits in the top right quadrant of the CD.
 Draw the first side. It will be exactly the same in length as the radius of the circular object - halfway through the diameter. Make sure the line is perfectly straight!
 - If you have a ruler, just measure the object's diameter and draw a line half that long.
- If you don't have a ruler, put the circular object on a piece of paper and gently trace the outline with your pencil. Remove the object and you should have a perfect circle. Use a straight edge to draw a line across the exact center of the circle - the point that is completely equidistant from any point around the circle's circumference.
 Use the circular object to draw an arc. Place the object on the line segment, with the edge of the circle resting on one side of the line. For accuracy, make sure the line intersects the exact center of the circle. Draw an arc with your pencil about a quarter of the way around the circumference of the circle.
  Draw another arc. Now move the circular object so that the edge touches the other end of the line segment. Make sure the segment passes through the exact center of the circle. Draw another quarter of a circle intersecting the first arc at a point directly above the line segment. This point is the top of your triangle.
  Complete the triangle. Draw the remaining sides of the triangle: two more straight lines connect the top with the two open ends of the line segment. Now you should have a perfectly equilateral triangle!
Method 3 of 3: Using a protractor
 Draw the first side. Use a ruler or the straight edge of your protractor to draw a straight line segment of an appropriate length. This segment will be the first side of your triangle and each of the other sides will be the same length - so make sure it's the right size!
 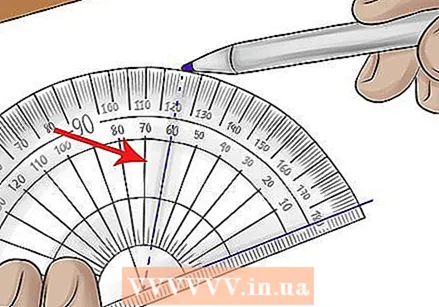 Measure with a protractor an angle of 60 ° at one end of the line.
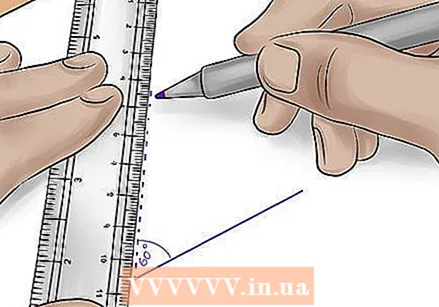 Draw the second side. Measure a new line segment equal to the first. Start it on one side of the original segment, where you measure the 60 ° angle. Start from the vertex and draw a line along the straight edge of the protractor until you reach the next "point".
 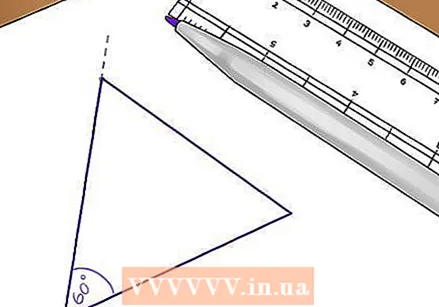 Finish the triangle. Use the straight edge of your protractor to draw the last side of the triangle. Connect the point at the end of the second segment to the unbound end of the first segment. You should now have an equilateral triangle.
Tips
- Use a compass with a lock to make sure you don't inadvertently change the spread of the compass.
- Don't make the compass lines too heavy - you want them to be thin so that you can easily erase them later.
- The compass method is usually more accurate as it does not depend on the correct measurement of the angles.
Warnings
- Be careful not to make holes in the surface underneath the paper.
Necessities
- Compass
- Something to put under the compass so that the point doesn't slip.
- Ruler
- Pencil (do not use mechanical pencils with a straightedge with a pencil holder, as they will not fit). Also make sure the tip of the pencil is sharp.


