Author:
John Pratt
Date Of Creation:
18 April 2021
Update Date:
1 July 2024

Content
In this article, we'll show you how to use your Windows or Mac computer's webcam to take a photo. Under Windows 10 you do this with the program "Camera", on a Mac you use the program "Photo Booth".
To step
Method 1 of 2: Windows
 Check if your computer has a webcam. Most laptops have a built-in webcam, but this is not always the case with desktop computers. You can then install a webcam on your computer before continuing.
  Open Start
  Type camera in the search box. Now your computer will search for the "Camera" program, which allows you to take a photo with a linked webcam.
  click on Camera. The icon of the program looks like a white camera and is at the top of the start menu.
  Wait for the camera to turn on. When the camera is activated, a light will light next to it, and you will see yourself in the "Camera" program window.
  Point your computer or webcam at what you want to photograph. You will see the desired topic on the screen of your computer.
  Click the "Photo" button. This button looks like a camera, you can find the button at the bottom of the window. Now a photo will be taken and it will be saved in the "Photos" folder on your Windows computer.
Method 2 of 2: Mac
 Open Spotlight
  Type photo booth in the Spotlight search window. Now your Mac will search for the "Photo Booth" program.
  click on Photo Booth. In the search results window, Photo Booth is displayed at the top. Click on the result to open the program.
 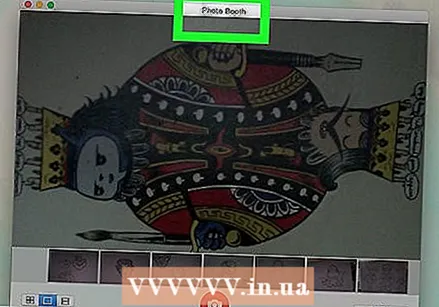 Wait for your Mac's camera to turn on. When the camera is activated, a green light will glow next to the camera.
 - When the camera is on, you will see yourself in the Photo Booth window.
 Point the screen of your computer towards what you want to photograph. Everything you see in the Photo Booth window will be in the picture, so adjust the direction of the camera to your liking.
  Click on the camera button. At the bottom of the window you will see a red button with a white camera in it. When you click on this, a photo will be taken, the photo will be saved in the "Photos" program on your Mac.
 - If you have an iPhone or iPad with "Photo Stream" activated, the photo will also be visible on your iPhone or iPad.
Tips
- If you have a computer with Windows 7, you will need a program from the webcam manufacturer to take a picture. If you don't know the name of the camera, type "camera" in the search box of "Start", or search online based on the type number of your computer.
- Photo Booth has all kinds of filters and other visual effects that you can use to edit the photo.
Warnings
- The photos you take with a webcam are often of lower quality than photos from smartphones, tablets or DSLR cameras.


