Author:
Eugene Taylor
Date Of Creation:
12 August 2021
Update Date:
1 July 2024
Content
- To step
- Part 1 of 3: Planting the cactus
- Part 2 of 3: Taking care of the cactus
- Part 3 of 3: Pruning and pest control
- Tips
- Warnings
- Necessities
The epiphyllum cactus is a native plant of Brazil that grows in divisions of the rainforest canopy. It produces beautiful flowers that usually open in the evening and only bloom for a few days. Growing an epiphyllum cactus outside of its natural habitat is relatively easy, but special attention must be paid to temperature, light and weather conditions.
To step
Part 1 of 3: Planting the cactus
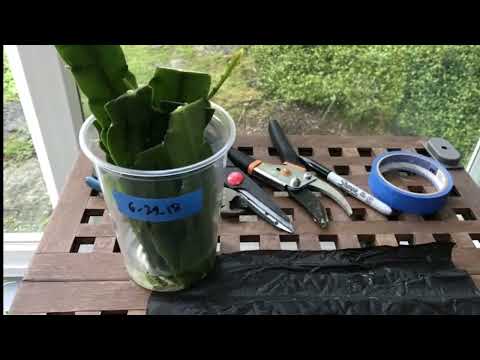
 Get cuttings from an epiphyllum cactus. You can buy cuttings at a garden center or through an online plant store.
 - Cactus cuttings are parts of the adult stem that are planted to create a completely new plant.
- If you already have a strong and healthy epiphyllum cactus, you can make your own cuttings. Choose a healthy leaf of about four inches and cut it under the base of the leaf from the stem. Repeat this until you have the desired number of cuttings.
 Store cuttings in a cool, dry place away from sunlight for 10-14 days. Ideal places are a garden shed, bathroom or cellar. Because the epiphyllum cactus is a succulent, cuttings can survive for up to a month.
 - Keeping the cuttings will allow them to heal. The purpose of this healing process is for crusts to form over the tips of the cutting. The crusts protect the cutting from rotting.
- Let the cuttings heal for a week before planting if you purchased them and are unsure of when they were cut from the mother plant.
 Plant three cuttings in a pot with a diameter of about 10 centimeters. Make sure the pot has drainage holes in the center of the bottom. This will provide plenty of room for the cactus while the drainage holes will drain excess water.
 - Plastic pots are better than terracotta pots because they will allow the soil to retain moisture for a longer period of time.
- Choose a soil mixture for epiphyllum cacti. This consists of three parts of potting soil mixed with one part of raw non-organic material such as perlite. The inorganic material should be 1/3 to 1 1/4 inches in diameter. You can also add 1 to 5.5 tablespoons of orchid bark per pot.
- Alternatively, it is also possible to plant the cuttings exclusively in perlite. When the cuttings have developed roots, however, you will have to repot them to the soil mixture for epiphyllum cacti.
- The soil mixture should always be moist, but never wet. This will ensure healthy and faster growth.
 Do not water the cuttings until they have taken root well. If you water too early, the cuttings will start to rot.
 - Gently pull on each cutting to check for rot. If you feel a bit of resistance, this is a good sign as it means the cutting is taking root. In this case you are allowed to water.
- If a cutting is rotten, take it out of the pot, cut away the rotten parts, let the cutting heal and then replant it.
Part 2 of 3: Taking care of the cactus
 Decide where you want to grow the cactus. Unless you live in a warm climate with temperatures rarely dropping below 10 ° C, the epiphyllum cactus will thrive indoors or in a heated conservatory.
 - If you plant the cactus outside, this should be done out of direct sunlight. A place under a tree or wooden grid that lets in filtered sunlight is ideal.
- If you keep the cactus indoors or in a conservatory, make sure there is moderate humidity. You can put the pot on top of a bowl full of pebbles with a little water.
 Place the epiphyllum cacti in hanging baskets in filtered sunlight.
- Epiphyllum cacti love to grow in hanging baskets and this will also provide a good basis for the overhanging growth of the plant. Hanging trays make it more difficult for snails - the main pest for epiphyllum cacti - to reach the plants.
- A shadow-like place under a tree or under a construction, made of cloth or battens for shade, will provide the right amount of light. Cacti can burn in direct sunlight. In a place with too much shade, the cactus can grow too lush and fail to produce flowers. Also, the long stems will not be strong enough to hold themselves upright, causing them to lean over and cause damage to the plant.
- If possible, choose east or north facing walls or eaves for the best light.
- Provide good air circulation, but protect the panels from storm and strong wind. Storm can cause the hanging baskets to swing against each other and break off stems.
 In warm weather, water the cactus every few days (or every day). The soil should never be completely dry, but neither should it remain wet after watering.
 - Check the soil regularly to determine if you need to water.
- When watering, make sure to provide enough water to allow excess water to drain out of the drainage holes. This will wash out the soil and prevent the build-up of soluble salts in the soil.
 Fertilize the cactus gently with a fertilizer that will be released over time. Epiphyllum cacti thrive best when you regularly apply light fertilizers.
 - Feed the epiphyllum cactus with every watering between May and the end of August. After this period, fertilize only once every two times you water.
- Only use a third or half the amount of fertilizer recommended on the label. Because cacti normally grow in nutrient-poor soil, they don't need many nutrients for healthy growth.
- During the winter, use a fertilizer with little or no nitrogen. A 2-10-10 or 0-10-10 formula is ideal. After the flowering period is over, you can opt for a balanced formula such as 10-10-10 or 5-5-5.
 During cold spells, move the cactus to a warmer place. Frost and prolonged temperatures below 4.5 ° C are harmful to epiphyllum cacti.
 - Cover the cactus with a blanket or cardboard box for better protection. Epiphyllum cacti are also vulnerable to hail, which may prevent the stems from breaking but still leave disfiguring scars.
- The best time to plant cacti is between April and September. This will provide heat and sun while avoiding direct sunlight, which can stunt growth.
 Repot the plant after 1 to 2 years. Replacing the soil mixture will provide the plant with new nutrients, because these will already have been absorbed by the cactus in a natural way.
 - The size of each plant will determine when to repot. A plant that grows well and is starting to get too big for the pot will need to be moved to a larger pot, while a plant that stays small may remain in the same pot for an extended period of time.
- Use plastic pots between 17.5 and 20 centimeters in diameter with the same drainage holes and the same soil mix.
- Wrap newspaper around the stem to avoid damage.
- Hold the plant by the base of the stem, turn upside down and gently tap the pot against a hard surface such as the bottom of a table to loosen the soil from the inside of the pot. Gently pull the pot away from the plant and remove old soil.
- Check the roots. If there are any signs of rot or other damage, cut them away as close to the plant as possible.
- Don't be discouraged if you haven't seen flowers yet; an epiphyllum cactus will not flower until it has reached the size of the pot, which is usually only about 3 to 4 years after planting the cutting.
Part 3 of 3: Pruning and pest control
 Disinfect your pruning shears with a solution of bleach. This will prevent the cactus from contracting diseases or other infections that can affect its growth.
 - Use a bleach solution that has been diluted to 10% and mix one part with one part water.
 Remove the flowers after flowering has come to an end. Cut just below the flower head.
 - Pruning dead parts of the plant will not only improve its appearance, but will also encourage new growth and healthy flowering.
 Cut away any dead, diseased and broken stems to the point where they appeared on the main stem. When you find a stem that you need to remove, follow it back to the base of the stem and make a straight cut just above the node with the parent stem.
 - Disinfect pruning shears immediately after trimming dead or diseased stems. This will keep the disease from spreading further.
- It is better to assume that every dead stem has died from a disease. Disinfecting after each pruning session will require more bleach, but it will keep the cactus healthy and beautiful.
 Remove long stems that threaten to disturb the cactus's balance. Follow them back to the mother stem and cut them off near the base.
 - These stems are usually located on the outer edges. Remove stems if necessary until all sides of the cactus look fairly uniform.
 Check the cactus for mealybugs, scale insects and spider mites. Snails are relatively easy to detect and remove (use store-bought snail bait for this), but the above-mentioned insects require special measures to prevent infestation.
 - Mealybugs look greasy, white and cottony. They move slowly and usually occur in clusters in front of or under the leaves, as in hidden parts of the nodes.
- Scale lice look like tiny cotton dome-shaped shells. They attach to stems and leaves, but can be pried loose.
- Spider mites are difficult to see with the naked eye, but signs of this include tissue and small brown spots, especially on the younger growths. If you tap the affected part of the plant against a white sheet of paper, spider mites will look like dust.
- These insects tend to soak up the plant's juices, causing the leaves to become weak, crumple, and wilt. Severe infestations can lead to the death of the plant. The first symptoms are stickiness and a black mold on or near the plant.
 Remove mealybugs and scale insects with a cotton swab dipped in alcohol. You can also spray a dilute solution of 1 part alcohol and 3 parts water on the cactus.
 - Spraying is best to combat infestation with spider mites and other nearly invisible pests. However, be careful as this can damage the epidermis of the cactus. Try on a small area before spraying the entire plant.
 Use an insecticidal soap to coat the plant. Insecticidal soap can be purchased at a local garden center.
 - This treatment can seriously damage the cactus. Since cacti contain oil and wax that makes them vulnerable, it is best that you use it in moderation and try a little before smearing the entire cactus with it.
 Spray insecticides to kill pests and stop serious infestations. Use insecticides such as neem or pyrethrin for visible insects. Systemic insecticides such as imidacloprid or acetate are best for controlling pests that are difficult to control.
 - Check the label to see how much to use for the cactus and whether long-term use is safe.
 Shield new plants from infected plants. Remember that the contamination is not only harmful, it will spread from plant to plant until stopped.
 - Carefully check new plants for the above symptoms and pests. When you are sure there are no pests, keep the plant away from the infested plants. If you do find pests on new plants, it may be easier and cheaper to just get rid of them instead of trying to treat them.
Tips
- Use a fertilizer that will be released over time to stimulate the flowers of the plant. During the winter, use a solution with no or little nitrogen such as a 2-10-10 or 0-10-10 formula. After the blooming season, add nitrogen using a solution such as 10-10-10 or 5-5-5. Use only one-third of the recommended amount on the label to mimic the natural nutrient-poor environment of epiphyllum cacti.
- Plant at least 3 cuttings of the same variety in a pot with a diameter of 17.5 to 20 centimeters, which will make them bloom faster.
Warnings
- Watch for pests such as mealybugs, aphids, caterpillars, snails, slugs and scale insects. Use bait for snails and slugs and control small scale infestations by rubbing a little rubbing alcohol directly on the plant with a cotton swab.
Necessities
- Epiphyllum cuttings
- Plastic pots with a diameter of 10 centimeters
- Soil mixture for epiphyllum cacti
- Perlite
- Orchid bark
- Hanging trays
- Water
- Plastic pots with a diameter of 17.5 to 20 centimeters
- Newspaper
- Fertilizer without or low in nitrogen
- 10-10-10 or 5-5-5 fertilizer

 quickly")

