Author:
John Pratt
Date Of Creation:
17 April 2021
Update Date:
1 July 2024
Content
- To step
- Part 1 of 3: Preparing for installation
- Part 2 of 3: Installing on Windows
- Part 3 of 3: On a Mac
- Tips
- Warnings
This wikiHow teaches you how to connect and set up a Canon wireless printer on your Windows or Mac computer. You can do this by connecting via the internet or by connecting your printer to your computer via a USB cable and having the printer installed and connected itself.
To step
Part 1 of 3: Preparing for installation
 Make sure your printer is connected and turned on. If your printer requires an ethernet connection to access the internet, you will also need to use an ethernet cable to connect the printer to your router.
  Check if your printer has installation software. If your printer came with a CD, chances are you will need to insert the CD into your computer and run the installer before you can set up the printer.
 - This is unlikely for modern printers, but some older printers require the CD to be installed before you can connect.
- To install the CD, simply place the CD in the CD tray of your computer and follow the on-screen instructions. For a Mac, you will need an external CD reader to perform this step.
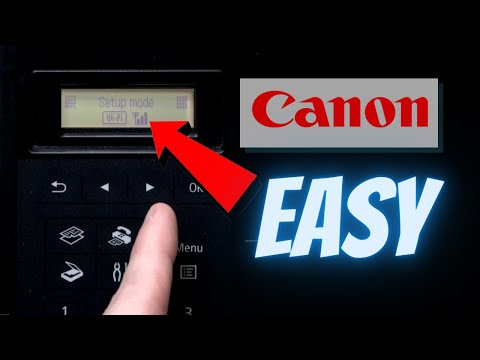
 Connect your printer to the internet. You usually do this by using the printer's LCD panel to select a wireless network and enter the password.
 - Consult your printer manual for specific instructions on how to connect your printer to the internet.
- You can find an online version of your printer's manual on the Canon website by clicking "SUPPORT to click, MANUALS from the drop-down menu, clicking Printers and find the model number of your printer.
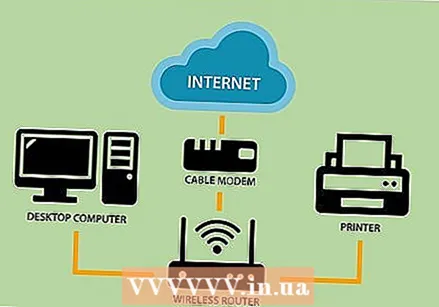 Make sure your computer is on the same network as your printer. For your wireless printer to receive commands from your computer, both your computer and your printer must be connected to the same Wi-Fi network.
 - If your printer is connected to a different Wi-Fi network than your computer, change the Wi-Fi network you connect to your computer before continuing.
Part 2 of 3: Installing on Windows
 Open Start
  Open Settings
  click on Appliances. You'll find this at the top of the Settings window.
  click on Printers & scanners. This tab is located on the left side of the window.
  click on + Add a printer or scanner. This is at the top of the page. This will open a popup window.
 - If you see the name of the printer (eg "Canon [model number]") in the "Printers & scanners" section, your printer is already connected.
 Click on the name of your printer. It should be in the popup window. This will ask your computer to connect to the printer. Once the connection process is complete, you can use the printer from your computer.
 - If Windows cannot find the printer, continue to the next step.
 Try installing the printer with a USB cable. If you don't see your printer in the window Add you may be able to install the printer by connecting it to your computer with a cable:
 - Connect your printer to your computer with a USB to USB cable.
- Wait for the installation window to appear.
- Follow the instructions on the screen.
Part 3 of 3: On a Mac
 Open the Apple menu
  click on System preferences .... It's at the top of the drop-down menu.
  click on Printers & Scanners. This printer-shaped icon is located in the System Preferences window.
  click on +. This is in the bottom left of the window. This will display a popup window.
 - If your printer is already connected over the network, you will see its name (eg, "Canon [model number]") in the left pane.
 Click on the name of your printer. It should appear in the selection menu. This will prompt the printer to start setting up. When it is done, you will see the name of the printer in the window on the left side of the window, indicating that the printer has successfully connected to your Mac.
 - If you do not see the name of the printer, continue with the next step.
 Try installing the printer with a USB cable. If your Mac cannot find your printer, you may be able to install the printer directly using a USB cable:
 - Update your Mac.
- Connect the printer to your computer with a USB to USB-C cable.
- Wait for the setup window to appear.
- Follow the instructions on the screen.
Tips
- Your printer's user manual will always provide the best guidelines for your specific printer model.
Warnings
- If you buy a printer designed for a specific operating system (e.g. Mac), you will most likely not be able to use that printer on another operating system (e.g. Windows).

 quickly")

