Author:
Charles Brown
Date Of Creation:
5 February 2021
Update Date:
1 July 2024

Content
This wikiHow shows you how to scan a digital version of a physical document onto your computer with a Canon all-in-one printer. You can do this on a Windows PC as well as a Mac.
To step
Part 1 of 3: Prepare to scan
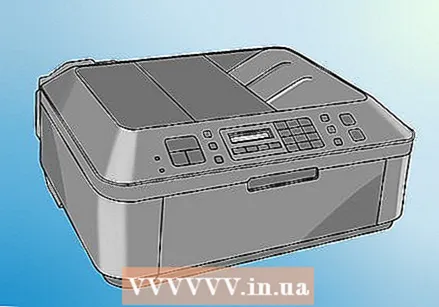 Check if your Canon printer has scanning capability. If you have a so-called "all-in-one" model, your printer can also scan. Some other printer models can also scan, but you will need to check the printer manual or product page to make sure.
 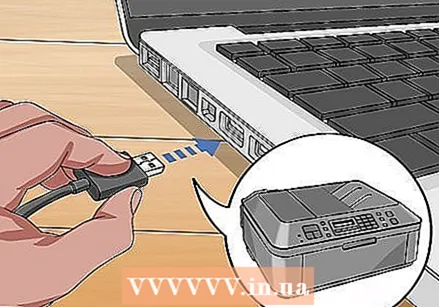 Connect your printer to your computer. Most Canon printers that can scan can also be connected wirelessly with a touchscreen, but you may have to connect your printer to your computer with a USB cable.
 - Most printers come with a USB cable that you can use if it doesn't work to connect the printer wirelessly.
 Turn on your printer if necessary. Press the button to turn on your printer. If your printer does not turn on, make sure it is connected to a working power source.
 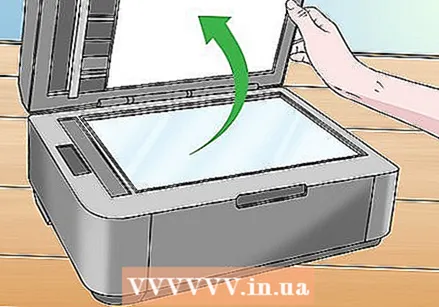 Open the scanner. Lift the lid of the scanner so that you can see the glass bottom of the scanner.
 - If your Canon printer has a multipurpose input tray, put the document there. You can look at the symbol on the input tray to see how to load the paper.
- If you cannot find out how to use the built-in scanner, check your Canon printer manual.
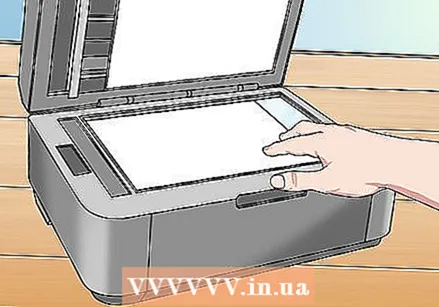 Place your document right side down in the scanner. You should see markings next to the glass bottom. This usually tells you exactly how the document should be placed in the scanner.
 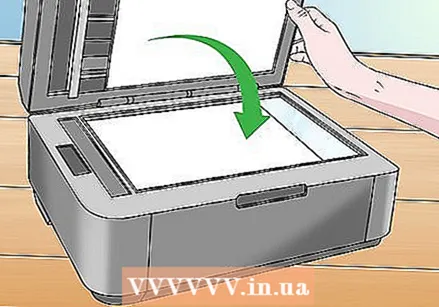 Close the scanner lid. Make sure the lid is closed before scanning the document.
Part 2 of 3: Scan a document in Windows
 Open Start
  Tap Start windows fax and scan in. By doing this, your computer will search for the Windows Fax and Scan app.
 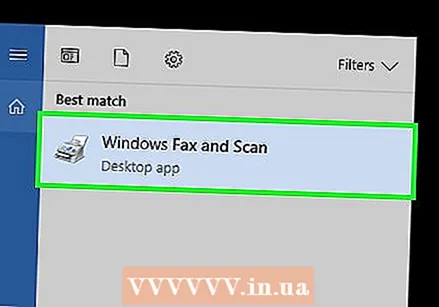 click on Windows Fax and Scan. This option can be found at the top of the Start screen. The Fax and Scan app will open.
 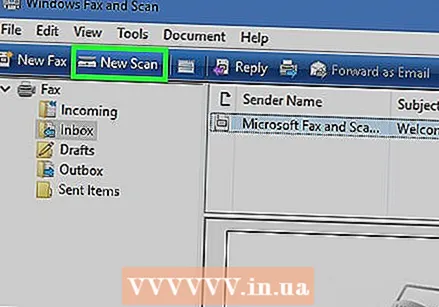 click on New scan. This option is located in the top left corner of the Fax and Scan window. Clicking on it will open a new window.
 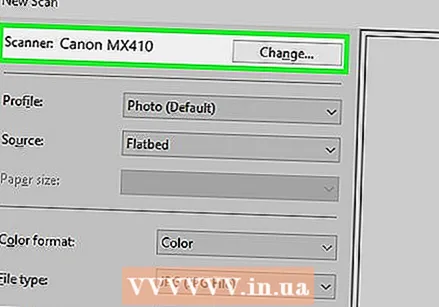 Check that the correct scanner is displayed. You should see the word "Canon" followed by the model number of your printer. If you see something else here, click Modify... and select your Canon printer.
 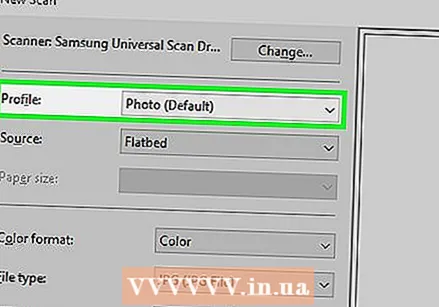 Select a document type. Click the drop-down menu next to "Profile" and select the document type (for example Photo) in the drop-down menu.
  Decide which colors your document should be. Click on the drop-down menu next to "Color format" and choose Color or Black and white.
 - Your scanner may have additional (or limited) color layout options.
 Choose a file type. Click the drop-down menu next to "File Type" and click the file type (for example pdf or jpg) that you want to use to save the scanned document to your computer.
 - Because you are scanning a document, you usually choose this pdf.
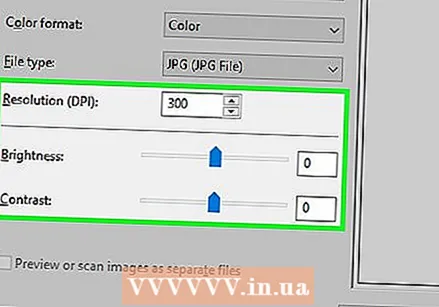 Set the other options on the page. Depending on your scanner, there may be other options (for example, "Resolution") that you can set before scanning the document.
  click on Example. This option can be found at the bottom of the window. By clicking on it you will see a preview of the document in the scanner.
 - If the document appears skewed, uneven or a part of it is not displayed, you can move the document in the scanner and click again Example Click to see if your adjustment solved the problem.
 click on Scan. This option can be found at the bottom of the window. The document will be scanned on your computer. To find the scanned document later, do the following:
 - Open Start
 Open the Apple menu
  click on System Preferences .... This option can be found at the top of the dropdown menu.
 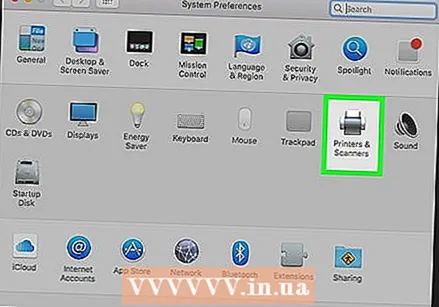 click on Printers and scanners. This printer-shaped icon is located on the right side of the System Preferences window.
 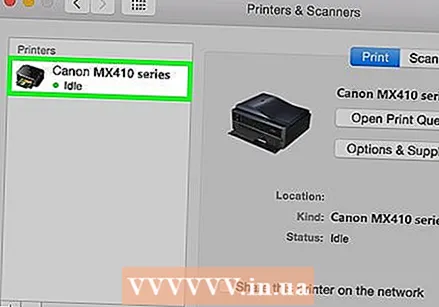 Select your Canon printer. Click on the "Canon" option in the top left corner of the window.
 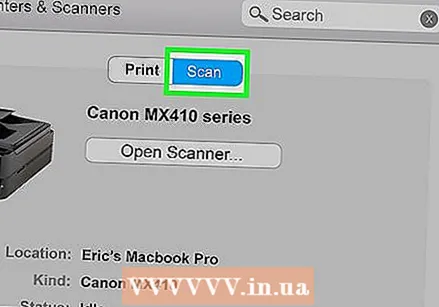 Click on the tab Scan. This is at the top of the window.
  click on Open scanner .... This option is at the top of the tab Scan.
  click on Show details. This can be found in the bottom right corner of the window.
 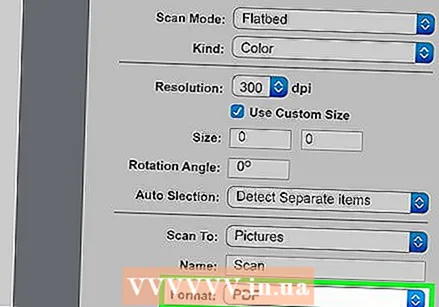 Choose a file type. Click the drop-down menu next to "File Type" and click the file type (for example pdf or jpeg) you want to use to save the file.
 - If you're scanning something other than a photo, it's best to choose pdf.
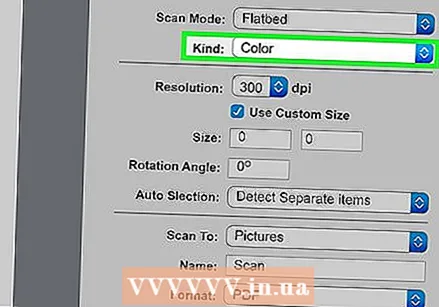 Pick a color. Click the drop-down menu next to "Type" at the top of the page and choose a color option (for example Black and white).
 - You may have limited options for your scanner here.
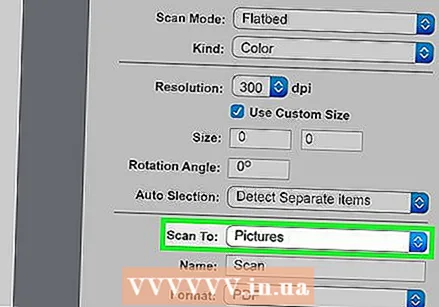 Choose where you want to save the scan. Click the drop-down menu next to "Save in" and click the folder where you want to save your scanned document (for example Desktop).
 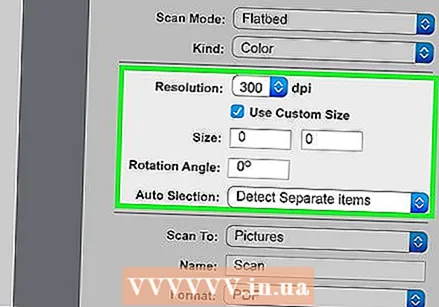 Adjust the other options on the page. Depending on the type of document you are scanning, you can adjust the "Resolution" and "Orientation" options.
 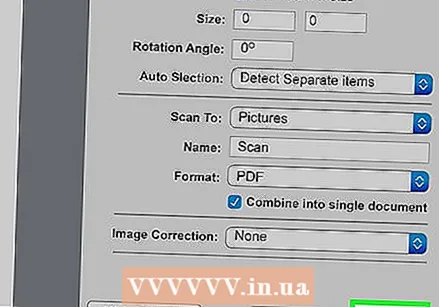 click on Scan. This can be found in the bottom right corner of the window. Your document will now be scanned on your computer. When the scan is done, you can find the scan in the folder you just chose to store the scan in.
- Open Start
Tips
- You can usually find an online version of your printer's manual on the Canon website.


