Author:
Charles Brown
Date Of Creation:
10 February 2021
Update Date:
1 July 2024
Content
- To step
- Part 1 of 3: Cleaning the floor
- Part 2 of 3: Choosing a sealant
- Part 3 of 3: Applying the product
- Tips
- Warnings
- Necessities
Concrete is a great material that is very durable and therefore suitable for floors. Whether the concrete floor is in your living room, basement or garage, the concrete is porous and you need to waterproof it to make it last longer. By sealing your concrete floor, it can no longer absorb water and stains. Start by clearing the floor and scrubbing the floor. If you've already cleaned and painted the floor, you can skip those steps. Then choose a suitable sealant and apply it to your floor.
To step
Part 1 of 3: Cleaning the floor
 Get everything off the floor. Remove all furniture and other items from the room and place them elsewhere. Find a temporary place for them, as the waterproofing of concrete can take up to a week.
 - Of course you don't want to have to move things around every time you have started the job. Moreover, it is a lot easier to be able to clean the entire floor in one go. If you're waterproofing a garage floor, you may even want to do this before moving into your new home.
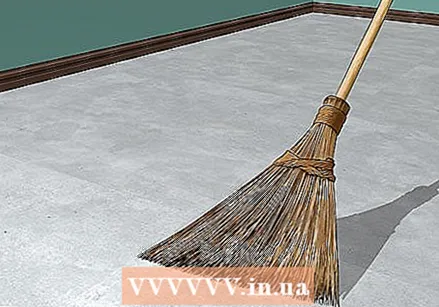 Blow or sweep away the dirt. First, wipe off all dirt and dust so that you can remove any spills from the floor later. Use a leaf blower to blow out the rest of the dirt or just sweep the floor thoroughly.
 - Scrub areas with oil spills and other dirty areas. Pour turpentine onto any spilled grease and scrub the areas with a scrub brush. Wipe off the excess grease and cleaner residue with paper towels. You can also use another cleaner like trisodium phosphate to scrub the grease stains with a scrub brush.
- If you do not remove the grease and dirt, the sealant will not adhere properly.
- For some grease removers, pour the solution onto the grease stains and spread it over the entire stain with a trowel. Then you let it dry. It dries to a powder that you can wipe away.
- Make sure to wipe off any residue of grease and cleaner with paper towels.
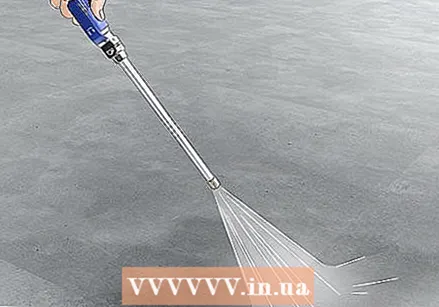
 Use a concrete cleaner to prepare the concrete for the sealant. Buy a concrete cleaner based on phosphoric acid or another concrete cleaner. Spray or pour the cleaner onto the floor, then rub it into the floor with a long-handled broom. Scrub the floor thoroughly with the broom and treat a small area at a time.
 - You can buy a kit for refinishing your floor. Such a set often contains a concrete cleaner.
 Rinse the cleaner off the floor. Rinse the floor completely with a garden hose. If the floor is slightly sloped, work from top to bottom. Otherwise, start at one end and work your way up to the other end. When you are inside, work towards a door.
 - Some people prefer to use a pressure washer for this step.
 Make sure the floor is completely dry before continuing. You can wipe the water off the floor with a squeegee to speed up the drying process, but it's still a good idea to wait 24 hours for the floor to dry completely.
  Use concrete sealant to fill cracks and cracks. If there are cracks in the floor, it is a good idea to fill them now. Using the tube, squeeze the sealant into the cracks. Use enough sealant to fill in the cracks. Smooth over with a trowel to smooth out the caulk.
 - Let the sealant dry completely before proceeding. View the packaging to see how long it will take for the sealant to set. Sometimes it can take up to a week for the sealant to fully cure.
Part 2 of 3: Choosing a sealant
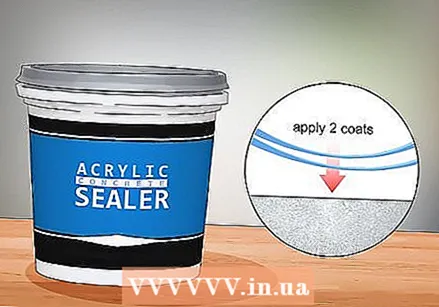 Choose an acrylic-based compound to seal an interior floor. This type of sealant stays on the concrete, rather than soaking in, and is easy to apply. However, it doesn't protect the floor as well against oil and paint stains, so choose a different solution if you're treating a garage floor. You often have to apply two coats of this remedy before it works.
 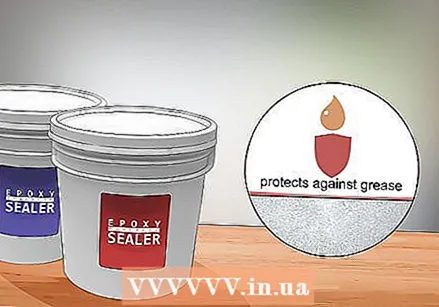 Choose an epoxy-based product for a colorful, durable finish. This type of sealant is very durable (more so than acrylic) and will also stay on the concrete instead of absorbing it. However, it does protect against grease stains, but is difficult to apply because you have to mix two components and apply before the epoxy dries. You can buy such a product in different colors so that you can change the look of your floor at the same time.
 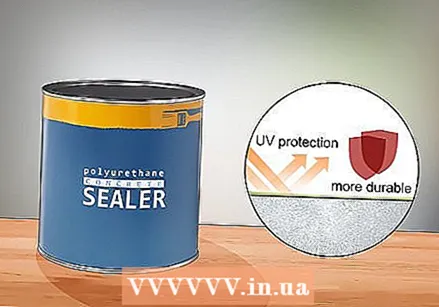 Try a polyurethane based agent for a durable finish. This agent can be applied to other sealants and is more durable than epoxy. It also protects against UV rays, which means that your floor will not turn yellow over time, as can happen with acrylic and epoxy. Such an agent remains on the concrete, just like acrylic and epoxy, but it is only thin and is therefore often applied to epoxy.
 - Polyurethane is available in a matt version, and with satin gloss and high gloss.
- To check if the concrete is already sealed, pour some water on it. If drops remain on the concrete, then the concrete is already waterproof. You can apply a polyurethane-based product over another, but if you are not sure what to choose, ask your hardware store.
 Choose a silane or siloxane-based agent if you don't want to change the look of the floor. Such an agent penetrates into the concrete and thus does not darken it or make it shine. The concrete remains matte and gray. This product protects the floor against moisture and wear.
 - Your floor can last for 20 years or more if you use an agent like this.
Part 3 of 3: Applying the product
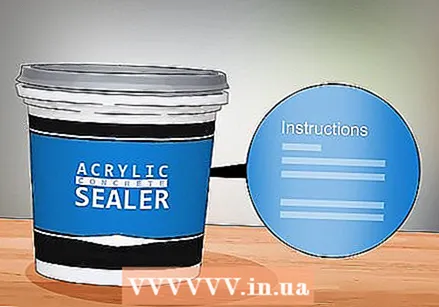 Read the instructions on the packaging first. Every sealant is different, so follow the directions on the packaging carefully. Take the time to read all of the instructions before you begin.
 - Look on the back of the product to find the ideal temperature for application. Some products do not dry properly if you apply them when it is too hot or too cold. Too high humidity can also be a problem, because then the agent cannot cure properly.
 Ventilate the room well. If you work in a garage, ventilation is easy. Just open the garage door. If you work indoors, open as many windows as possible. It also helps to have a fan aimed at your window to draw the fumes out.
 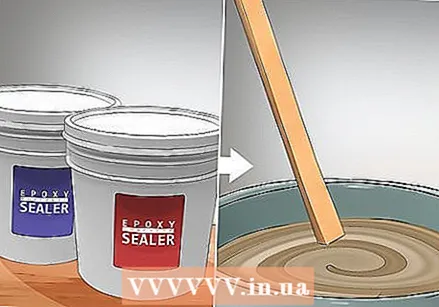 Mix the two components if you are using an epoxy-based product. Some sealants have two components. Empty the smaller container into the larger container and use a stir stick to mix both components. Do not perform this step until you are ready to apply the product.
 - If you're using epoxy, you may only have an hour to apply, so work quickly.
 Visually divide the space into quarters. It's best to work on a quarter at a time. Before starting the next, cover the entire section and always have a way to get out of the room so you don't have to walk on the wet floor.
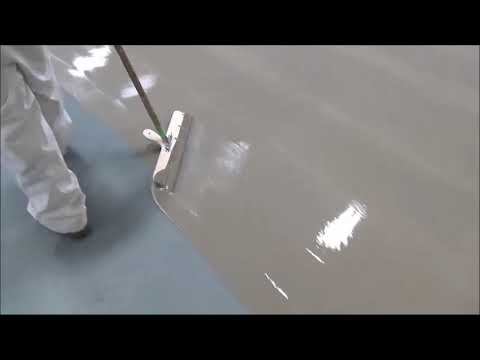
 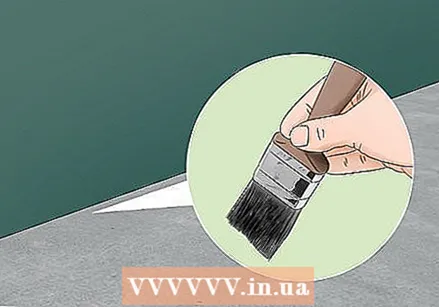 Use a small brush to apply around the edges. Choose a paintbrush that is five to seven inches wide and is intended for applying paint. Dip the brush in the medium. Run it along the edges of the first section you are treating to treat the areas that your roller or paint pad cannot reach. Apply the sealant in clean, even strokes.
 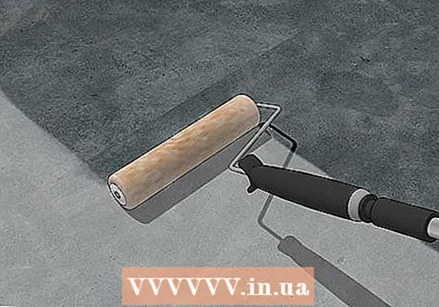 Apply the sealant to the concrete with a paint pad or paint roller. Pour the agent into a paint container. Attach a telescopic handle to the paint pad or paint roller and dip it into the paint tray. Run the paint pad or paint roller around the edge you just treated. Keep going over the floor and applying more sealant.
 - Always have a wet edge while treating the floor. If you let the edge dry, it won't flow nicely into the next section you treat.
- You can use any paint roller or paint pad.
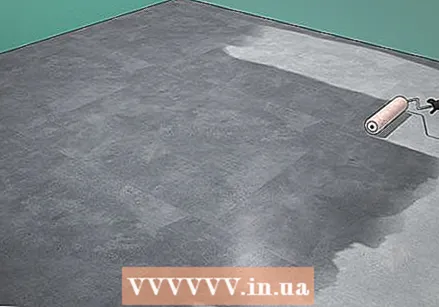 Apply a single even coat on the floor. Treat a quarter at a time and move around the room. Make sure that the product does not remain in puddles on the floor by treating low areas several times to spread the product. Make sure to treat the entire floor so that you don't have any bald spots.
  Wait for the product to dry before walking or driving over it. Read the directions on the package to find out how long you should let the product dry. You may have to wait a day before you can walk over it, and three to four days before you can drive over it.
 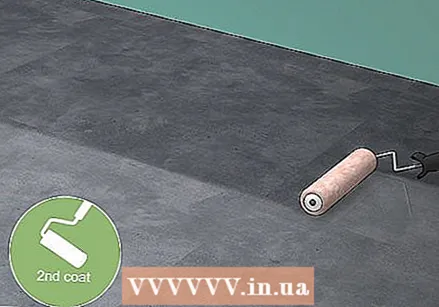 Apply a second coat if necessary. Some sealants require a second coat. Some acrylics and epoxies are less durable if you only apply a single coat. Applying a second layer also ensures that the floor is completely covered. Wait to apply the second coat until the first coat is completely dry.
 - Always read the directions on the packaging. It may take up to five to seven days to cure before applying a second coat.
Tips
- After pouring the concrete, wait a month before sealing. The concrete needs time to harden.
- After applying the sealant, water and other liquids should flow from your concrete floor instead of absorbing them.
Warnings
- Wear rubber gloves, long pants, a long-sleeved shirt, and eye protection when waterproofing your concrete floor, as the degreaser and sealant can irritate your skin and eyes.
Necessities
- Broom
- Sweeping tin
- Degreaser
- Concrete cleaner
- Garden hose
- Bucket
- Broom with a long handle
- Fast drying filler for concrete
- Trowel or putty knife
- Sealant
- Paint tray
- Paintbrush
- Paint roller with telescopic handle


