
Content
- To step
- Part 1 of 3: Preparing your bathroom
- Part 2 of 3: Painting the ceiling and woodwork
- Part 3 of 3: Apply several coats of paint
- Tips
- Warnings
- Necessities
If your bathroom is in need of a makeover, it might be a good idea to give it a fresh paint job. Since wall paint for a bathroom has to process a lot of moisture, it is best to go for a durable mold-resistant product. Before starting work, place cloths on the bathroom floor for protection so that you don't get paint splatters on the floor. Then use a good angled paintbrush to tackle the trim and hard-to-reach areas, and paint the larger surfaces with a paint roller. With the right tools and a little effort, your bathroom will be like new again in no time!
To step
Part 1 of 3: Preparing your bathroom
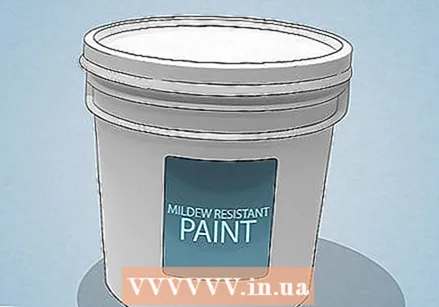 Opt for anti-fungal satin paint. Bathroom paint suffers a lot from wear and tear, so go for a water-resistant, easy-care product. Because it is more durable and easier to clean than matte paint, it is best to choose satin paint for your bathroom. The only downside is that this will accentuate imperfections, so it's important to properly prep walls and ceiling before painting.
 - As for the color, it is best to choose a shade that will complement the hallway or the room next to the bathroom. Lighter shades are usually a good choice for smaller spaces.
- Paint manufacturer websites often allow you to upload a photo of the room you want to paint so you can experiment with colors. You can also pick up color cards at a paint store first, so that you can see at home which color fits best. Keep in mind that glossy paint reflects more light, making colors appear brighter.
 Remove all wall coverings, bath products and electrical appliances. Remove all wall decorations, clear out shelves and unscrew the towel rack, in short, remove as much as possible anything that could get in the way while painting. Unscrew the covers from the outlets and wall switches as well, then put the screws back in loosely so you don't lose them.
 - If you also want to paint a washbasin cupboard or other cupboard, remove the knobs and / or handles.
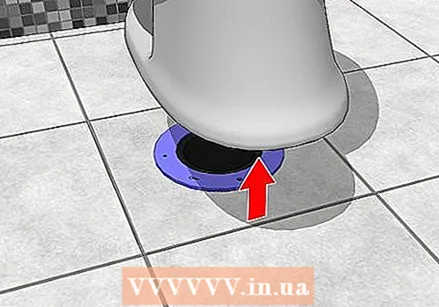 Detach the toilet or sink if no roller or brush will fit behind it. If there is a little space between the toilet and the wall, you can simply buy a thin sponge stick that is specifically designed for cleaning the wall behind a toilet. You can also paint with that. Find one online or at a DIY store. If there really is no space, turn off the water supply and flush the toilet to drain the water. Then you start loosening the toilet.
 - If the cistern is detachable, loosen the nuts on the mounting bolts that connect it to the toilet bowl. If the toilet bowl is still blocking the wall, loosen the mounting bolts at the bottom and lift the toilet bowl forward a little.
 Clean the walls well so that your paintwork lasts longer. Paint cannot adhere to surfaces covered with dust, dirt, or mold, so thoroughly clean the walls with a mix of 1 part bleach and 3 parts warm water. Dip a sponge or soft scouring pad in the solution, squeeze it, and thoroughly scrub any surfaces you plan to paint. It may seem like a lot of work, but it will keep your new paint from peeling off after just a few months.
 - You can also dilute trisodium phosphate-based concentrated cleaner with water in the same way. Trisodium Phosphate is a stronger cleaner, so you don't have to scrub as hard.
- Wear rubber gloves when using both trisodium phosphate and bleaching solution. If your bathroom has a window, open it; if not, turn on the extractor.
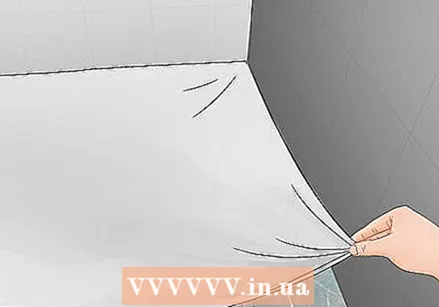 Place cloths on the floor. To protect the floor, stick the edges of the cloths to the skirting boards or to the floor. Canvas cloths are best for the floor. You can cover the sink, bathtub and other fixtures with plastic.
 - Canvas is heavier and less smooth than plastic. It also absorbs the paint, making it less likely that you will step into a wet paint spot and then accidentally leave paint marks around the house.
- If you left a fixture on the wall, such as a toilet paper holder or towel rack, tape it off with masking tape to protect it from paint splatters.
Warning: because the cloth is absorbent, you should clean up large spills before the paint seeps through the cloth. You can also stick a sheet of plastic to the floor first and then put the canvas over it as extra protection.
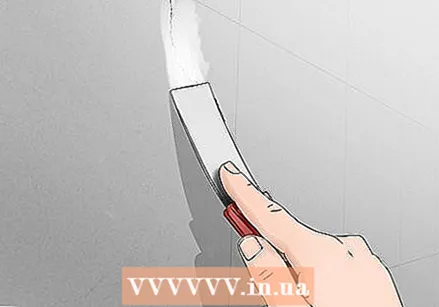 Repair any holes or cracks with filler or plaster mortar. Shine a bright light along the walls and ceiling to find the areas that need to be repaired. Use a putty knife to fix the problem areas, then scrape off the excess to get a smooth surface.
 - Use wood filler to repair any holes or cuts in baseboards, windowsill, or other woodwork. Allow the filler or plaster mortar to dry for 6 to 24 hours (check instructions for specific drying times). Then sand all repaired surfaces with fine sandpaper - 320 grit - until smooth and flush with the surrounding surface.
- Before you start painting your bathroom, you may want to re-seal the edges of your tub or sink.
Part 2 of 3: Painting the ceiling and woodwork
 If you want to paint it, start with the ceiling. If you are painting the ceiling, use a brush for the edges where the ceiling and walls meet. Finish the job with a roller on a long stick. For best results, use a good quality lint roller that will allow you to get a lot of paint on the ceiling in a short time.
 - Dip the roller in the paint tray and then roll back and forth along the ridges to remove the excess paint. Start in one corner of the ceiling and roll in one continuous motion. Try to keep the roller wet, overlapping the already painted edges by about 8 cm each time.
- If you are using latex paint, you should be able to apply a second coat after 4 hours. For even coverage, apply the first coat in one direction, say north to south, and the second in the other direction, east to west.
- Painting with a brush around the edges is pretty much the same as coloring within the lines; you try to make as tight an edge as possible with your brush.
Tip: opt for anti-fungal ceiling paint, which is matte (not glossy), dries slowly and splatters less. Although anti-fungal products are slightly more expensive, they are more resistant to moisture and last longer.
 Paint the woodwork with the same brush you use to paint the walls. Use an angled brush to paint the baseboards. Paint the woodwork first so you don't have to tape the walls, which is more difficult than taping baseboards and door moldings. Depending on the type of paint you are using, apply a second coat after 4 to 24 hours.
 - Satin gloss is a good choice for bathroom finishes. Skirting boards and window and door moldings trap a lot of dust and dirt, and satin paint is more durable and easier to clean than matte finishes.
- White is often used for the woodwork, but you could experiment with color, especially if your walls are already white. Gray, blue and black are trendy choices if you want your finish to stand out a bit more.
 If you're not sure you can paint the edges tight enough, mask the edges of the woodwork. If you have a steady, practiced hand, you don't have to tape off every edge. However, if you want to err on the side of caution, let the woodwork dry for 24 hours and then stick masking tape along the edges that connect to the walls.
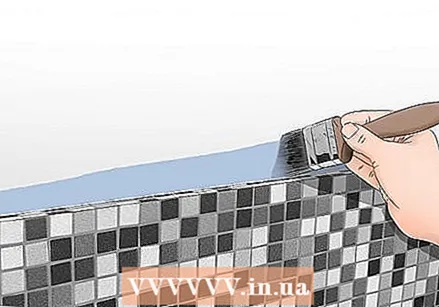
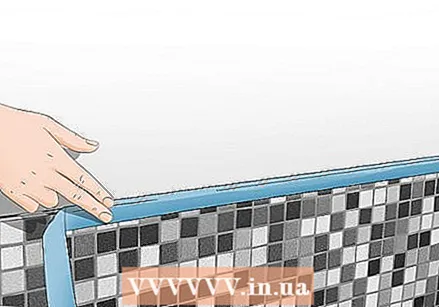
 - Also cover your bathroom furniture and wall tiles with painter's tape.
- Even if you have a steady hand, you still need to mask the horizontal woodwork, such as baseboards and horizontal tile edges. The chance of paint splashes is much greater with horizontal edges than with vertical edges.
Part 3 of 3: Apply several coats of paint
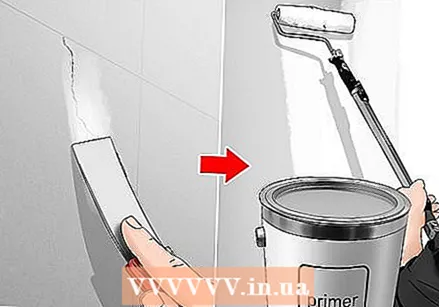 Apply a coat of primer to the walls first if you want a big color change or have gaps filled. If you have good hiding paint, haven't made any repairs, and aren't making drastic color changes, you can skip the primer, or use a paint that is paint and primer in one. If your bathroom is currently dark and your new color is light, it is wise to prime. Use the same technique for priming as for the top coats; brush the edges first and then use a roller to paint the larger surfaces.
 - You should also prime any spots you have repaired. Wall filler is porous and will absorb the paint, resulting in dull spots. By treating the repaired areas well, they will not be noticeable later.
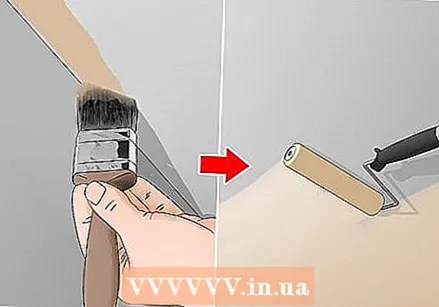
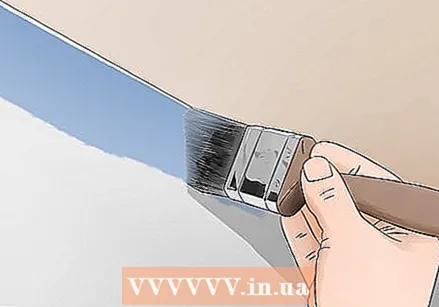 Use an angled brush to paint the edges around a wall. Dip the brush in the paint, tap the excess paint off, leaving about an inch below the edge of the ceiling. Go back over it again, bringing the tip of the brush right up to the edge, being careful not to go over it. To avoid unsightly lines, paint along the edges of one wall, then finish the rest of the wall with a roller before moving on to the next.
 - Always do one wall at a time so that you always paint over wet paint. Painting over dried or tacky paint will cause visible streaks. If you first paint the edges all over the room, some areas will have already dried halfway by the time you roll over them.
- It is really important to choose satin wall paint for the bathroom. This will strike a good balance between hiding imperfections and durability.
 Paint the large surfaces with a paint roller. Fill the deep part of the paint tray with paint, dip the roller in it, and roll it over the ridges of the tray to get rid of any excess paint. Start at one corner and run the roller in a vertical motion across the wall, the full height of the wall. Roll over the surface you just did, or over the paint along the edges of the wall, then continue.
 - When you're done with the first wall, move on to the next. Paint the edges with a brush and use a roller for the larger areas.
- Periodically immerse the roller in the paint and prevent the roller from drying out. You don't want the roller to be so wet that the paint drips off, but keeping it wet will prevent unsightly streaks.
 Let the first coat dry for at least 4 hours, or as directed. Before applying the next coat, observe the recommended drying time. With latex paint you can apply a second layer after 4 hours; with oil-based paint this is sometimes only possible after 24 hours.
 - Check the instructions on the product if you are unsure of the recommended drying time.
 Apply a second coat of paint for best results. Use the same technique to apply the second coat of paint. Paint the edges of a wall with a paint brush, then use a paint roller to finish the wall.
 - Don't forget to paint one wall at a time to avoid painting over half-dried paint.
 Wait 24 hours to replace any wall decorations, curtains and electrical outlets. After the paint has completely dried, cut one edge of the masking tape and pull it off. Fold and store the floor cloths, remove the plastic cover from the bathtub, toilet and sink, hang the curtains and towel rack back, and install the light switches and outlets.
 - If necessary, replace the toilet and turn on the water supply again.
- If you pull the tape away too quickly without cutting it, the dried paint from the wall can come along with the tape, resulting in unsightly chipped areas.
Important: After painting the bathroom, wait another 24 hours to shower so that the paint can dry properly.
Tips
- If your style is modern, cooler hues like white with subtle blue undertones are best. Cozy warm tones, such as white with yellow undertones, are ideal if you have a more traditional taste.
- Stir the paint well before pouring it into a container or dipping your brush in it. The pigments are evenly distributed by stirring.
- If you are taking a break for more than 10 minutes, cover the container or bucket to prevent the paint from clumping.
- It's easier to paint clean edges with a new high-quality paintbrush than with a brush with messy or bristly bristles.
- Keep a damp cloth handy so you can quickly wipe off any mistakes.
- Keep brushes and rollers smooth and moist by wrapping them tightly in plastic when not in use for a while.
Warnings
- If there are windows, open them or turn on the extractor to ventilate the bathroom. If there are no windows or extractor, consider using a fan.
- If you are using a ladder, make sure it is on a stable, level surface. Wear non-slip shoes and always put both feet on the steps.
Necessities
- Bleach or cleaner based on trisodium phosphate
- Sponge or scouring pad
- Cleaning cloth
- Putty knife
- Wall filler
- Wood filler
- Rubber gloves
- Paint (preferably anti-fungal)
- Masking tape
- Angled brush
- Paint roller
- Paint tray
- Long stick
- Canvas cloths
- Cover plastic
- Paint can opener or screwdriver
- Knife
- Ladder (optional)
- Primer (optional)


