Author:
Morris Wright
Date Of Creation:
27 April 2021
Update Date:
1 July 2024
Content
This wikiHow teaches you how to back up the contents of your Mac's hard drive without using Time Machine.
To step
Part 1 of 2: Preparing for a backup
 Buy an external hard drive. Since you're using the external hard drive to back up your entire hard drive, the drive must be larger than your Mac's drive (for example, if the Mac's drive is 256 GB, buy an external drive of at least least 500 GB).
 - It is often not much more expensive to buy a 1 terabyte (1024 gigabyte) external hard drive than it is to buy a 500 gigabyte hard drive, so consider spending about $ 20 more to get more storage space.
- You will generally want to buy an external hard drive that has enough space for you and comes from a reliable manufacturer such as Western Digital or Seagate.
- If you don't have an external hard drive, you can also use a CD, DVD, or USB flash drive.
- You can also try a cloud storage site such as iCloud, Google Drive or Dropbox.
 Connect your external hard drive to your Mac. Connect the USB end of the hard drive cable to the USB port on your Mac, and the other end to the hard drive.
 - Most modern Macs have USB-C ports (also known as Thunderbolts) instead of conventional USB 3.0 ports. If this is the case for you, you may need to purchase a USB 3.0 to USB-C adapter for your Mac before you can connect a hard drive.
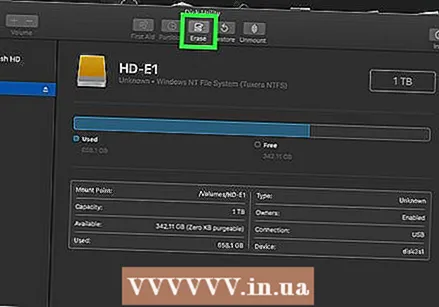 Format your external hard drive. Formatting makes the hard drive work on your Mac's operating system. If you don't format the drive, you can't use it.
 - Make sure you Mac OS Extended (Journaled) as the File System Value.
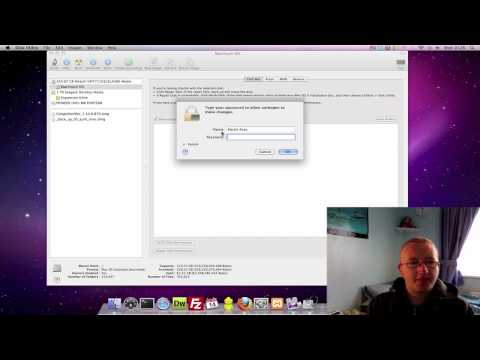
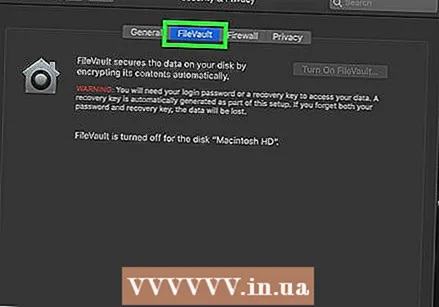 Turn off FileVault. FileVault makes it impossible to clone your Mac's hard drive, so you'll need to turn off FileVault if you ever had it enabled.
 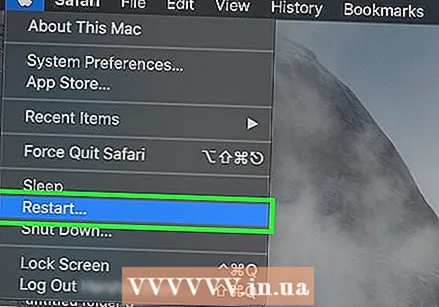 Restart your Mac. Click on it Apple menu
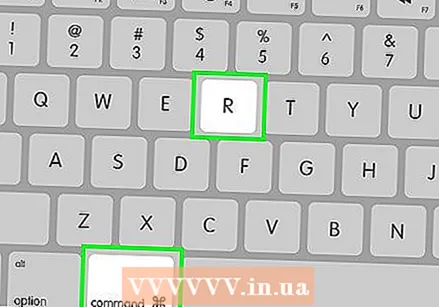 Press ⌘ Command+R.. You should do this immediately after you click Reboot now and hold the button until the recovery screen appears.
  Wait for the Recovery icon to appear. It looks like a spinning globe. Once the icon appears you can use the ⌘ Command and R. release buttons. Your Mac will keep loading the recovery screen. When it's done, you can move on to the next part.
Part 2 of 2: Back up your Mac
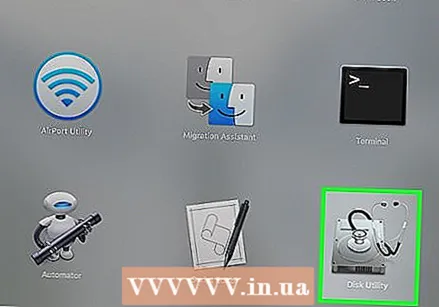 click on Disk Utility. This is in the center of the recovery window.
  click on Further. This option is in the lower right corner of the window. This will open the Disk Utility.
  Select your external hard drive. Click on the name or letter of your external hard drive on the left side of the window.
  click on To adjust. This menu option is in the top left corner of the screen. A selection menu will appear.
 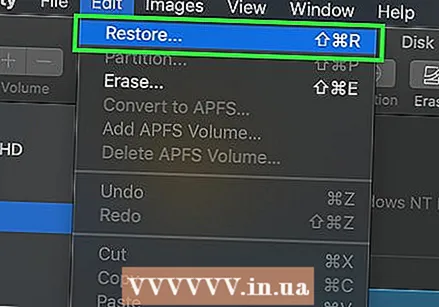 click on Recovery .... This is in the selection menu. This will open a popup window.
 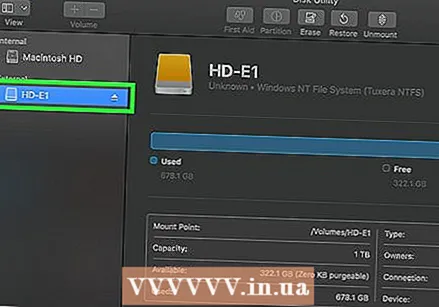 Select your Mac's hard drive. Click "Recover from" in the drop-down menu, and click the name of your Mac's hard drive in the resulting drop-down menu.
 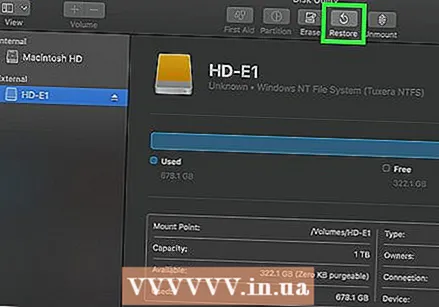 click on Recovery. This is the blue button on the right side of the window. This will start copying the contents of your Mac's hard drive to your external hard drive.
  Wait for the copy to finish. When prompted, you can restart your Mac and start using it as usual.
 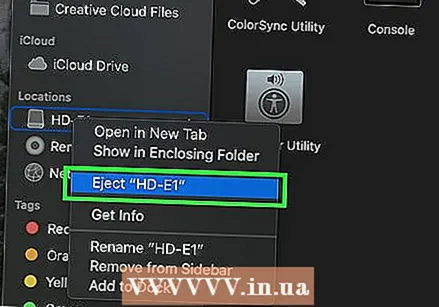 Eject your external hard drive. This ensures that the information on the disk is not accidentally damaged.
Tips
- This process is also known as "mapping" your hard drive, because it creates a perfect image of the contents of your hard drive and their exact location.
- It's relatively easy to back up with Time Machine and this just requires you to have an external hard drive - you don't need a Time Capsule (or AirPort) hard drive from Apple to use Time Machine.
Warnings
- Data stored on external hard drives can expire over time. Make sure to back up your Mac regularly (once a month, for example).


